The ip access-list command options and arguments
You can create an access list in two styles: classic and modern. The classic style does not support the editing feature. If you use classic style to create an ACL, you cannot modify existing entries after applying it to the interface. However, you can add new entries at the end of the applied ACL. The modern style supports the editing feature. If you use the modern style to create an access list, you can add new entries at any place as well as modify, change, and delete existing entries.
The 'ip access-list' command
The 'ip access-list' command allows you to create and manage ACLs. It is a global configuration mode command. It uses the following syntax.
Router(config)# ip access-list standard|extended ACL_name or number
standard|extended: - This option specifies the type of ACL. To create a standard ACL, select the 'standard' option. To create an extended ACL, use the 'extended' option.
ACL_name or number: - This parameter specifies the number or the name of the ACL. The router uses this number or name to group all statements. Instead of using a number, you should use a name here. A clear and descriptive name makes ACL management easier. For example, suppose you find an ACL 126. The number 126 does not reveal any information about the ACL. However, if you find an ACL with a name like 'BlockSales', you can easily assume its purpose.
Examples
The following command creates a standard ACL with the number 34.
Router(config)#ip access-list standard 34
The following command creates a standard ACL with the name 'BlockProduction'.
Router(config)#ip access-list standard BlockProduction
The following command creates an extended ACL with the number 136.
Router(config)#ip access-list extended 136
The following command creates an extended ACL with the name 'AllowHttpTraffic'.
Router(config)#ip access-list extended AllowHttpTraffic
When you hit the Enter key after specifying the name or the number, the command prompt changes, and you enter ACL configuration mode. The command prompt depends on the value of the 'standard|extended' option. If you have selected the standard option, you will get the following command prompt.
Router(config-std-acl)#
If you have selected the extended option, you will get the following command prompt.
Router(config-ext-acl)#
In ACL configuration mode, you create and manage statements. The options available to specify statements depend on the type of ACL. If you have selected the standard ACL, the following options will be available.
Router(config)#ip access-list standard ACL_name
Router(config-std-acl)#permit|deny source_IP_address
[wildcard_mask] [log]
The following options will be available if you have selected the extended ACL.
Router(config)#ip access-list extended ACL_name
Router(config-ext-acl)#permit|deny IP_protocol
source_IP_address wildcard_mask
[protocol_information]
destination_IP_address wildcard_mask
[protocol_information] [log]
Examples
The following code block creates a named extended ACL.
Router(config)#ip access-list extended SecureManagement
Router(config-ext-acl)#permit ip 172.15.0.0 0.0.255.255 172.16.0.0 0.0.255.255
Router(config-ext-acl)#permit tcp any 172.16.0.0 0.0.255.255 established log
Router(config-ext-acl)#permit udp any host 172.16.1.1 eq dns log
Router(config-ext-acl)#permit tcp 172.17.0.0 0.0.255.255 host 176.16.1.2 eq telnet log
Router(config-ext-acl)#permit icmp any 176.16.0.0 0.0.255.255 echo-reply log
Router(config-ext-acl)#deny ip any any log
The following code blocks create a named standard ACL.
Router(config)#ip access-list standard SecureDevelopment
Router(config-std-acl)#permit ip 192.168.1.0 0.0.0.255
Router(config-std-acl)#deny ip any any log
Activating ACLs
To activate an ACL, use the following commands.
Router(config)#interface type [slot_#]port_#
Router(config-if)#ip access-group ACL_# in|out
The first command enters the interface configuration mode. Specify the interface name and number as the argument to this command. The second command activates the ACL on the interface. Specify the ACL number or name and the direction in which you want to activate the ACL. The following commands activate the SecureManagement ACL on the FastEthernet 0/0 interface in the inward direction.
Router(config)#interface FastEthernet 0/0
Router(config-if)#ip access-group SecureManagement in

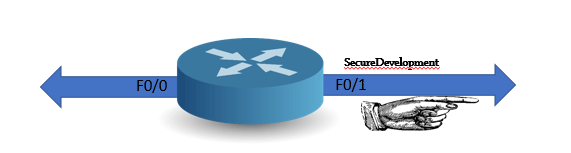
The following commands activate the SecureDevelopment ACL on the FastEthernet 0/1 interface in the outward direction.
Router(config)#interface FastEthernet 0/1
Router(config-if)#ip access-group SecureDevelopment out
Verifying ACLs
Once you have created and activated your ACLs, you can use the following commands to verify their configuration and operation.
The 'show running-config' command
This command displays running configurations. You can use this command to view ACLs and the interfaces that have ACL configurations. The following code block shows the sample output of this command.
Router#
Router#show running-config
Building configuration...
[Output omitted]
interface GigabitEthernet0/2
ip address 30.0.0.1 255.0.0.0
ip access-group 10 out
access-list 10 deny 10.0.0.0 0.255.255.255
access-list 10 permit 20.0.0.0 0.255.255.255
end
Router#
The above output shows that ACL 10 is applied to the GigabitEthernet0/2 interface in the outward direction and contains two statements.
The 'show access-lists' command
This command displays all access lists and their parameters. It also shows statistics about how many times each statement matched a packet. This command does not show which ACL is applied to which interface. The following code block shows the sample output of this command.
Router#show access-lists
Extended IP access list 100
permit tcp 172.16.0.0 0.0.255.255 any established (189 matches)
permit udp host 172.16.1.39 any eq domain (32 matches)
permit icmp host 172.16.0.0 any (67 matches)
Standard IP access list 10
10 deny 10.0.0.0 0.255.255.255(79 matches)
20 permit 20.0.0.0 0.255.255.255(39 matches)
IPX sap access list 1000
deny FFFFFFFF 7
permit FFFFFFFF 0
It displays all ACLs from all protocols. If you want to view ACLs only for the IP protocol, use the 'show ip access-lists' command. The following is an example of the output from this command.
Router#show ip access-lists
Extended IP access list 100
permit tcp 172.16.0.0 0.0.255.255 any established (189 matches)
permit udp host 172.16.1.39 any eq domain (32 matches)
permit icmp host 172.16.0.0 any (67 matches)
Standard IP access list 10
10 deny 10.0.0.0 0.255.255.255(79 matches)
20 permit 20.0.0.0 0.255.255.255(39 matches)
The above command displays all ACLs. To view only a particular ACL, use one of the following two commands:
Router#show access-lists ACL_number_or_name
Or
Router#show ip access-lists ACL_number_or_name
The following command shows the entries of ACL 10.
Router#show ip access-lists 10
Standard IP access list 10
10 deny 10.0.0.0 0.255.255.255(79 matches)
20 permit 20.0.0.0 0.255.255.255(39 matches)
Resetting the counter
To clear and reset the counter for an ACL, use the following command.
Router#clear access-list counters [ACL_#_number_or_name]
The following command clears the ACL 20 counter.
Router#clear access-list counters 20
Identifying ACL types
You can edit or update an ACL only if you used the 'ip access-list' command to create it. If you use it to create an ACL, the router automatically adds a sequence number to each entry. Sequence numbers allow you to insert, edit, update, and delete statements in an existing ACL. Use the 'show access-lists' command to know whether an ACL has a sequence number. The following code block shows the sample output of this command.
Router#show access-list
Extended IP access list 101
10 permit ip host 192.168.101.69 any
20 permit ip host 192.168.101.89 any
Standard IP access list 30
deny 10.0.0.0 0.255.255.255
permit 20.0.0.0 0.255.255.255
As you can see in the above output, ACL 101 has sequence numbers, and ACL 30 does not have sequence numbers. You can edit ACL 101, but you cannot edit ACL 30.
Editing/updating ACL entries
To edit or update an ACL, enter ACL configuration mode, and use the following command to delete the existing entry.
Router(config)#ip access-list {standard|extended} ACL_name_or_number#
Router(config-{std|ext}-nacl)# no sequence_#
After deleting the existing entry, create the new entry in its place. To insert the updated entry, use the sequence number of the deleted entry. To update an entry in the standard access list, use the following command.
Router(config)#ip access-list standard ACL_name
Router(config-std-acl)# [sequence no] permit|deny source_IP_address
[wildcard_mask]
To update an entry in the extended access list, use the following command.
Router(config)#ip access-list extended ACL_name
Router(config-ext-acl)#[sequence no] permit|deny IP_protocol
source_IP_address wildcard_mask
[protocol_information]
destination_IP_address wildcard_mask
[protocol_information] [log]
The following code block updates an entry [sequence no 20] and verifies it.
Router#show access-lists
Extended IP access list SecureManagment
10 permit ip 10.0.0.0 0.255.255.255 20.0.0.0 0.255.255.255
20 permit ip 10.0.0.0 0.255.255.255 30.0.0.0 0.255.255.255
30 permit ip 10.0.0.0 0.255.255.255 40.0.0.0 0.255.255.255
Router#configure terminal
Enter configuration commands, one per line. End with CNTL/Z.
Router(config)#ip access-list extended SecureManagment
Router(config-ext-nacl)#no 20
Router(config-ext-nacl)#20 deny ip 10.0.0.0 0.255.255.255 20.0.0.0 0.255.255.255
Router(config-ext-nacl)#exit
Router(config)#exit
Router#show access-lists
Extended IP access list SecureManagment
10 permit ip 10.0.0.0 0.255.255.255 20.0.0.0 0.255.255.255
20 deny ip 10.0.0.0 0.255.255.255 20.0.0.0 0.255.255.255
30 permit ip 10.0.0.0 0.255.255.255 40.0.0.0 0.255.255.255
Router#
Inserting new entries
A router assigns sequence numbers in blocks of 10. For example, if you have three entries in an ACL, the router assigns sequence numbers 10, 20, and 30 to them, respectively. To insert a new entry, use a sequence number that is between the entries. For example, if you want to insert a new entry between entries with sequence numbers 10 and 20, you can use any number between 11 and 19. The following code block inserts a new statement with sequence number 12 into the ACL SecureManagement.
Router#show access-lists
Extended IP access list SecureManagment
10 permit ip 10.0.0.0 0.255.255.255 20.0.0.0 0.255.255.255
20 permit ip 10.0.0.0 0.255.255.255 30.0.0.0 0.255.255.255
30 permit ip 10.0.0.0 0.255.255.255 40.0.0.0 0.255.255.255
Router#configure terminal
Enter configuration commands, one per line. End with CNTL/Z.
Router(config)#ip access-list extended SecureManagment
Router(config-ext-nacl)#12 deny ip 10.0.0.0 0.255.255.255 30.0.0.1 0.0.0.0
Router(config-ext-nacl)#exit
Router(config)#exit
Router#show access-lists
Extended IP access list SecureManagment
10 permit ip 10.0.0.0 0.255.255.255 20.0.0.0 0.255.255.255
12 deny ip 10.0.0.0 0.255.255.255 30.0.0.1 0.0.0.0
20 permit ip 10.0.0.0 0.255.255.255 30.0.0.0 0.255.255.255
30 permit ip 10.0.0.0 0.255.255.255 40.0.0.0 0.255.255.255
Router#
Deleting an ACL
To delete an ACL, use the following command.
Router(config)#ip access-list {standard|extended} ACL_name_or_number#
The following code deletes the SecureManagement ACL.
Router(config)#no ip access-list extended SecureManagement
This tutorial is part of the tutorial "Cisco Access List Commands, Concepts, and Configurations". Other parts of this tutorial are as follows:
Chapter 01 Definition, purposes, benefits, and functions of ACL
Chapter 02 Basic concepts and fundamentals of ACLs
Chapter 03 How Access Lists work on Cisco routers
Chapter 04 Types of access control lists explained
Chapter 05 Wildcard Masks in ACLs Explained
Chapter 06 Rules and configuration guidelines for Cisco ACLs
Chapter 07 Access Control List Explained with Examples
Chapter 08 The ip access-list command options and arguments
Chapter 09 Standard ACL Configuration Commands Explained
Chapter 10 Configure Standard Access Control List Step-by-Step Guide
Chapter 11 How to secure VTY access to the Router
Chapter 12 Extended ACL Configuration Commands Explained
Chapter 13 Configure Extended Access Control List Step-by-Step Guide
Chapter 14 How to block ICMP Ping on Cisco Routers
Conclusion
This tutorial explained how to use the 'ip access-list' command to create, apply, edit, update, manage, and delete numbered and named standard and extended access lists. Learning the options, arguments, and parameters of the 'ip access-list' command helps you use this for ACL management more effectively.
By ComputerNetworkingNotes Updated on 2025-11-08