How to Create a Bootable USB on Ubuntu
A bootable USB drive allows you to install an operating system. Most modern laptops or systems do not have a DVD drive. However, all of them have a USB port. In the absence of a DVD drive, you can use a USB drive to install an operating system. In this tutorial, I will explain how to create a bootable USB drive for any operating system on Ubuntu.
Prerequisites:-
- An 8GB or larger USB drive
- An Ubuntu system with the GNOME desktop
- The ISO image of the operating system
Steps:-
- Download or move the ISO image file to the Ubuntu system.
- Prepare the USB drive and attach it to the system.
- Use the Disks tool to create a bootable USB drive.
Downloading or moving the ISO image file to the Ubuntu system
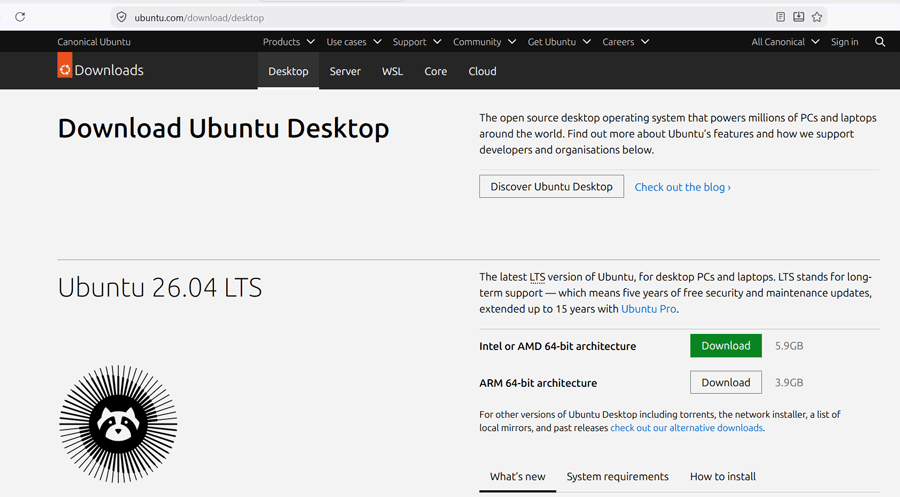
Download the ISO image of the operating system you want to install using the USB drive. If you have already downloaded it on another system, move that image to the Ubuntu system. In this tutorial, I will prepare a bootable disk for Ubuntu Desktop 26.04 LTS. You can download the latest version of Ubuntu from its official website.
https://ubuntu.com/download/desktop
Preparing the USB drive
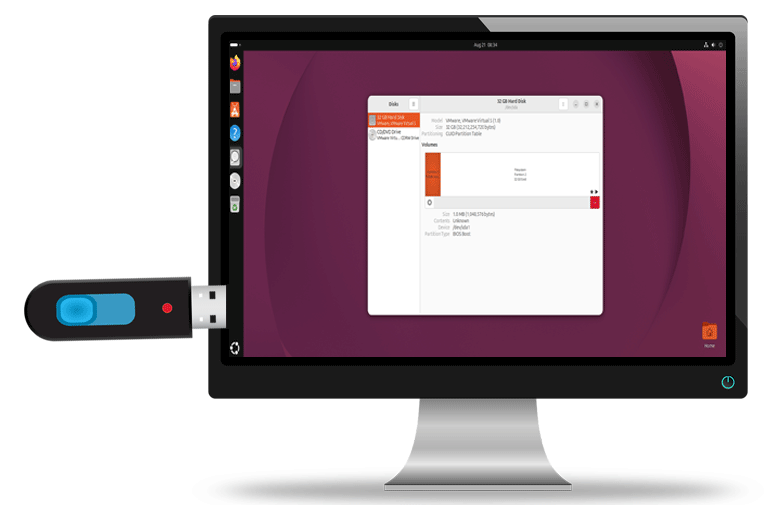
The USB drive you will use for this process must not contain any meaningful data. This process will format and wipe out all data from the drive. If your drive contains any data, copy or move it to another drive or disk before using the drive for this process. After that, attach it to the Ubuntu system.
Creating a bootable USB drive
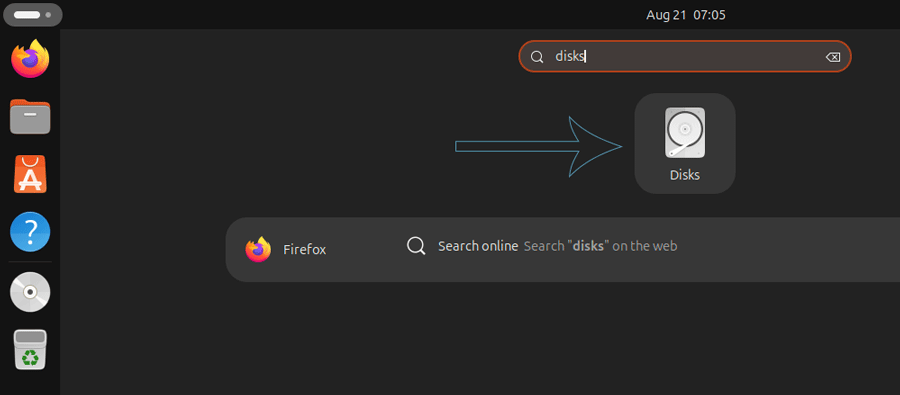
If the GNOME desktop environment, which is also the default on Ubuntu, is available, you do not need to download or install any other tool or third-party application for creating a bootable USB drive. The GNOME desktop includes an application called Disks to create a bootable USB drive. Start this application.
The Disks application scans the system for all disk drives and lists them in the left pane. The list includes all attached hard disks, CD, DVD, and USB drives. Select the USB drive that you want to make bootable. Since it lists all attached drives, including the hard disk or disks containing the operating system and data, make the selection carefully. An incorrect selection, such as selecting the hard disk that contains the OS or data, can result in an unstable system or data corruption.
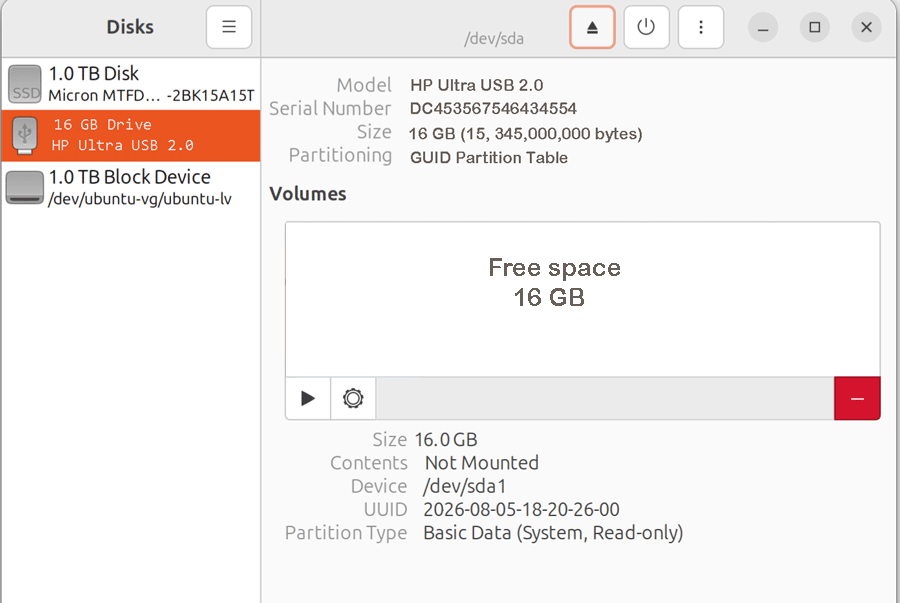
The USB drive must not be accessible by any other application during this process. Close all applications, including the file browser that directly accesses this USB drive or any file or folder on it. After that, click Drive Options on the top bar of the window and click the Restore Disk Image… option.
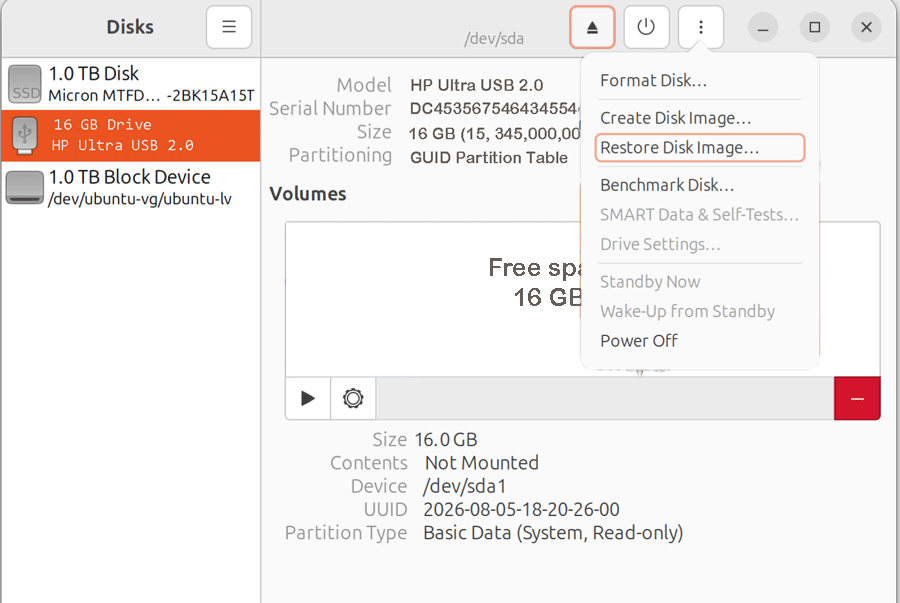
Click the Browse icon next to the Image to Restore option, select the ISO image file for the OS you want to deploy to the USB drive, then click Start Recording.
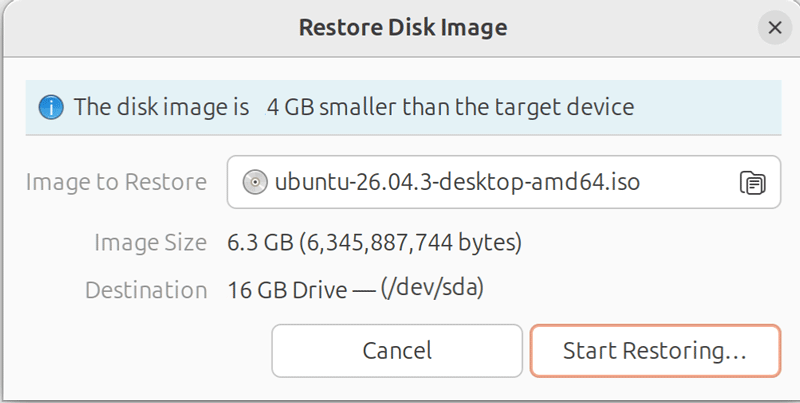
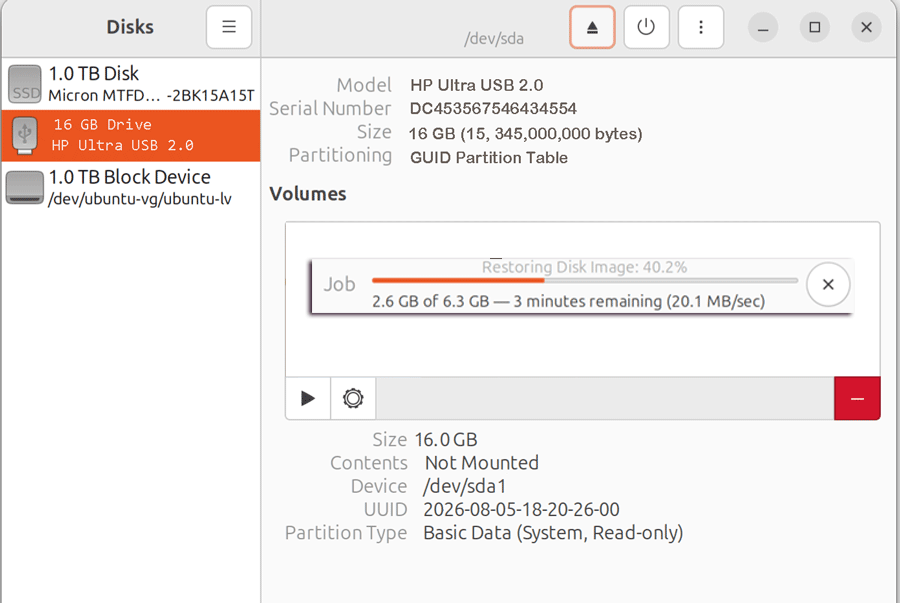
This process requires administrative privileges. Enter your login password to authenticate the process. After successful authentication, it starts the process. The process may take several minutes.
Once the process is finished, click the Eject button on the top bar. Wait a few seconds, then remove the USB drive.
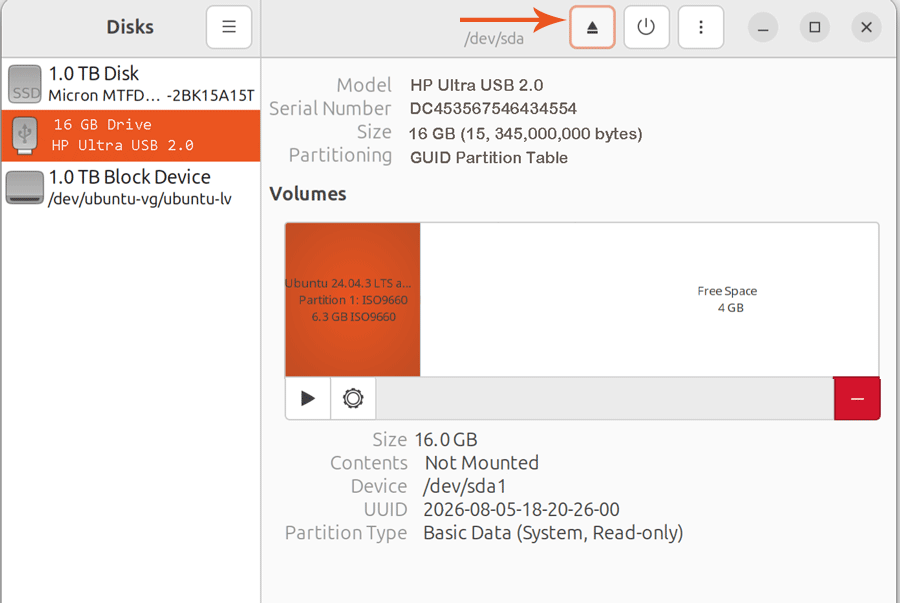
Now, this drive contains a bootable ISO image of Ubuntu. You can use it to boot and install Ubuntu on any system that contains a USB port.
Conclusion
In this tutorial, I explained how to create a bootable USB drive using the GNOME built-in tool. For demonstration, I created a bootable USB drive for Ubuntu. You can use this process to create a bootable USB drive for any operating system.
Author Laxmi Goswami Updated on 2026-08-22