Set Up Ubuntu For Web Developers
If you are a web developer looking for a guide to set up Ubuntu for web development, this article is for you. It covers everything a typical web developer needs. On Ubuntu, there are many ways to do the same thing and get the same result. It also applies to this topic. You have many ways to set up Ubuntu for web development. Among them, in this tutorial, I will use the simplest and easiest method. This approach lets you set up your Ubuntu system for web development in 30 minutes, regardless of your Linux system administration experience.
Prerequisites:-
- An Ubuntu desktop system
- Internet connectivity
Setting up a web environment
As a web developer, you build and test websites and web-based applications. Before launching a new website or updating an existing one, you need to run several tests and fix errors and notifications that arise during testing. For this, you need a local setup that simulates the web server you use to host your websites or applications. You can install the same Apache web server that your web server uses to host and serve your websites on your local system and use it for testing. However, you must consider some technical issues when using this approach.
- First, configuring Apache is not as simple as you may think. It includes thousands of configuration directives that you must set up correctly. Configuring them requires an in-depth knowledge of networking and protocols.
- Second, Apache does not provide the database service that all modern websites need. For this, you need to install and configure a database server (such as MySQL, SQL Server, MariaDB, or PostgreSQL) separately.
- Third, you need to connect and configure Apache and your database server to work together.
- Fourth, you must configure and manage services that control and run both servers on your system.
- Fifth and finally, you configure and manage the protocols and ports that both servers need to run.
If you are a network or system administrator and know how to run and manage various network services, you can install Apache and a database server directly. It gives you full control over both servers and closely matches the web server that hosts your websites. However, if you are a web developer and want to focus on building websites rather than configuring and managing network services, you can use XAMPP. It handles all the configuration listed above for you.
What is XAMPP?
XAMPP (Cross-Platform (X), Apache (A), MariaDB(M), PHP (P), and Perl (P)) includes the Apache web server, MariaDB, PHP, and Perl. It runs a standalone, stripped-down version of the Apache web server and MariaDB database server. It lets you test how your website will work on a live server directly from your computer without uploading it. It is a cross-platform application. A cross-platform application works similarly across all major operating systems and versions. Whether you are on Windows, macOS, or Linux, you can use it on that system.
Installing and configuring XAMPP
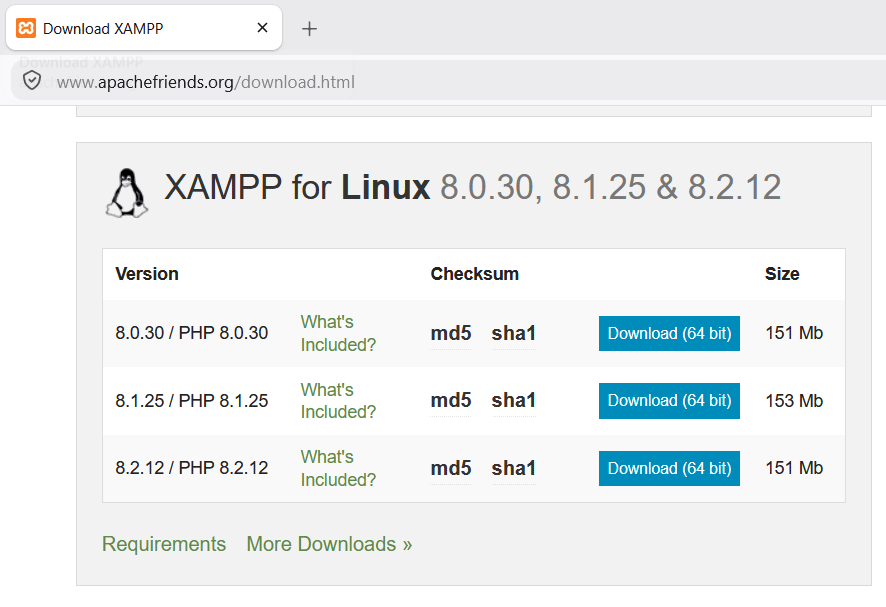
To download XAMPP, visit its official site, scroll down to the XAMPP for Linux section, and download the XAMPP version that matches your hardware architecture.
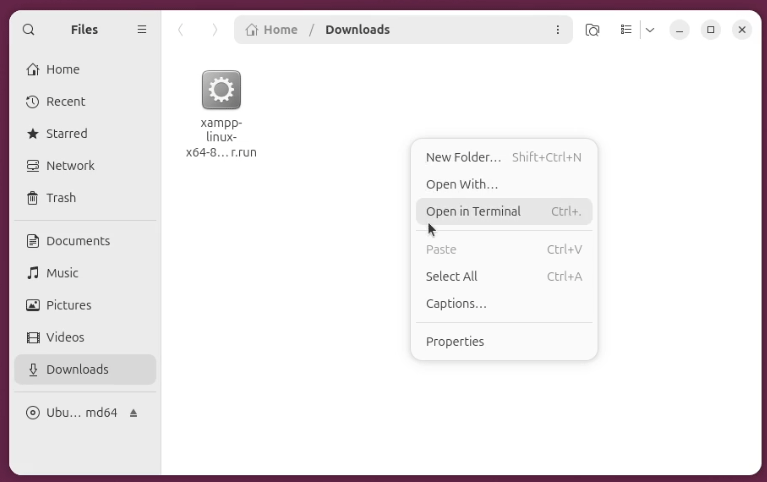
Open a terminal and change the current directory to the folder that contains the downloaded file, or open the folder that contains the downloaded file, then right-click anywhere inside the folder and click Open in Terminal.
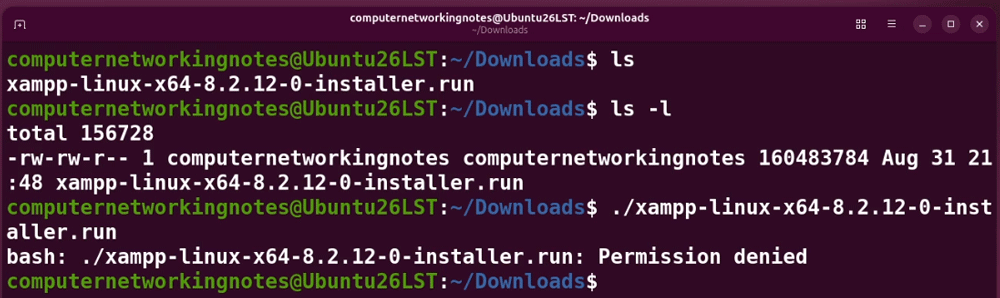
By default, Linux does not assign the execute permission to any file downloaded from the Internet. This permission is required for running the installer program. You can verify this by listing the downloaded file's permissions and then executing it.
$ls -l
$./[downloaded file]
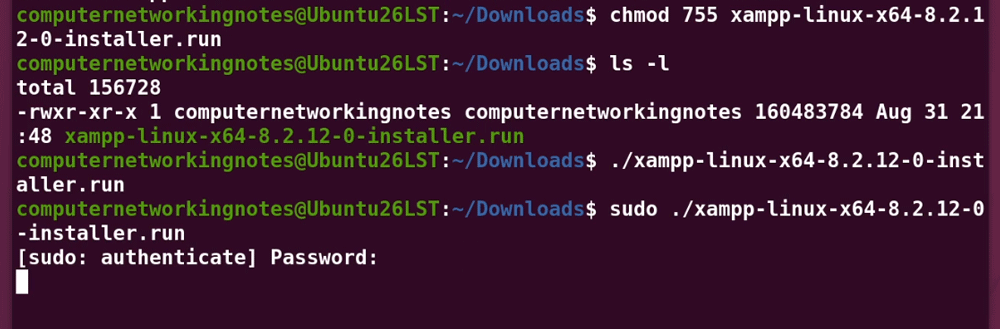
To run the installer program, you need to make it executable. Linux categorizes tasks into two types: regular and privileged. Changing file permissions is a privileged task.
Regular tasks do not require special permissions. You can run them directly under your regular user account. However, you cannot perform privileged tasks under your regular user account. For that, you need to switch to an administrator account. The default administrator account is root. However, it is disabled by default. You can enable it to run privileged tasks. However, it is neither recommended nor required. Ubuntu offers a few commands that let you promote your regular user account to an administrator account as required. The sudo command is one of them. It lets you run a privileged command. It requires authentication, which you can do with your login password. The chmod command changes a file's default permissions.
Run the following command to add the execute permission to the XAMPP installer file. Authenticate with your login password.
$sudo chmod 755 [downloaded file]
After adding the execute permission, run the following command.
$sudo ./[downloaded file]
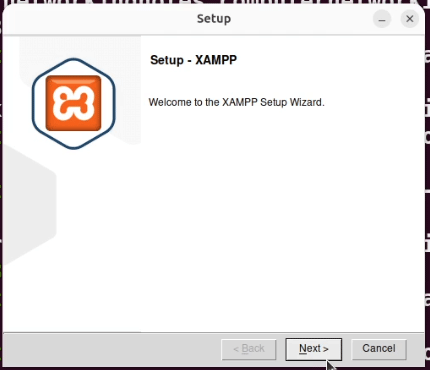
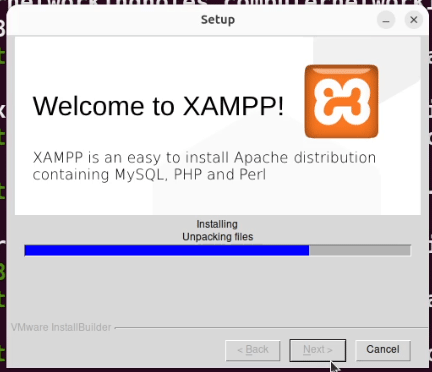
The installation starts in a wizard. Click Next on the welcome screen.
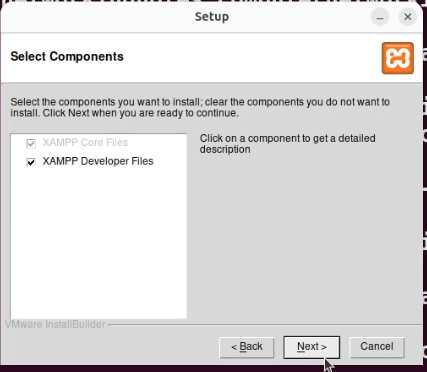
The next screen lets you select the components you want to install. The core component is compulsory and selected by default. Developer files are optional. You can install or skip them. Keep the default selection and click Next.
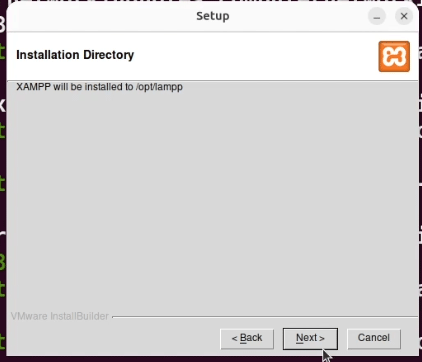
The next screen shows the location where XAMPP will be installed. Click Next.
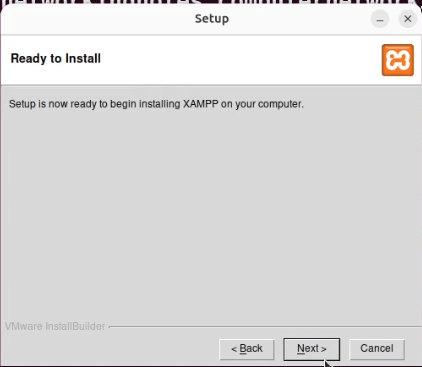
The next screen asks you to confirm the installation before starting it. Click Next to start the installation.
The installation process takes a few minutes.
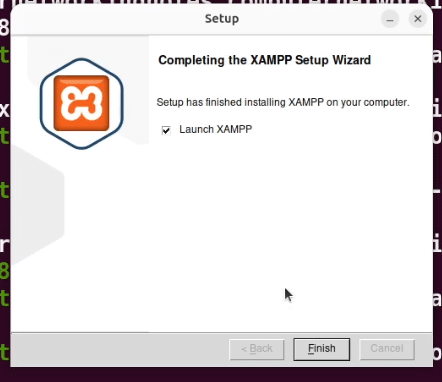
The last screen lets you start XAMPP. If you do not want to start it immediately, uncheck the 'Launch XAMPP' option on the last screen. Click Finish to close the wizard.
Verifying XAMPP
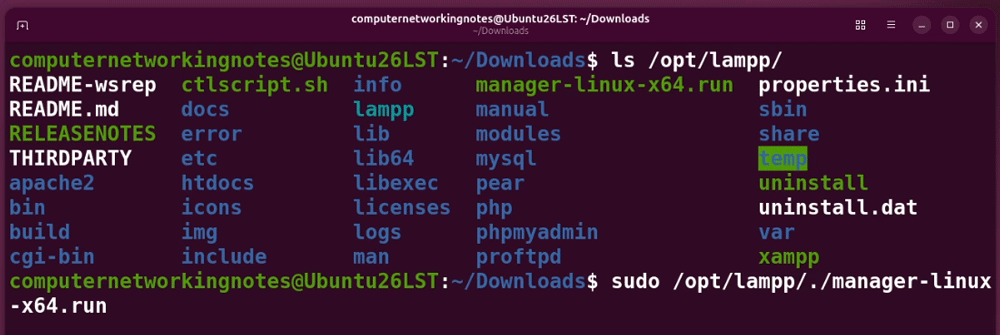
The wizard installs XAMPP in the /opt/lampp directory. You can check this directory to verify the installation.
#ls /opt/lammp
To start, stop, and restart the Apache and MariaDB servers in XAMPP, run the XAMPP manager using the following command.
#sudo /opt/lammp/./manager-linux-x64.run
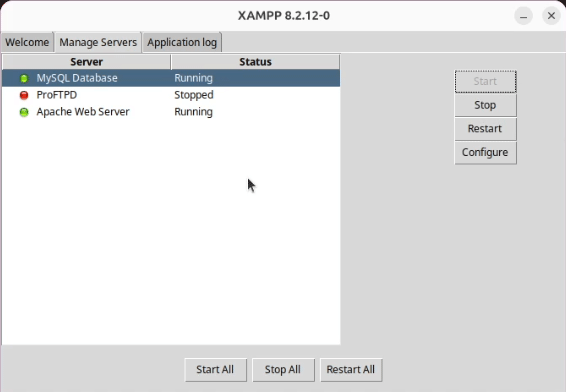
It launches the XAMPP Manager, which lets you start, stop, and restart the MariaDB database and Apache web server services.
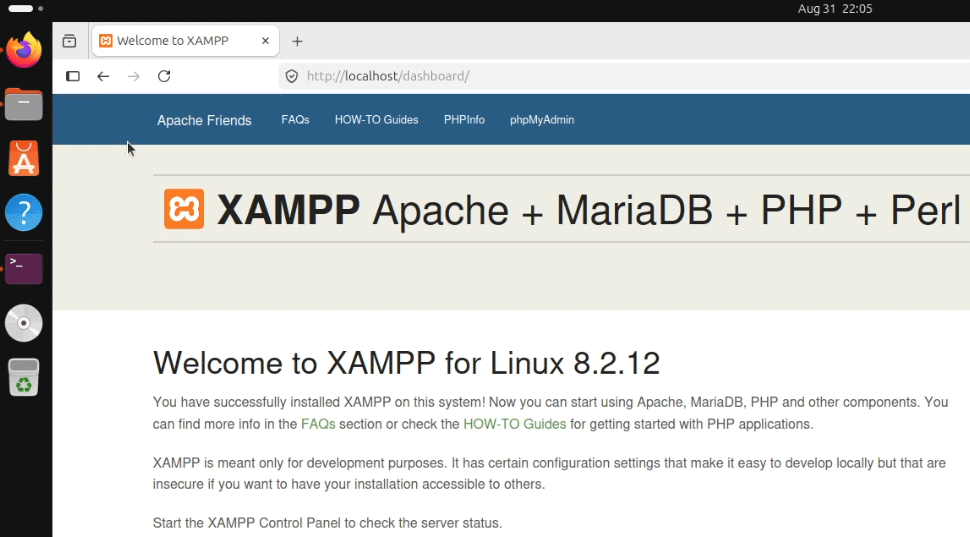
To verify the Apache web server, open the web browser and access the following URL.
http://localhost
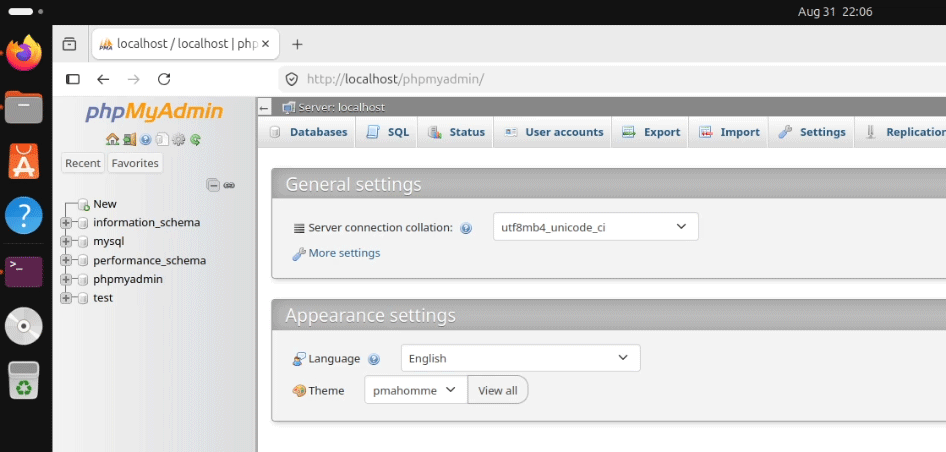
To verify the MariaDB database server, access the following URL.
http://localhost/phpmyadmin
The net-tools package
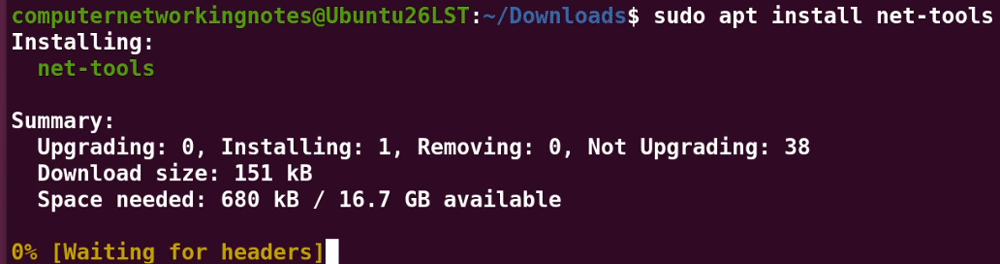
The net-tools package is optional but recommended. This package provides commands to manage XAMPP and its services directly from the command prompt. You also need these commands to create a script that starts XAMPP automatically at boot time. Run the following command to install this package.
$sudo apt install net-tools
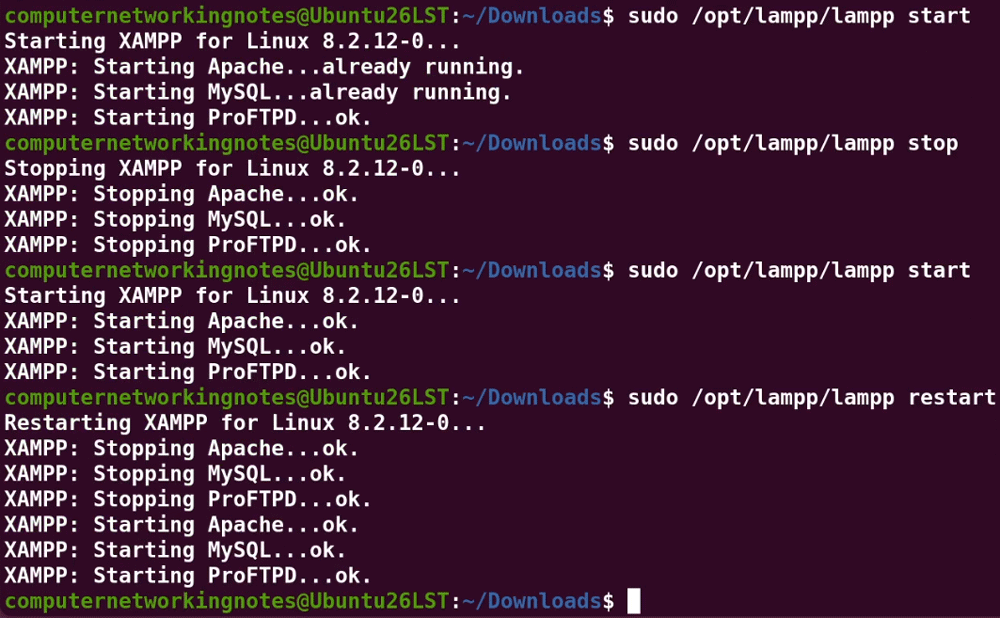
After installing this package, use the following command to start all services.
$sudo /opt/lampp/lampp start
The following command stops all services.
$sudo /opt/lampp/lampp stop
Use the following command to restart all services.
$sudo /opt/lampp/lampp restart
Starting XAMPP automatically at boot time
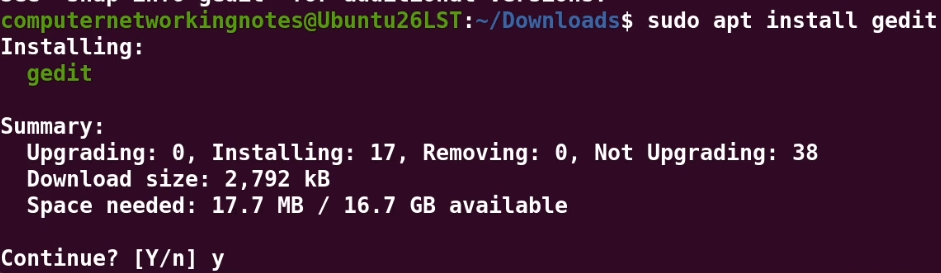
As a web developer, you use XAMPP frequently. Starting it each time can be a bit frustrating. In that case, you can create a script and run it at boot time as a service. To create the script, you can use any default editor, such as vi or nano. However, these editors are a bit complex to use. If you need a simple notepad-like editor, you can install gedit.
$sudo apt-get install gedit
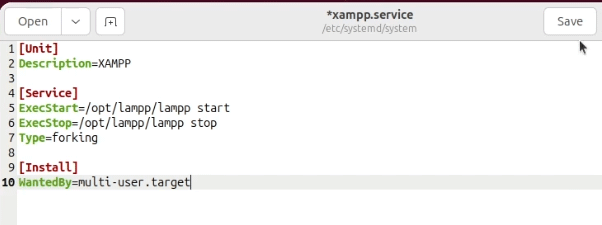
Create a script file in the /etc/systemd/system/ directory.
$sudo gedit /etc/systemd/system/xampp.service

Add the following lines to the file and save it.
[Unit]
Description=XAMPP

[Service]
ExecStart=/opt/lampp/lampp start
ExecStop=/opt/lampp/lampp stop
Type=forking

[Install]
WantedBy=multi-user.target
Add this script to the list of services enabled by the boot process.
$sudo systemctl enable xampp.service
Reboot the system and verify that XAMPP starts automatically.

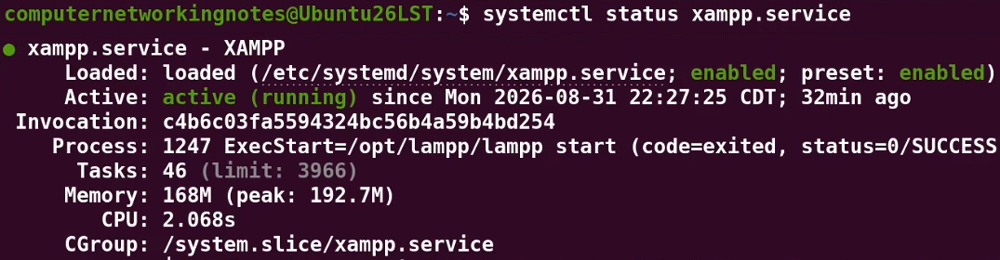
To verify that XAMPP starts at boot, access localhost and phpMyAdmin again in a web browser, or check the status of the service you created.
$sudo systemctl status xampp.service
Fixing the file permissions for the htdocs folder
The default webroot folder for XAMPP is htdocs. By default, the Apache web server installed by XAMPP looks in this folder for websites. If you install and use XAMPP on Windows, you can drop your website in this folder without restrictions. However, this isn't the case on Ubuntu. Ubuntu won't let you add files or create new folders there. To verify this, open this folder in File Explorer and create a new folder. The system will not let you do this.
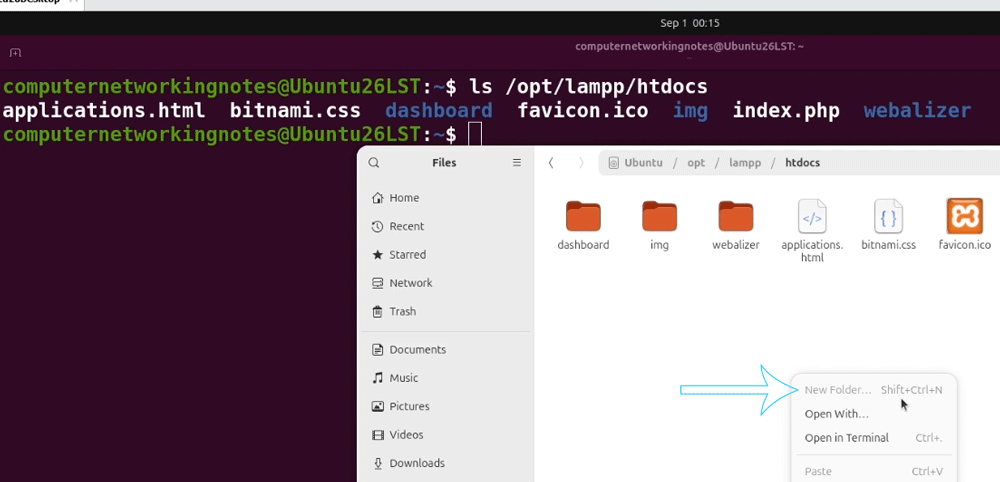
This problem is not related to XAMPP. So, changing the XAMPP configuration will not fix it. The default file permissions on Linux cause this issue. There are many ways to fix this issue. The most common fix found online is to run the following command.
$sudo chmod -R 777 /opt/lampp/htdocs
This will temporarily fix the issue but can create other problems. Since file permissions are out of scope for this tutorial, I will not go into detail. If you choose this fix, consider the following things.
- It will not solve this issue permanently. You have to run this command every time you create a new file or folder inside this folder.
- It makes this folder writable for everyone. Any user who can connect to this system can access files and folders stored in this folder. It is considered the worst file permission implementation.
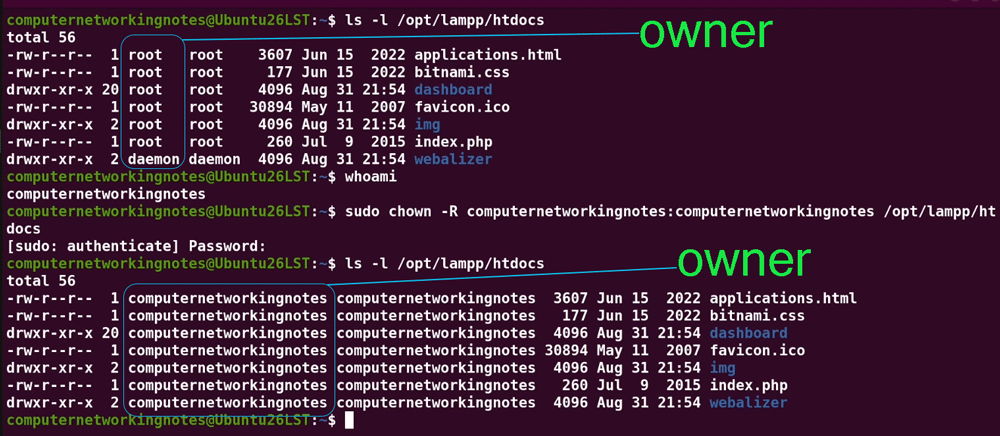
The correct way to fix this issue is to change the folder's ownership. The default file permission automatically grants the owner all necessary permissions for its files and folders. By default, the user who installs XAMPP becomes the owner of the htdocs folder. Since we installed XAMPP as root (the default administrator account), root became the owner. To verify this, run the following command.
$ls -l /opt/lampp/htdocs
The second column in the output shows the owner name. Changing ownership to the user account you use to log in to your Ubuntu system will permanently fix this issue without compromising security. It is also considered the best and recommended way to fix the htdocs file permission issue. To view the login name of the user account, use the following command.
$whoami
Run the following command to change the ownership to your user account.
$sudo chown -R [your username]:[your username] /opt/lampp/htdocs
Verify the ownership has changed.
$ls -l /opt/lampp/htdocs
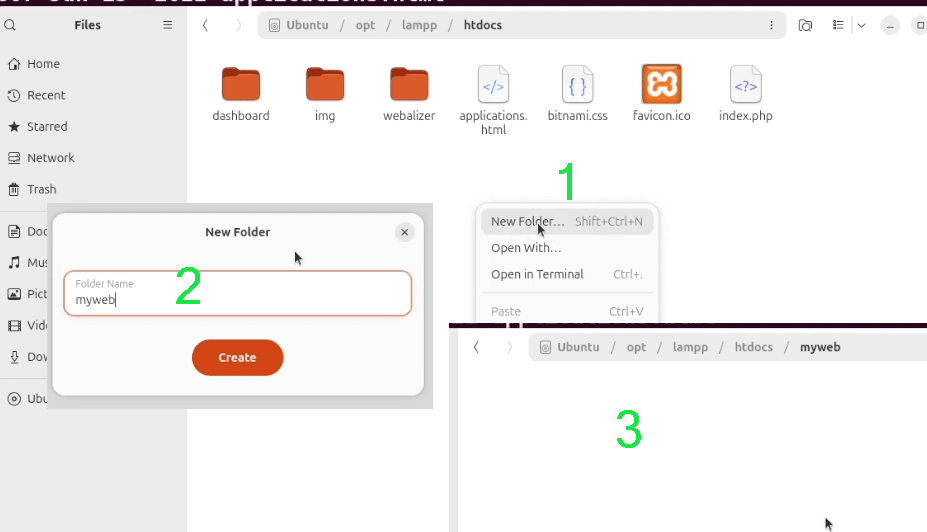
After changing ownership, create a folder in the htdocs folder to verify the issue is fixed.
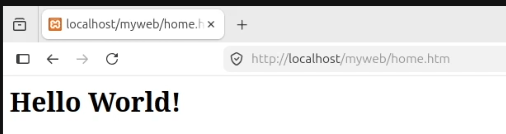
To verify the setup, create a simple webpage and access it in the web browser.
$cat > /opt/lampp/htdocs/myweb/home.htm
<h1>Hello World!</h1>
Ctrl+D

Access the following URL in the web browser.
http://localhost/myweb/home.htm
Installing the Visual Studio Code editor
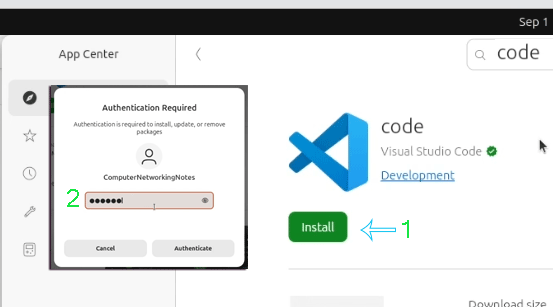
Web developers need a code editor. Visual Studio Code is the most commonly used cross-platform code editor. It is available in the Snap Store. Open the Snap Store and search for Code.
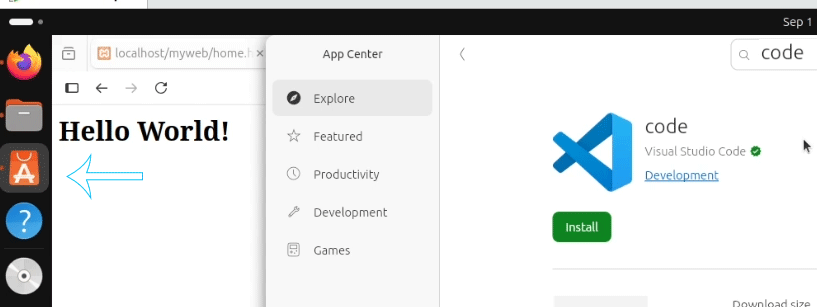
Click the Install button to start the installation. Authenticate the installation with your login password.
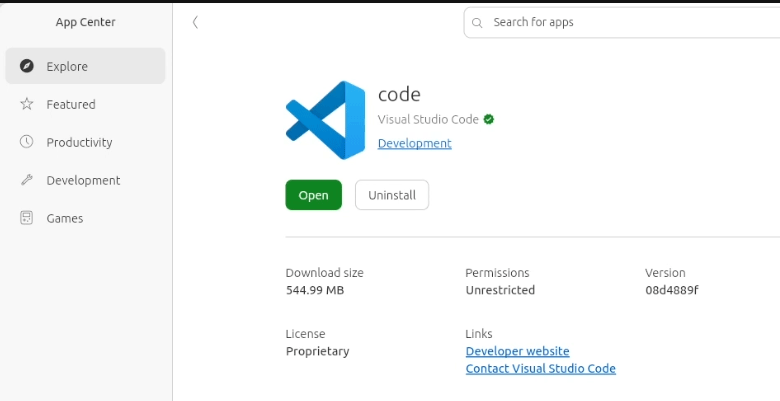
The installation process may take a few seconds. Once the installation is complete, you can open it directly from the Snap Store for testing or from Dash, as you would with other applications.
Verifying Apache and Code
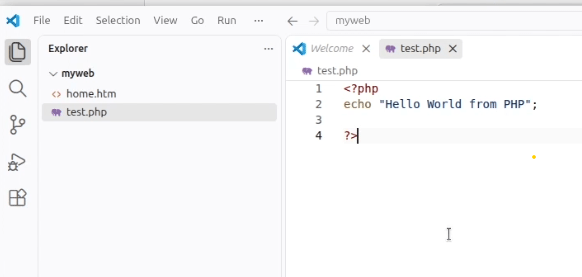
Open the Code editor and create a simple PHP file in the htdocs folder.
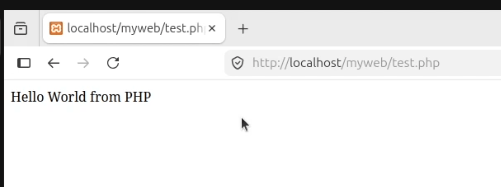
Access the file in the web browser.
Installing FileZilla ftp client
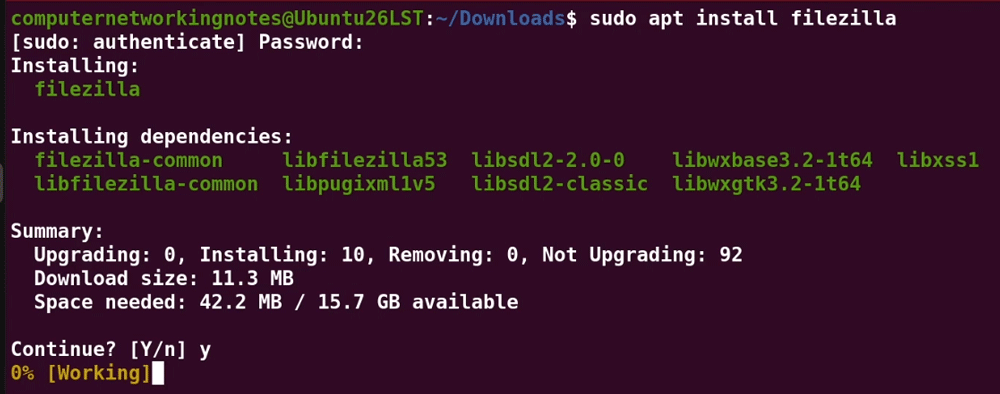
You need an FTP client to upload files to your web server. FileZilla is the most popular and widely used ftp client program. It is not available on the Snap Store. However, you can install it from the command line. Run the following command to install it.
$sudo apt install filezilla
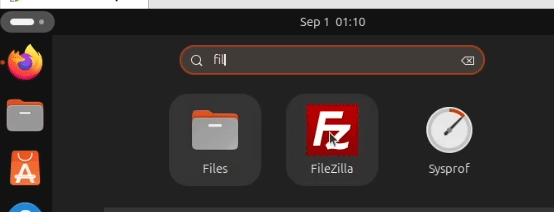
After installation, you can open it from the Dash menu.
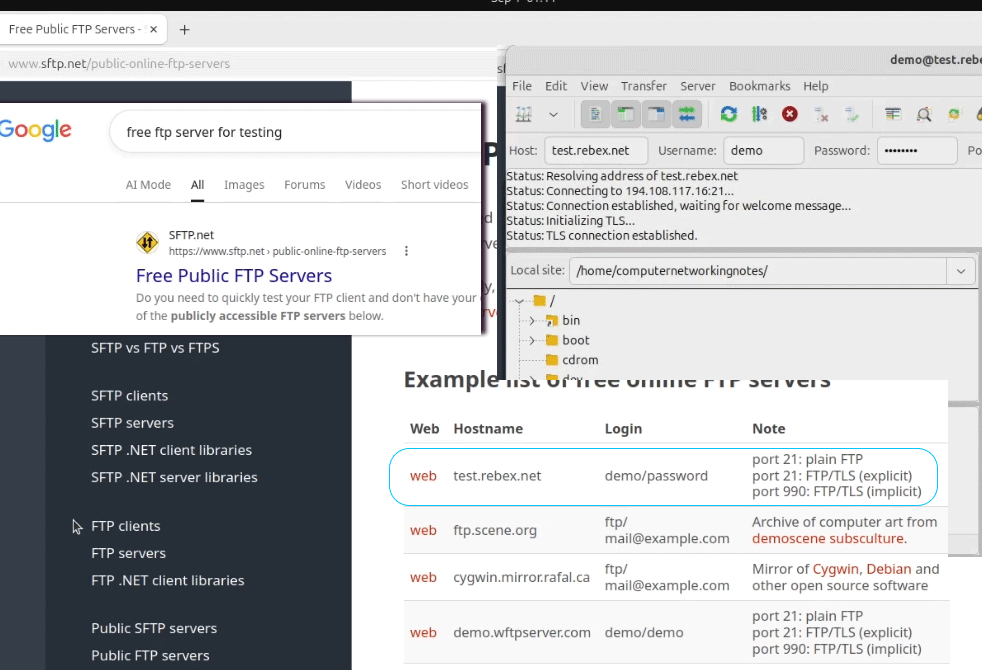
Many sites offer free FTP servers for testing. Access any such FTP server to verify the FileZilla client.
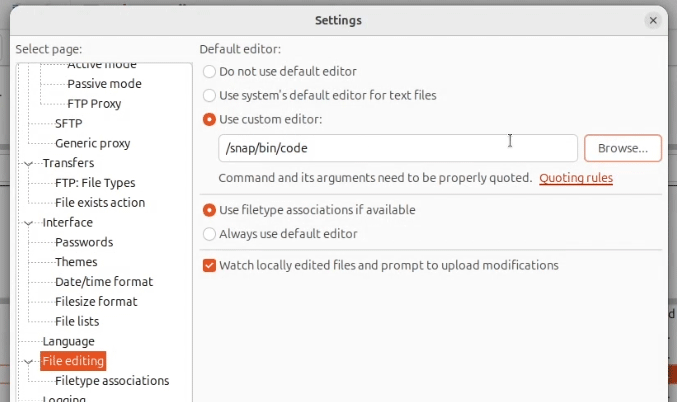
Setting Code as the default file editor in FileZilla
Click Edit, then Settings. In the window that opens, expand the File Editing option in the left pane. In the Right pane, select Use the custom editor, click Browse, and select the Code executable. The default location for the Code executable is /snap/bin/code.
Resetting the system
If you ever need to remove the applications installed in this tutorial, use the following steps.
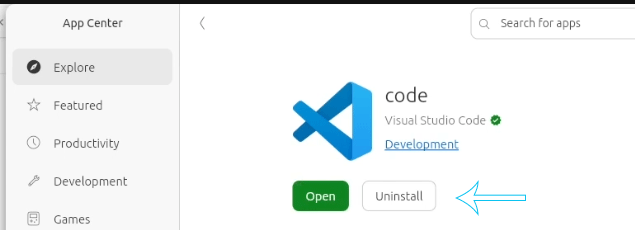
To remove the Code editor, open the Snap Store, search for Code, click Uninstall, and authenticate with your login password.
To remove the FileZilla ftp client, open a terminal and run the following command.
$sudo apt remove filezilla
Uninstalling/removing XAMPP
To uninstall XAMPP, back up all your websites and run the following command.
$sudo /opt/lampp/./uninstall

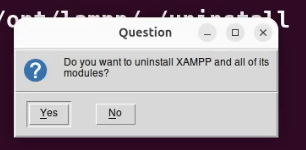
The uninstallation process starts within a wizard and asks for confirmation. Click Yes to start the process.
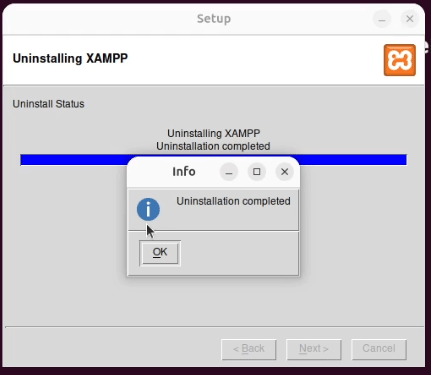
The process takes a few seconds. Click Ok to close the wizard.
If you have created a script to start XAMPP at boot time, you also need to remove that. First, disable the service at boot time and then delete the script file.
$sudo systemctl disable xampp.service
$sudo rm -f /etc/systemd/system/xampp.service

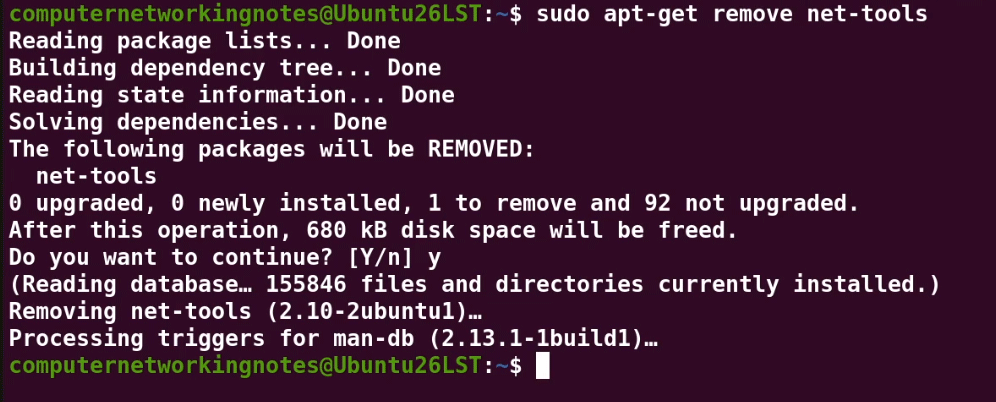
Finally, remove the net-tools package that you installed to manage XAMPP services.
$sudo apt-get remove net-tools
Conclusion
In this tutorial, I explained how to set up an Ubuntu system for web development. By following these steps, you can use any Ubuntu system for web development. These steps are straightforward and require no prior experience.
Author Laxmi Goswami Updated on 2026-09-20