GNOME Desktop Environment Features Explained
GNOME is the default desktop environment on RHEL. It comes in two versions: Standard and Classic. Standard provides a fresh, modern look, while Classic more closely matches older GNOME versions. Standard is the default. You can use either one or set it as the default. GNOME Shell is a Wayland display server. It provides both variations. This tutorial provides a detailed overview of the GNOME desktop and explains its core features and functions.
Selecting the default desktop
Start the system or log out of your current session if you are already logged in. The login screen shows an option in the bottom-right corner to change the default desktop environment you will get after you log in. This is not available on the lock screen.
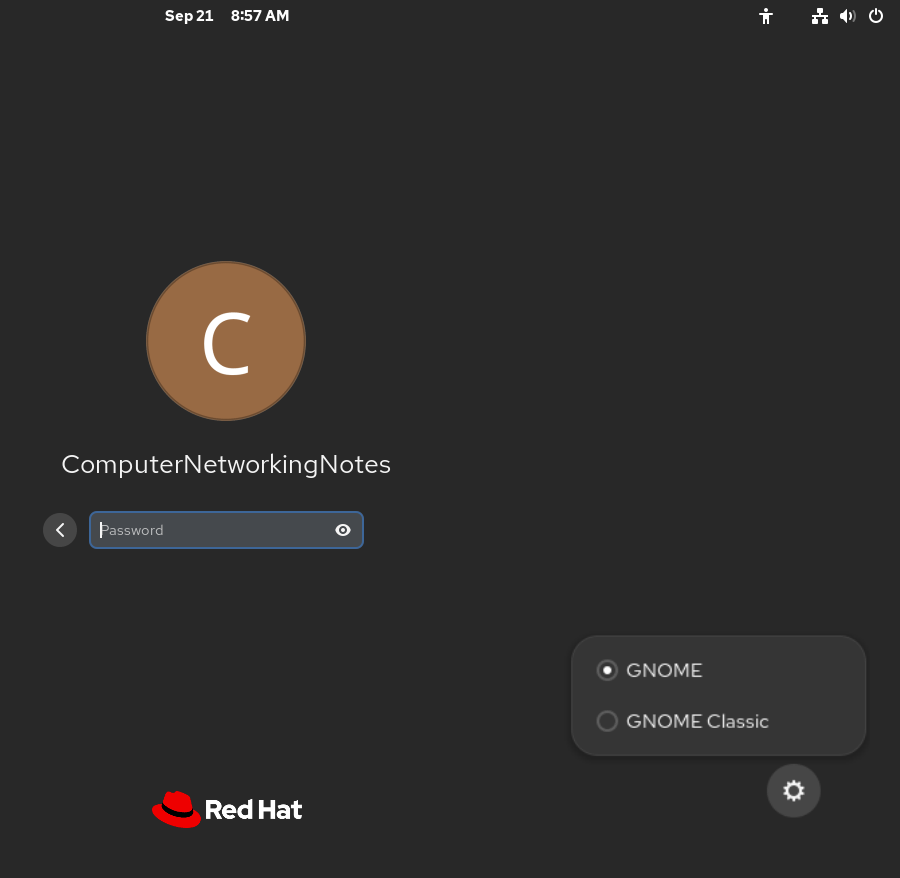
Overview of GNOME desktop
The default desktop screen appears after you log in. It contains a top bar that runs along the top of the screen.

It contains three things:-
- Activities button (on the left)
- Information and notifications (in the middle)
- Controls for various applications (on the right)
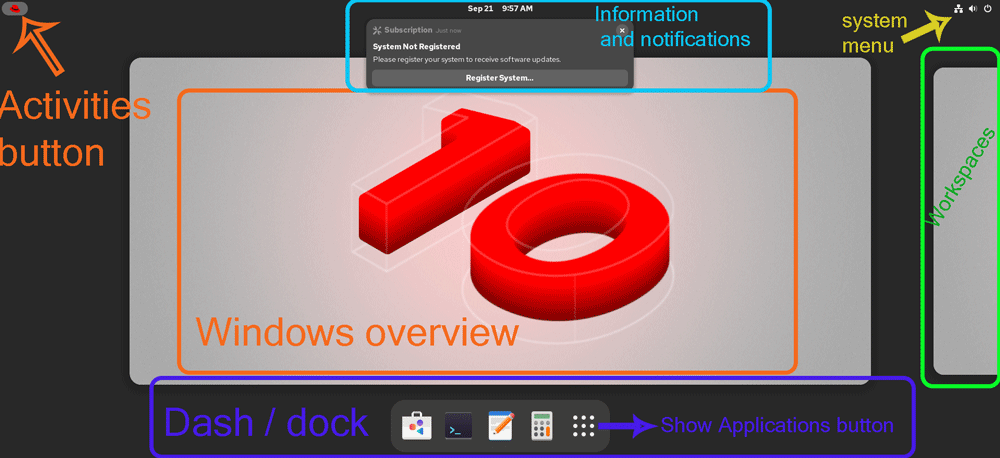
The left part displays the Activities button. When you click it, it displays the activities overview screen. The activities overview screen contains three sections:
- the Windows overview in the center
- the Show Applications button and a few frequently used applications at the bottom of the screen
- the workspace selector on the right side.
The Windows overview
The Windows overview screen contains a search box at the top. The search box lets you find installed applications.
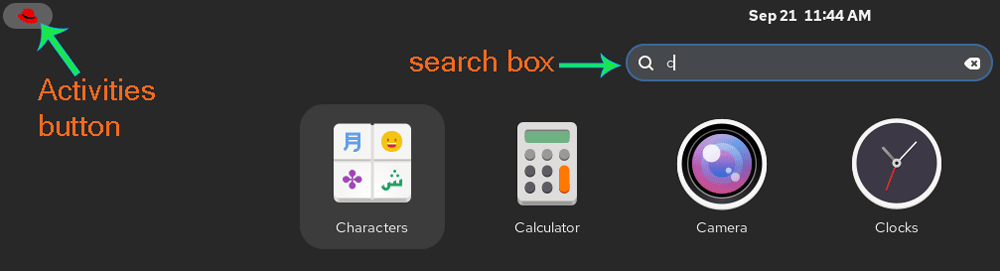
It also displays thumbnails of active windows in the current workspace. These thumbnails let you bring windows to the foreground on a cluttered workspace or move them to another workspace.
Workspace selector displays thumbnails of active workspaces. It also lets you select and move windows from one workspace to another.
Dash is the configurable list of icons. It displays frequently used applications, running applications, and a Show Applications button to list all installed applications. It is also called the dock.
Information and notifications
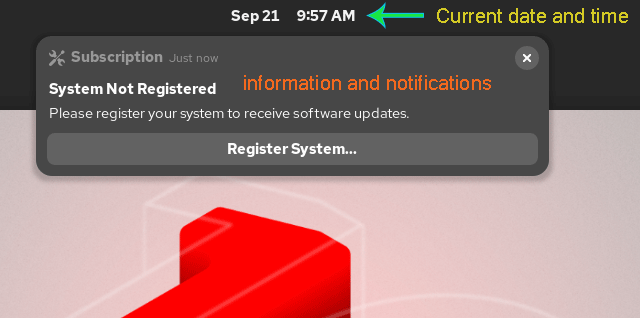
The center part of the top bar displays the current date and time, information, and notifications as they arise. It lets you review notifications from applications and system components. A notification first appears briefly as a single line. A persistent indicator appears in the top bar next to the clock to show recently received notifications. To review these notifications, open the message tray. The message tray displays the complete notification. You can view and close the message tray.
Controls for various applications
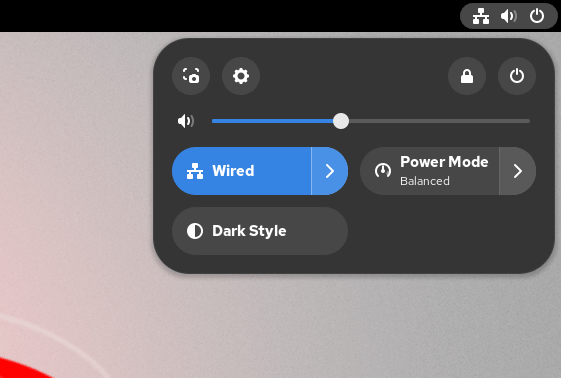
The right part of the top bar is called the system menu. It provides controls to switch network connections on or off and adjust screen brightness. It also offers buttons to open the Settings window, lock the screen, shut down the system, adjust account settings, and log out of the system.
Workspaces
Workspaces are separate desktop screens. You can use them to group open application windows by task. For example, you may be running a few system maintenance-related tasks (such as installing or setting up new applications) that take a bit of time to complete. You can open a browser or other communication apps in another workspace while the installation completes. To move an application from one workspace to another, click the Activities button, select the application’s icon in Windows overview, and drag and drop it to the new workspace on the right side of Windows overview. To switch between workspaces, press Alt+Ctrl+Left or Right Arrow keys.
Locking the screen or logging out of the current session
The system menu includes options to temporarily lock the screen (ideal when leaving the system for a short time) or log out of the current session entirely. To lock the screen, open the system menu and click the lock button at the bottom. Alternatively, leave the system idle for a while; GNOME will lock it automatically.
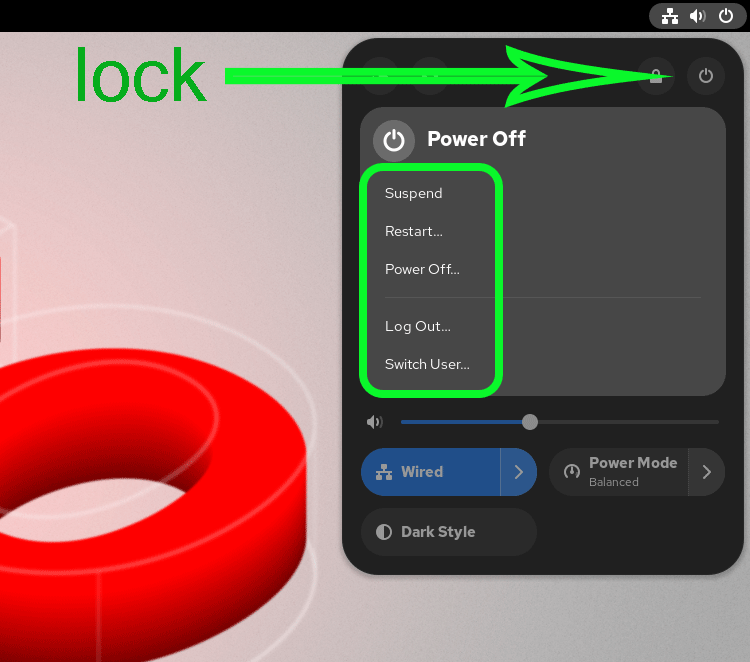
To unlock the screen, press Enter or Space and enter your password.
To log out and end the current session, click the system menu in the upper-right corner of the top bar, click Power Off/Log out, then click Log Out. A window opens with the option to Cancel or confirm the Log Out action.
Shutting down or rebooting the system
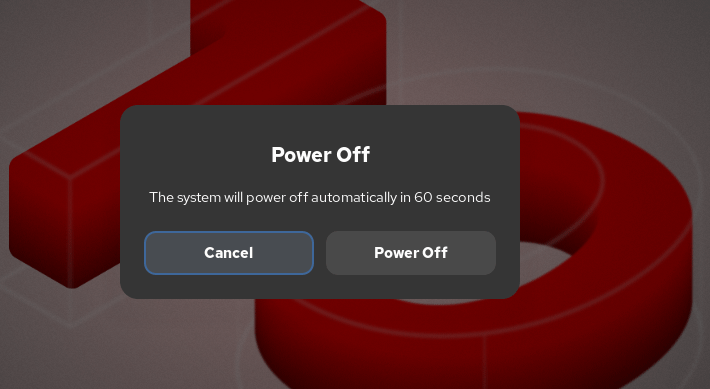
Shut down and reboot options are available in the system menu. To shut down the system, open the system menu, click Power Off/Log out, then click Power Off. It opens a window that offers the option to Cancel or confirm the Power Off action. If you do not choose, it automatically shuts down the system after 60 seconds.
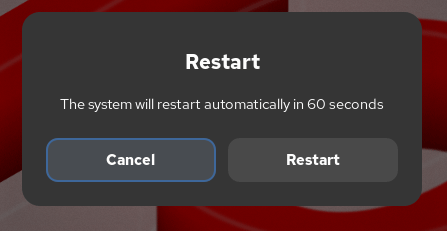
To reboot the system, open the system menu, select Power Off/Log out, and click Restart. A window appears that lets you cancel or confirm the Restart action. If you do not choose, the system automatically restarts after 60 seconds.
Switching between user accounts
The Switch user accounts feature lets you change user accounts without logging out of the current session. You can use this feature to log in with another user account for a specific task while keeping your current session active. For example, if you want to perform a system maintenance task while keeping your session active, you can switch to the root account. This will keep your current session active. You can log out of the root account after your task finishes. To switch user accounts, open the system menu and click Switch User.
Conclusion
The GNOME desktop provides a simple interface for managing applications, workspaces, and system settings. Its intuitive layout, combined with features like workspaces, notifications, and easy user switching, ensures an efficient workflow for both new and experienced users.
Author Laxmi Goswami Updated on 2026-09-21