Task Scheduling in Linux with cron and at command
Task scheduling allows you to run specific tasks at a particular time. Linux offers two native tools for task scheduling: at and cron. This tutorial explains how to use the at tool for task scheduling.
Installing the at tool
Most Linux distributions provide the at utility with the default installation. However, if it is not available, use the following command to install it.
On RedHat-based distributions (RedHat, CentOS, Fedora, etc.)
#dnf install at [Use if login with the root user]
or
$sudo dnf install at [Use if login with a non-root user]
On Debian-based distributions (Debian, Ubuntu, Kubuntu, etc.)
$sudo apt update
$sudo apt install at
It installs the at package. The at package includes the atd daemon. The atd daemon provides the main at command and a few additional commands to make task scheduling easier. Use the following command to view all commands this daemon offers.
#dnf repoquery -l at | grep bin

| at | It is the main command of the package. It schedules jobs to run at the given time. |
| atq | It is equivalent to the at -l command. It lists the jobs queue. |
| atrm | It is equivalent to the at -r command. It accepts a job number as an argument. It deletes the specified job from the queue. |
| batch | It is equivalent to the at -b command. Instead of the time, it runs the scheduled job when the system load drops below 0.8. |
| atd | It is the daemon that provides all commands, features, and functions of the at package. |
| atrun | It is a script that runs the scheduled jobs by the at command. It periodically checks the job queue and executes the scheduled jobs based on their specified time frame. |
Starting/enabling the atd daemon
The atd daemon must be running to use the at and related commands. Start it if it is stopped or enable it if it is disabled. The systemctl command controls all daemons. It provides various options to manage daemons. The following table lists the essential options.
| systemctl status [daemon_name] | Display the current status |
| systemctl start [daemon_name] | Start the daemon in the running session |
| systemctl stop [daemon_name] | Stop the daemon in the running session |
| systemctl restart [daemon_name] | Restart the daemon in the running session |
| systemctl enable [daemon_name] | Enable and start the daemon at boot time |
| systemctl disable [daemon_name] | Disable and stop the daemon at boot time |
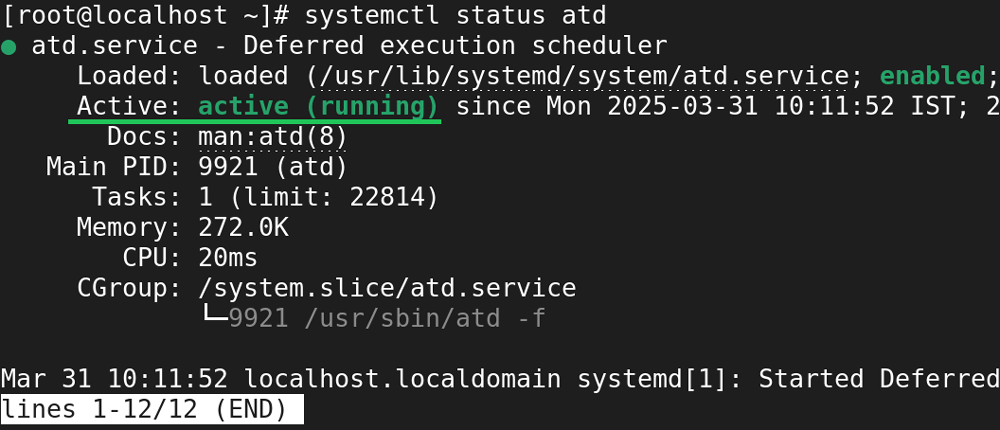
The following command displays the current status of the atd daemon.
#systemctl status atd
The following command stops the atd daemon.
#systemctl stop atd

The following command starts the atd daemon.
#systemctl start atd

The date command
The at command schedules tasks or scripts to run at the specified time. It uses the system time to calculate the provided time. The date command without any arguments or options prints the current date and time.
#date

Task scheduling with the at command
The at command needs a job and a time as arguments. A job can be any executable resource, such as a command or a script. There are three ways to specify the job to the at command.
- Using piping
- Using interactive mode
- Using a batch or script file
Using piping
Piping is the standard shell feature. It redirects the output of a command as the input of another command. It uses a bar (|) sign. It takes the output from the left-side command and supplies it as the input to the right-side command.

You can use this feature to specify the command or script you want the at command to schedule. However, it is not as simple as it sounds. If you directly specify the command, the command executes, and the at command receives the output, not the command itself. Let us take an example. Suppose you want the at command to schedule the ls command to run after one minute. If you use the following command, it will be incorrect.
#ls | at now + 1 minute
If you use the above command, the shell will execute the ls command and send the output to the at command as the input.

The at command needs the command you want to run, not the output of the command you want to run.
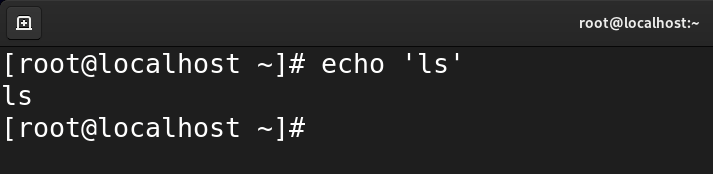
You can use the echo command to solve this issue. The echo command prints the value of the specified variable. If you provide a quote-enclosed text string to it as an argument, it displays that as it is. Using this feature, if you specify a command after enclosing it with quotes, it prints that as it is on the terminal. For example, the following command generates the ls command as the output.
#echo 'ls'
ls
#
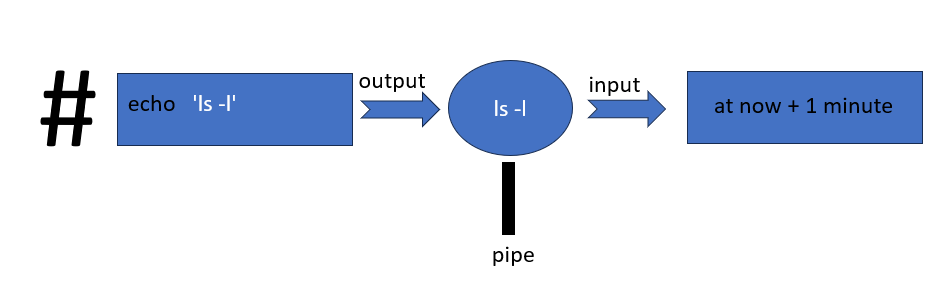
If you redirect this output to the at command, the at command receives the command, not the output.
#echo 'ls' | at now + 1 minute

If the command needs arguments and options, enclose them with the command. For example, if you want to use the -l option with the ls command, use the following command.
#echo 'ls -l' | at now + 1 minute
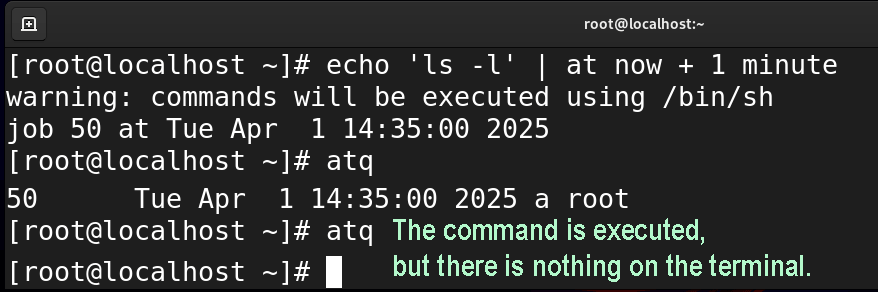
There is one more thing that you need to adjust. If the command generates an output on the terminal, specify the terminal path or the location where you want to display or save the output. To view the output on the current terminal, use the output of the tty command. The tty command displays the path of the current terminal. For example, the ls command lists the content of the specified directory. It generates the output on the terminal. If you do not provide the output location, the command will execute, but nothing will display on the screen. For example, the following command will show nothing on the terminal after one minute.
#echo 'ls -l' | at now + 1 minute
To view the output on the terminal, redirect the output to the terminal. To view the terminal path, use the tty command.
#tty
/dev/pts/0
Use the terminal path with the command to receive the output on the terminal.
#echo 'ls -l > /dev/pts/0' | at now + 1 minute

If the command does not generate a terminal output, there is no need to specify the terminal path. For example, the mkdir command creates a directory but does not display any message on the terminal unless it encounters an error. In that case, you can specify only the command and its arguments.
#echo 'mkdir /testdir' | at now + 1 minute
The above command creates a directory (/testdir) after one minute. However, it does not generate any notification on the screen. You need to manually check the destination path to verify the execution of the command.
#ls /testdir
If the destination contains the directory, it verifies the command executed at the scheduled time.

If the command accepts arguments in quotes, use double quotes. For example, the echo command accepts the text string in quotes. If you want the at command to schedule a job for it, use double quotes for the command that will be passed as the text string to the at command. The following at command schedules the echo command to display a hello message on the terminal after one minute.
#echo 'echo "hello" > [terminal path]' | at now + 1 minute

If you want to save the output in a file, specify the file path. For example, the following command saves the output in the file /testdir/testfile.
#echo 'echo "hello" > /testdir/testfile' | at now + 1 minute

Right side of the pipe
The at command works on the right side of the pipe. It requires a specific time as an argument to schedule the job. It supports all standard time formats. You can specify the time in any format of your choice.
24-Hour format
- HH:MM
12-Hour format
- HH:MM AM
- HH:MM PM
The following command specifies the time in a 24-hour format.
#echo 'echo "hello" > /dev/pts/0' | at 17:52
The following command specifies the same time in a 12-hour format.
#echo 'echo "hello" > /dev/pts/0' | at 05:52 PM

Commonly used time formats
It also supports widely used time formats.
| now | Current date and time |
| midnight | 00:00 AM |
| noon | 12:00 PM |
| teatime | 4 PM |
| today | Current day |
| tomorrow | Day after the current day |
The following are examples of the above time formats.
#echo 'echo "hello" > /dev/pts/0'  | at now
#echo 'echo "hello" > /dev/pts/0'  | at midnight
#echo 'echo "hello" > /dev/pts/0'  | at noon
#echo 'echo "hello" > /dev/pts/0'  | at teatime
#echo 'echo "hello" > /dev/pts/0'  | at tomorrow

Using relative time
To specify a relative time, use the plus (+) sign. You can use relative time with all standard units. The following are examples of the relative time formats.
Current time + five minutes
#echo 'echo "hello" > /dev/pts/0' | at now + 5 minutes
Current time + 2 hours
#echo 'echo "hello" > /dev/pts/0' | at now + 2 hours

Using interactive mode
In interactive mode, you can schedule multiple commands to run at a specific time. Use the following syntax to start the interactive prompt.
#at [time]
> command or script to schedule
> command or script to schedule
Ctrl+ D
The Ctrl+D saves the job queue.
Since the atd daemon provides this prompt, you do not need to use the echo command to schedule the job. However, you need to specify the output location.

Using a batch or script file
The -f option allows you to specify a batch or script file. It uses the following syntax.
#at [time] -f [script file location]
The following command schedules the my.sh script to run at 04:37 PM.
#at 04:37PM -f /testdir/my.sh
The script file you schedule to run must be executable. The chmod command with +x option makes a script file executable.

Scheduling a task based on the system load average
Instead of time, if you want to schedule a task based on the system load, use the batch command or at command with the -b option. It schedules a task to run when the system load average drops below 0.8. It allows you to run bulky scripts in the idle time. The following command runs the /testdir/my.sh script when the system load average drops below 0.8.
#echo '/testdir/my.sh' | batch

Viewing jobs queue
Use the atq command or at command with the -l option to list all scheduled jobs in the queue.
#atq
#at -l

Deleting a job from the queue
To delete a scheduled job, use the atrm command or the at command with the -r option. It needs a job number. Use the atq command to view the job number of all scheduled jobs.
#atrm [job number]

Securing the atd daemon
By default, all users are allowed to use the atd daemon. If you want to allow or deny specific user accounts, use the following two files.
- /etc/at.allow
- /etc/at.deny
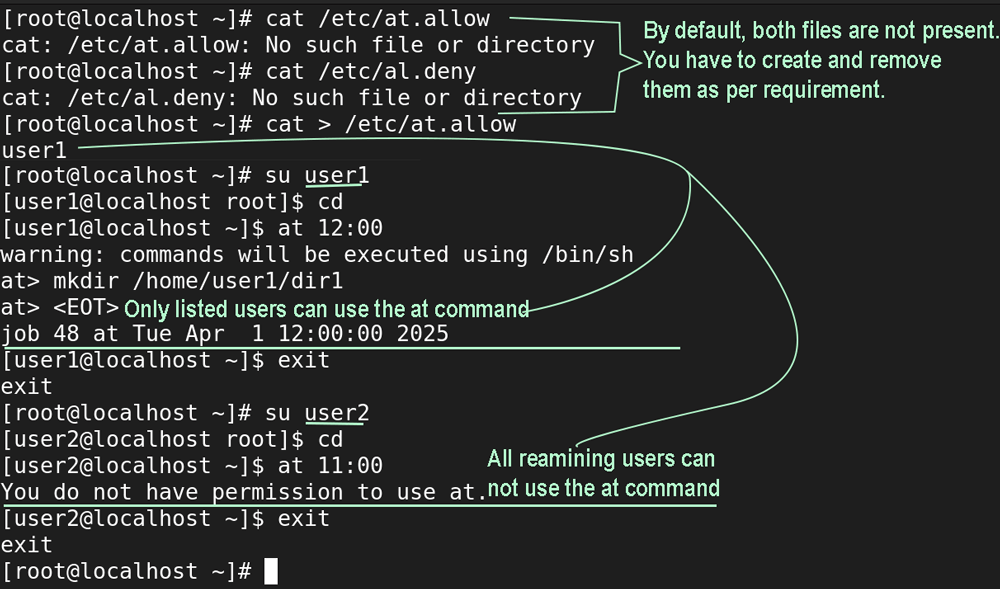
The /etc/at.allow file
This file allows users to use the atd daemon. If you use this file, only the user accounts listed in it can use the atd daemon. All remaining accounts can not use the atd daemon. Use this file to allow only specific user accounts while blocking all remaining accounts.
The /etc/at.deny file
This file blocks users from using the atd daemon. If you use this file, only the user accounts listed in it cannot use the atd daemon. All remaining accounts can use the atd daemon. Use this file to block only specific user accounts while allowing all remaining accounts.
Example
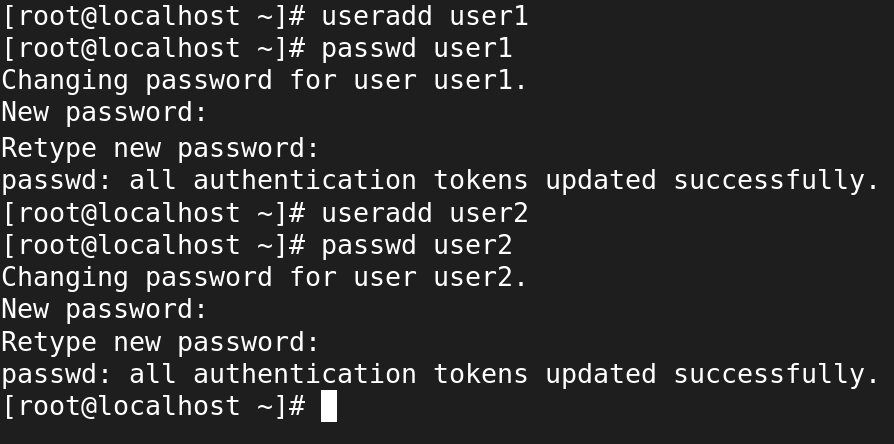
Create two accounts: user1 and user2.
Create the /etc/at.allow file and add user1 to it.
Switch to user1 and schedule a task to verify that user1 is allowed.
Switch to user2 and schedule a task to verify that all remaining users are denied.
Switch to root user and delete the /etc/at.allow file.
Create the /etc/at.deny file and add user1 to it.
Switch to user1 and schedule a task to verify that user1 is denied.
Switch to user2 and schedule a task to verify that all remaining users are allowed.

Conclusion
This tutorial explained how to use the at command for task scheduling. Task scheduling is essential for system administration. It allows you to execute commands and scripts at a specific time automatically. The at tool is for one go. The cron tool is for repetitive tasks.
By ComputerNetworkingNotes Updated on 2025-11-12