How to Configure Syslog Server in Linux
Log files store and provide essential information about the services running on the system. For example, it can tell you which service was accessed by whom at what time, and what they did after accessing it. You can use this information to prepare access reports and troubleshoot service-related issues. Checking and managing log files are easy when you have a few servers in your network. However, if you have multiple servers (e.g., 30-50) in your network, accessing logs from each server can be tedious. A log server makes this task easy. It allows you to access logs from all servers on a single server. It also enhances network security. Instead of granting login access to all servers, grant the admin who monitors the logs login access to the log server. The admin can view logs from all servers on a single log server. This tutorial explains how to set up a log server on RHEL/CentOS.
Objectives:-
- Configure a RHEL/CentOS system in a network as a Syslog server.
- Configure all client systems to send their logs to the Syslog server.
Prerequisites
You need at least 2 RHEL systems on a single LAN. Both systems must have connectivity. The following explains how to set up this lab.
RHCE Practice Lab Setup in VMWare and VirtualBoxYou will deploy the first system as the Syslog server and use the second system as the client to test the log server. All configuration steps and commands explained in this tutorial require root privileges. Log in with the root account on both the server and client system.
Syslog server configuration
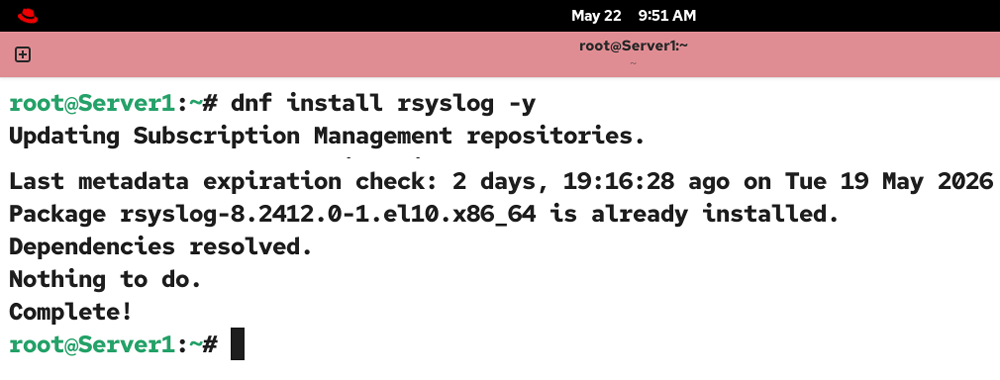
The rsyslog package provides the local and remote logging service. This package must be installed on both the Server and client systems. This package is part of the default installation packages. It should be available on RHEL systems. If it is not available for any reason, use the following command to install it.
#dnf install rsyslog -y
The /etc/rsyslog.conf is the main configuration file for rsyslog. You can add custom rules for your specific requirements directly to this file, or create a custom file in the /etc/rsyslog.d/ directory. Editing this file directly is not recommended, as it is part of the package and can be overwritten by the default one during the next package update.
Instead of editing this file directly, create a custom file in the /etc/rsyslog.d/ directory and add the following lines. You can choose any descriptive name for your configuration file. However, make sure it ends with .conf. For example, you can use the name remotelogs.conf.
template(name="TmplAuthpriv" type="list") {
    constant(value="/var/log/remote/auth/")
    property(name="hostname")
    constant(value="/")
    property(name="programname" SecurePath="replace")
    constant(value=".log")
    }

template(name="TmplMsg" type="list") {
    constant(value="/var/log/remote/msg/")
    property(name="hostname")
    constant(value="/")
    property(name="programname" SecurePath="replace")
    constant(value=".log")
    }

module(load="imtcp")

ruleset(name="remote1"){
     authpriv.*   action(type="omfile" DynaFile="TmplAuthpriv")
      *.info;mail.none;authpriv.none;cron.none
action(type="omfile" DynaFile="TmplMsg")
}

input(type="imtcp" port="514" ruleset="remote1")
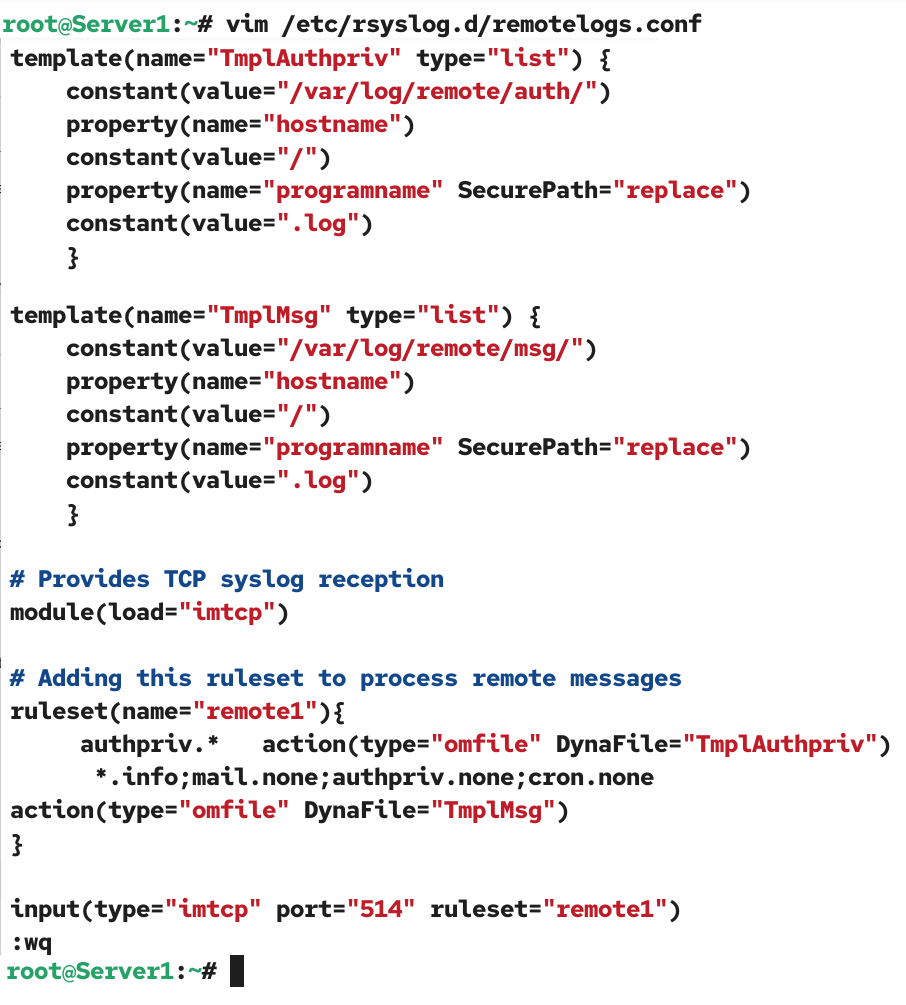
The above configuration configures this server to accept logs from remote servers on TCP port 514. Use the following command to check and verify the configuration.
#rsyslogd -N 1

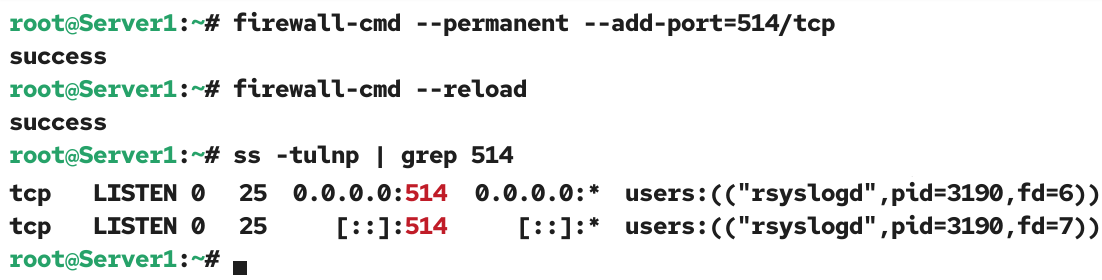
If the above command returns an error, recheck your configuration file and fix it before moving to the next step. If it returns no errors, configure the firewall to allow incoming rsyslog traffic on TCP port 514.
#firewall-cmd --permanent --add-port=514/tcp
Run the following to reload the firewall.
#firewall-cmd --reload
Use the following command to verify that rsyslog is listening on TCP port 514.
#ss -tulnp | grep 514
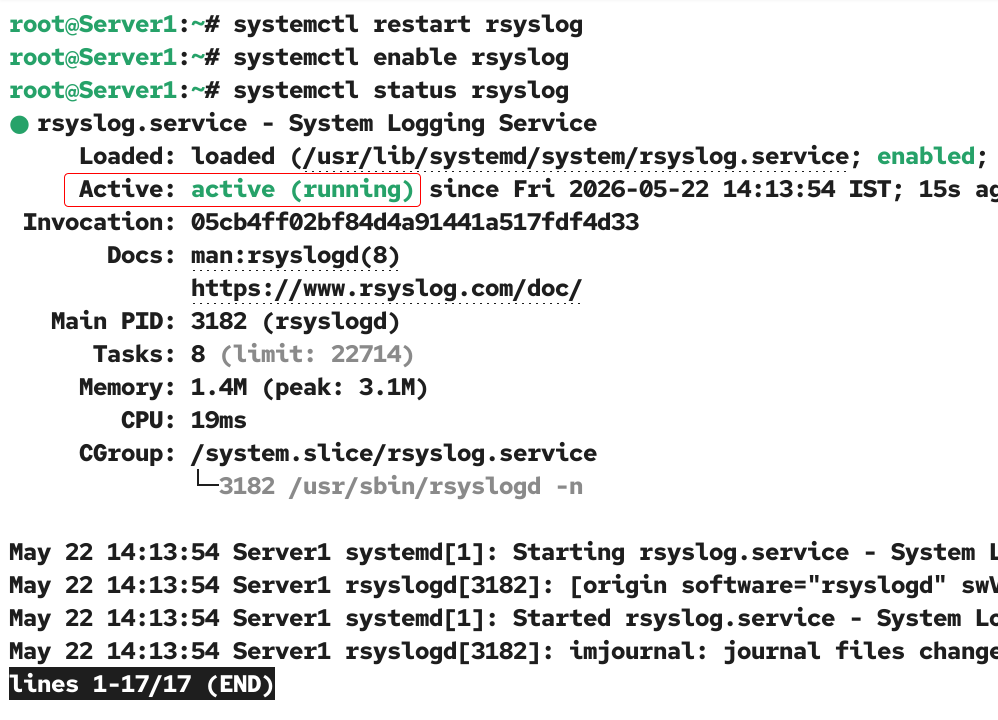
Next, restart the rsyslog service to apply the new configuration.
#systemctl restart rsyslog
#systemctl enable rsyslog
#systemctl status rsyslog
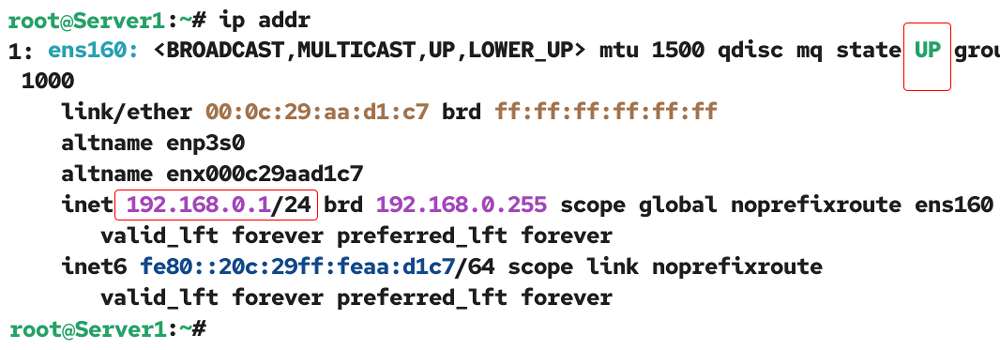
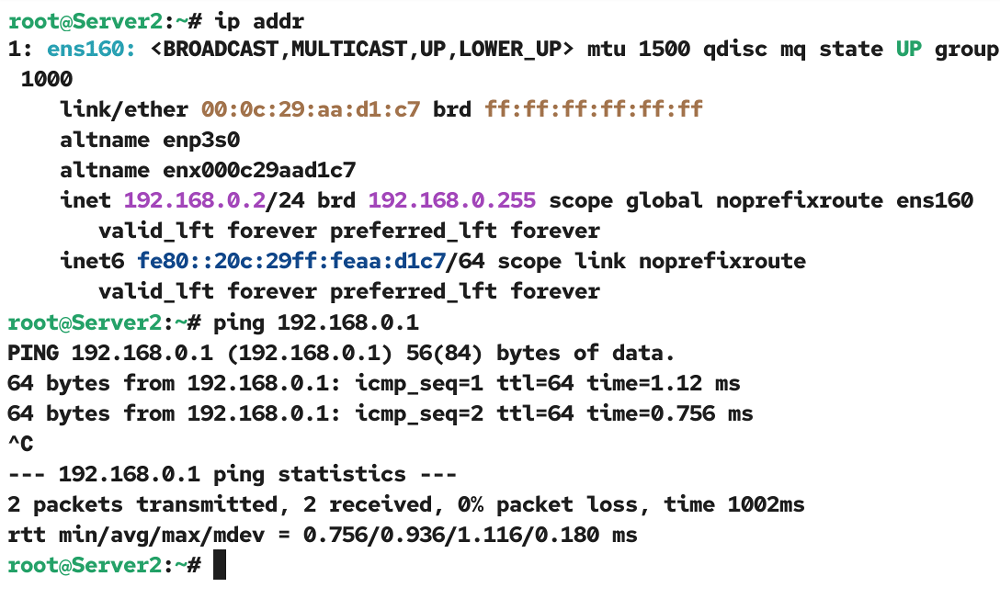
In the next step, note down the IP address of the server. You need it on the client system.
#ip addr
Syslog client configuration
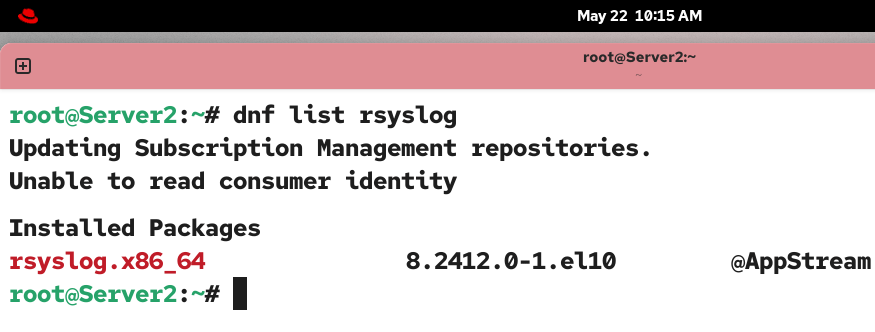
In the first step, verify the rsyslog package is installed on the client system. Use the following command to check whether it is installed.
#dnf list rsyslog
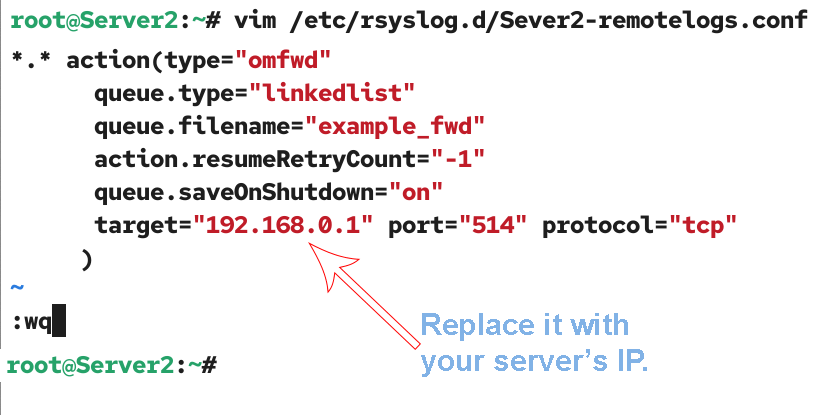
If it is not available, install it using the command listed in the Syslog server configuration section above. After installing the rsyslog package, create a custom configuration file in the /etc/rsyslog.d/ directory and add the following configuration to it. Use a descriptive name that reflects the client system’s name for the configuration file. The name must end with .conf.
*.* action(type="omfwd"
      queue.type="linkedlist"
      queue.filename="example_fwd"
      action.resumeRetryCount="-1"
      queue.saveOnShutdown="on"
      target="192.168.0.1" port="514" protocol="tcp"
     )
Replace the target IP with your server’s IP.
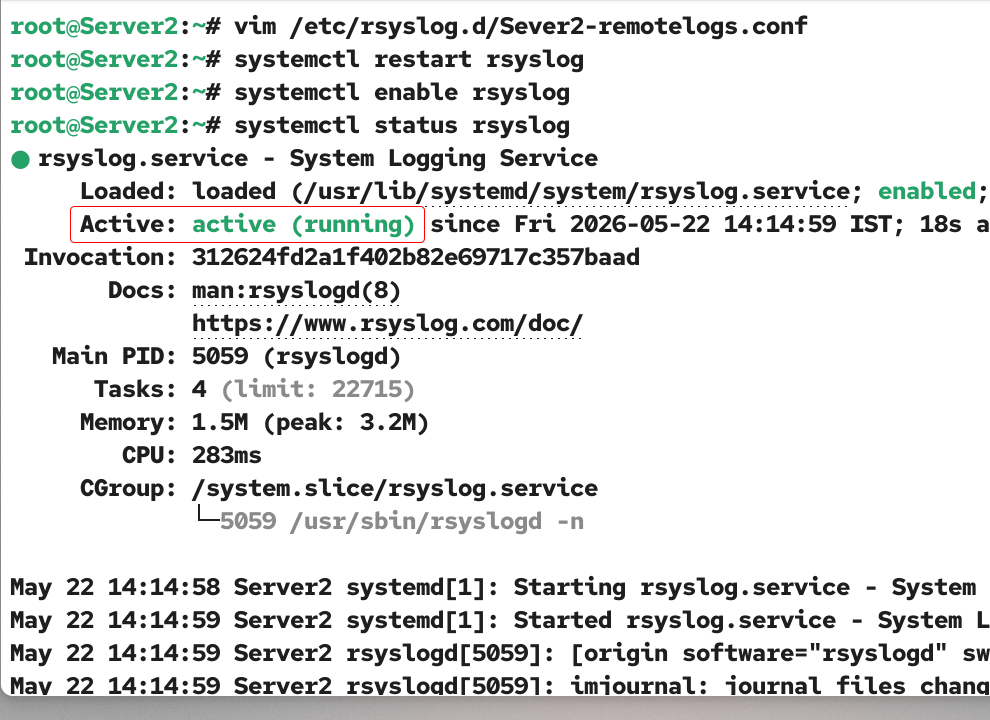
Restart, enable at boot time, and check the service’s status. It must be active and running.
#systemctl restart rsyslog
#systemctl enable rsyslog
#systemctl status rsyslog
At this point, the client is ready to forward all messages to the log server.
Testing and verifying the log server
To test and verify the log server, check connectivity between the client and the log server.
If both systems are connected, run the following command on the client system. This command generates a log.
#logger This is a test log.

The client system forwards this log to the log server. The log server creates a separate directory for each client in the /var/log/remote/msg/ directory and saves all messages it receives from that client in that directory. It uses a separate file for each message type. The log server saves this message in the /var/log/remote/msg/[hostname_of_the_client]/root.log file.
#cat /var/log/remote/msg/Server2/root.log
Replace Server2 with the hostname of your client system.

Conclusion
Setting up a centralized log server on RHEL/CentOS simplifies log management and monitoring across multiple systems. It allows you to collect, review, and troubleshoot service activity from a single location. This approach not only saves time but also enhances network security by minimizing direct access to individual servers.
Author Laxmi Goswami Updated on 2026-05-23