How to Configure RAID in Linux Step by Step Guide
RAID (Redundant Array of Independent Disks) is a technology that uses multiple disk drives to improve performance and data redundancy. It combines multiple physical disk drives into a single logical unit. This tutorial explains RAID terminology and configuration steps in Linux.
RAID Terminology
The following are the essential terms related to the RAID configuration.
| Chunk | This is the data block size used in RAID configuration. For example, if the chunk size is 64KB, there would be 16 chunks in 1MB (1024KB/64KB) RAID array. |
| Hot spare | This is the additional disk in the RAID array. If any disk fails, data from the faulty disk will be migrated to this spare disk automatically. |
| Mirroring | If this feature is enabled, it will save a copy of the same data on another disk. It is just like making an additional copy of data for backup purposes. |
| Striping | If this feature is enabled, it will write data randomly on all available disks. It is like sharing data between all disks, so they all fill equally. |
| Parity | This is a method of regenerating lost data from saved parity information. |
| Array | It is a group of devices or partitions we use to create a RAID device. |
RAID Levels
Different RAID levels are defined based on how mirroring and stripping are required. Red Hat Linux uses only level 0, 1, 5, and 6 among these levels.
RAID Level 0
This level provides striping without parity. It performs read and write operations simultaneously. It offers faster speed than other levels. It requires at least two hard disks. It fills all disks equally.
RAID Level 1
This level provides parity without striping. It writes data on two disks simultaneously. If one disk fails, it uses another disk as a backup. It requires double hard disks. For example, if we want to use two hard disks, we have to deploy four hard disks, or if we need one disk, we must deploy two. The first hard disk stores the original data, while the other disk stores the exact copy of the first disk. Since it saves data in two places, it provides a slower speed than level 0.
RAID Level 5
This level provides both parity and striping. It requires at least three disks. It writes parity data equally on all disks. If one disk fails, it can reconstruct data from parity data available on the remaining disks. It provides a combination of integrity and performance.
RAID Level 6
RAID level 6 functions similarly to level 5 but saves parity data on two locations, allowing for the failure of two disks.
LAB Setup for practice
I used a virtual system with four additional hard disks of the same size to demonstrate and explain all the exercises in this tutorial. You can check previous parts of this tutorial series to learn more about this setup.

This tutorial is part of the tutorial series Linux disk management concepts and configurations. Other parts of this series are the following.
Chapter 02 File Management Commands in Linux
Chapter 03 Linux file system types explained
Chapter 04 Adding and removing hard disks in VMware Workstation
Chapter 05 List view and find hard disk names in Linux
Chapter 06 The fdisk command on Linux explained
Chapter 07 Manage Linux disk partition with the gdisk command
Chapter 08 The /etc/fstab file on Linux explained
Chapter 09 Linux disk management with the parted command
Chapter 10 The mkfs command on Linux
Chapter 11 The mount command on Linux temporary mounting
Chapter 12 The swap space on Linux explained
Chapter 13 How to create a swap partition in Linux
Chapter 14 How to configure LVM in Linux step-by-step
Listing disk drive configurations
The lsblk command lists all attached hard disks and their partitions.

As the above output shows, this system has five hard disks: sda, sdb, sdc, sdd, and nvme0n1. I attached the sda, sdb, sdc, and sdd virtual disks for this tutorial. The nvme0n1 disk contains the operating system. I will not touch this disk to mitigate any chance of data loss or corrupting the operating system. You can follow a similar approach on your system to practice the RAID configuration without messing up the existing system. If you do, make sure you use all disks of the same size.
RAID configuration
The mdadm package provides all the tools, utilities, and modules we need to create, configure, verify, and manage RAID devices. It is essential for RAID configuration. It is part of the default installation. We can use the dnf command to confirm it.

Due to any reasons, if it is not present, use the following command to install it.
#dnf install mdadm
Creating a RAID array
The mdadm command creates a RAID array. It uses the following syntax.
#mdadm --create  /dev/[ RAID array Name or Number] --level=[RAID Level] --raid-devices=[Number of storage devices]
[Storage Device] [Storage Device] ....N
For example, the following command creates a raid array named md0 with the level 0 configuration containing two devices: sda and sdb.
#mdadm --create /dev/md0 --level=0 --raid-device=2 /dev/sda /dev/sdb
The following command creates a raid array for level 1 with the same configuration.
#mdadm --create /dev/md0 --level=1 --raid-device=2 /dev/sda /dev/sdb
The following command creates a level 5 raid array using sda, sdb, and sdc disks.
#mdadm --create /dev/md0 --level=5 --raid-device=3 /dev/sda /dev/sdb /dev/sdc
Creating and managing a raid array is the same at all levels. However, the minimum requirement is different. Levels 0 and 1 need a minimum of two disks, whereas levels 5 and 6 require three.
Create a raid array at your preferred level.

Verifying a raid array
Linux keeps runtime variables and configurations in the /proc directory. It provides a way to view and change kernel parameters in real-time. We can use it to view active raid arrays and their parameters.
#cat /proc/mdstat

The output displays active arrays and their parameters. Parameters include raid level, the label of all disks in the array, numbers of active and spare disks, superblock and chuck size.
The mdadm command with the --detail option provides detailed information about a particular array. For example, the following command displays the /dev/md0 array information.
#mdadm --detail /dev/md0

Creating a file system
After creating a raid array, we must make a file system. The mkfs command creates a file system on the specified device or partition. The following command creates an xfs file system on the array we created.
#mkfs.xfs /dev/md0

Mounting the raid array
A mount point allows us to access the raid array. Create a mount point and add an entry in the /etc/fstab file.
The /etc/fstab file saves information about all partitions and devices Linux mounts at the boot time.
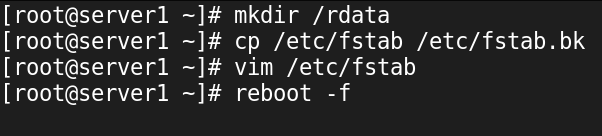
Create a directory, take a backup of the current /etc/fstab file, and open it for editing.
#mkdir /rdata
#cp /etc/fstab /etc/fstab.bk
#vim /etc/fstab

Add the following entry at the end of existing entries and save the file.
/dev/md0 /rdata xfs defaults 0 0

A fstab entry has the following six fields.
| Device name | Device's name, full path, or UUID. It is the partition or device we want to mount to the Linux file system. |
| Mount point | The directory where we want to mount the partition. |
| File system | The file system is on the partition. |
| Options | Control options. |
| Dump support | Use value 0 to disable and 1 to enable this feature. |
| File system check at boot time | Use value 0 to disable and 1 to enable this feature. |
Restart the system.
#reboot -f
After restart, use the lsblk command to verify the raid array.
#lsblk

Add some dummy data to verify the raid array is online and working correctly.
#man ls > /rdata/testfile
#wc /rdata/testfile

Adding spare disks
A spare disk is the best backup strategy we can implement in a raid array. RAID uses spare disks to replace faulty disks. When a disk in the array is damaged or defective, RAID uses spare disks to replace it. This entire process happens automatically. The following command adds the sdd disk as the spare disk to the raid array /dev/md0.
#mdadm --manage /dev/md0 --add /dev/sdd

Use the mdadm command with the --detail option to verify the spare disk.
#mdadm --detail /dev/md0

Replacing a drive
To remove a disk from the raid array, change its state to faulty. RAID allows us to remove defective devices from the array. The following command makes the /dev/sda drive faulty.
#mdadm --manage --set-faulty /dev/md0 /dev/sda
If a spare disk is available, it automatically replaces the faulty disk with the spare disk and reconstructs the array. View the array detail again to verify the change.
#mdadm --detail /dev/md0

We can verify this by checking the data stored on the RAID device.
#ls /rdata
#wc /rdata/testfile
Removing or deleting a raid array
Removing or deleting a raid array is the following five-step process.
- Move all important data to another raid array device or partition.
- Unmount the raid array.
- Use the stop option to stop the raid array.
- Use the remove option to delete the raid array.
- Use the zero-superblock option to remove raid metadata from disks.
Since our testing raid array contains no meaningful data, we can skip the first step.
#umount /dev/md0
#mdadm --stop /dev/md0
#mdadm --remove /dev/md0
#mdadm --zero-superblock /dev/sda /dev/sdb /dev/sdc /dev/sdd

After removing the raid array, restore the original /etc/fstab file and restart the system.

Use the lsblk command to verify the delete operation.

Conclusion
Understanding RAID terminology and configurations is essential for effective disk management in Linux. The choice of RAID level depends on your needs for performance and redundancy. Properly setting up and managing RAID arrays can significantly enhance data reliability and access speeds.
By ComputerNetworkingNotes Updated on 2026-02-02