How to Enable and Disable Root Login in Ubuntu
In Linux, the root account is the primary administrator account. When we install Linux, the installation wizard automatically creates this account. In some Linux flavors, such as RedHat and CentOS, the installation wizard allows us to set a password on this account.
In Ubuntu Linux, the installation wizard does not have an option to set a password. It also does not give any information about this account. It simply creates this account without a password in the background. Linux treats a user account without a password or an empty password as a locked account. Since the installation wizard creates the root account without a password, it remains locked until we manually enable it. Before we unlock the root account, let us understand how Ubuntu stores the root account information.
Linux saves local user accounts in the following two files.
- /etc/passwd: - This file saves user records.
- /etc/shadow: - This file stores user passwords.
The grep command allows us to view a specific record from these files. The following commands show the root account's records.
$grep root /etc/passwd
$sudo grep root /etc/shadow
The second command needs authentication. Type the password you used to log in to the system.

As the above output shows, the /etc/passwd file has the character x in the password field of the root account's entry. The /etc/shadow file has the symbol * in this field. The character x in the /etc/passwd file represents the account password saved in the /etc/shadow file. The symbol * in the /etc/shadow file represents an empty password. An empty password keeps the account locked. The system does not allow you to use a locked account to log in.
Only a root account can perform system management-related tasks. If you run a command that changes the system properties under a regular user account, Linux denies the action. For example, if you want to install or remove a software package, you must use the root account. You can verify this by running a system administrator command.
Install or remove a software package from a regular account.
$apt-get install vlc
$apt-get remove firefox

As the above output shows, the system denied the operation. It verifies you cannot run system administration commands under the regular user account.
Enabling root account in Ubuntu
To perform system administration-related tasks, you must enable the root account. There are four ways to unlock the root account.
- Enabling the root account temporarily
- Enabling the root account for the current session
- Enabling the root account for the CLI interface
- Enabling the root account for the GUI interface
Enabling the root account temporarily
If you only need to run a few commands, you can use the sudo command. The sudo command allows you to run a single command with the root privilege. You can run it as many times as you want. However, the first time, it asks you to authenticate the action by typing your password. It prevents scripts from abusing this command.
Example
Install, verify, and remove the VLC player. Use the sudo command to run necessary commands under the root privilege.
$sudo apt-get install vlc
$sudo apt list vlc
$sudo apt-get remove vlc

The main problem with this approach is that you must type the word sudo with every command you want to run with the root privilege. This option is best when you need to run only a few commands. However, this method is annoying if you run multiple system commands to achieve a specific goal. In that case, the second option is better than this.
Enabling the root account for the current session
This option allows you to enable and use the root account til you need it in the running session. The following command enables the root account in the current session.
$sudo –i
You must authenticate this command with your password. This command switches the shell prompt from the current user account to the root user account. When the tasks that need root privilege are over, you can use the exit command. The exit command terminates the root session and returns the shell prompt to the regular account.
Example
Enable the root account in the current session, list the username, list a software package, terminate the root account, and switch to the regular account.
$whoami
$sudo –i
#whoami
#apt list firefox
#exit
$whoami

Enabling the root account for the CLI interface
This option permanently enables the root account for the CLI interface. The default Linux installation provides a few virtual consoles. You can use these consoles to manage the system and perform routine tasks from the command line. The default installation creates the root account without a password. Without the password, an account remains locked. You can unlock it by setting a password. The following command sets a password for it.
$ sudo -i passwd root
You can access a virtual console by pressing the ALT+CTRL+F(1 to 6) keys. On the virtual console, you can log in from the root account. If you wish to lock the root account again, you can remove its password. The following command removes the password from the root account.
$sudo passwd -dl root
The above command locks the root account again.
Example
| Set a password to the root account | $ sudo -i passwd root |
| Access a virtual console | ATL+CTRL+f4 |
| Log in from the root account | root password |
| Verify the root account | #whoami |
| Exit the root account | #exit |
| Switch to GUI | ALT+CTRL+F(1 or 2) |
| Remove the password from the root account | $sudo passwd -dl root |

Enabling the root account for the GUI interface
The GUI interface has an additional security layer to protect users from using the root account to log in. You can verify this from the login screen of the GUI interface.

To enable the root account for the GUI interface, you need to adjust a few settings in the following files.
/etc/gdm3/custom.conf
/etc/pam.d/gdm-password
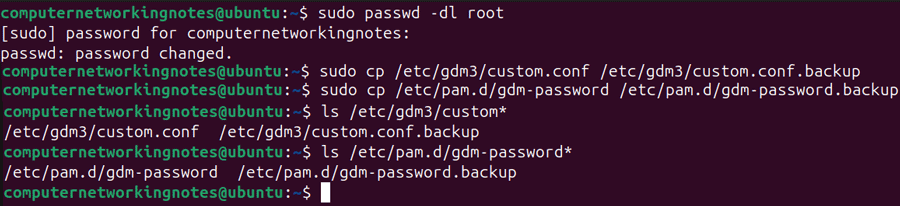
Set a password for the root account and create a backup of both files.
$ sudo -i passwd root
$cp /etc/gdm3/custom.conf /etc/gdm3/custom.conf.backup
$cp /etc/pam.d/gdm-password /etc/pam.d/gdm-password.backup
Open the /etc/gdm3/custom.conf file.
$sudo vim /etc/gdm3/custom.conf
Add the following line to the [security] directive and save the file.
AllowRoot=true

Open the /etc/pam.d/gdm-password file, add the hash (#) sign to the following line, and save the file.
auth required pam_succeed_if.so user !=root quiet_success

To apply these changes, we have to restart the system.

After restart, log in from the root account.

If you wish to lock the root account again, remove the password from the root account and restore both files from the backup.
$sudo passwd -dl root
$cp /etc/gdm3/custom.conf.backup /etc/gdm3/custom.conf
$cp /etc/pam.d/gdm-password.backup /etc/pam.d/gdm-password

Conclusion
There are four ways to enable the root account on Ubuntu: temporary, in the current session, on the CLI interface, and in the GUI interface. The first and second options are the recommended methods. Administrators mainly use these methods to unlock and use the root account. The third and fourth options involve security risks. Unless you are a system or network administrator or know how Linux works, limit the use of these options.
Author Laxmi Goswami Updated on 2026-05-11