How to Configure a Wireless Network in Packet Tracer
Packet Tracer is a network simulator software. It includes all essential Cisco devices for the CCNA or other entry-level certification programs. This tutorial explains how to configure, test, and verify a wireless network in Packet Tracer.
Lab setup
Open Packet Tracer and add a wireless router and three PCs to the workspace.
Adding a wireless router
Click Network devices (available in the bottom left), click Wireless devices (a sub-section of Network devices), drag WRT300N (from all available devices), and drop it into the workspace.
Adding PCs
Click Devices, select PC, and drag it into the workspace.

Changing Ethernet cards
By default, a PC includes a wired LAN card. A wired LAN card has an RJ-45 socket. It allows you to connect to the network using an Ethernet cable. To connect to a wireless router, you must replace it with a wireless LAN card. Click PC, click Physical menu, click the power button to turn it off, drag the installed LAN card, and drop it into the Modules section. Drag a WMP300 wireless LAN card from Modules, drop it into the empty slot, and power on the PC.
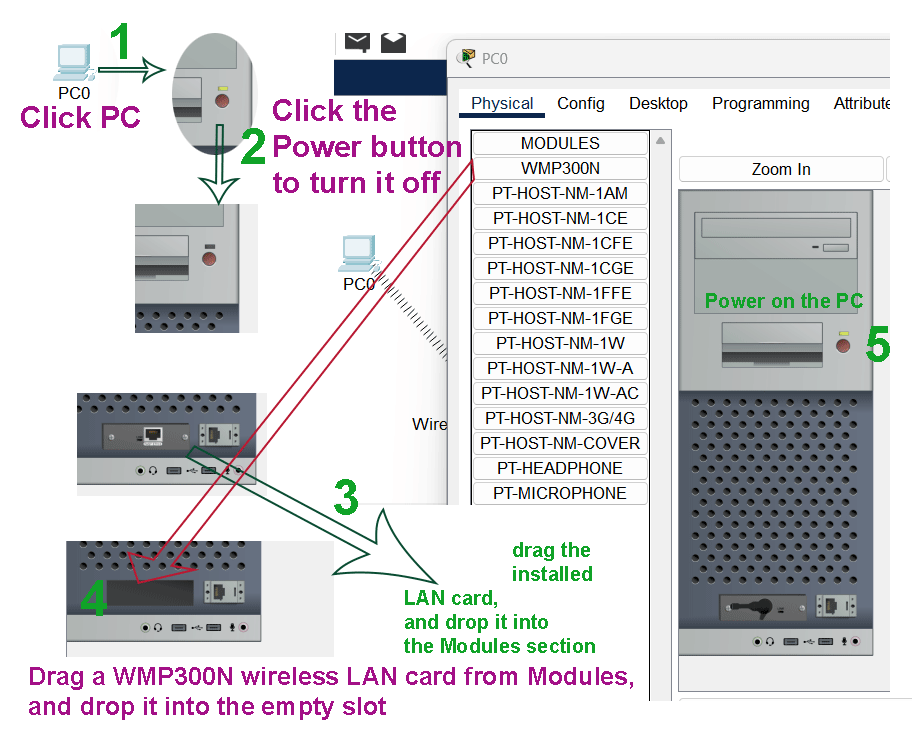
Repeat the same process on all PCs.
Default configuration
The default configuration on the wireless router includes a running DHCP service that automatically provides essential IP configuration to all PCs when you replace their wired LAN cards with wireless LAN cards. It allows you to set up a basic wireless network out of the box.

However, it does not automatically enable any security feature. It means anyone can connect to the wireless router. To use custom IP configurations or adjust security options, you must configure the wireless router according to your requirements. The Config menu allows you to view and configure essential settings. The Wireless tab under the Config menu shows the default SSID, authentication method, and server settings.

The LAN tab displays the default IP configuration. It allows you to manage it from an end device such as a PC or Server.

Configuring the wireless router
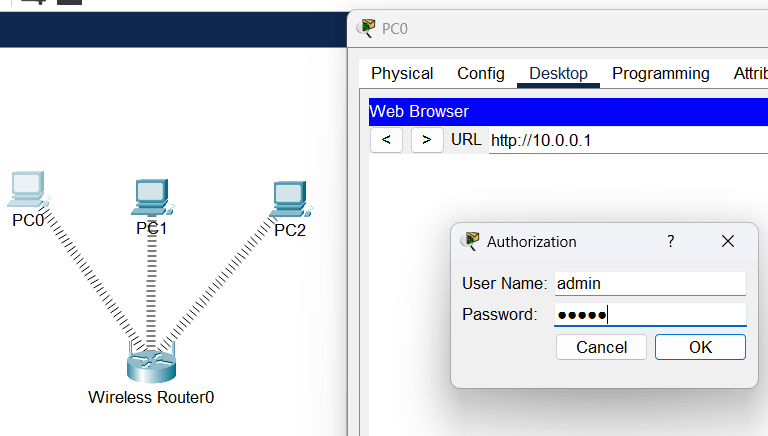
Click the PC icon, click the Desktop menu, and click the Web browser icon.

Use the wireless router's IP address to access it remotely. The default username and password are admin.

It opens the wireless router's web interface, which allows you to manage all settings and configurations.
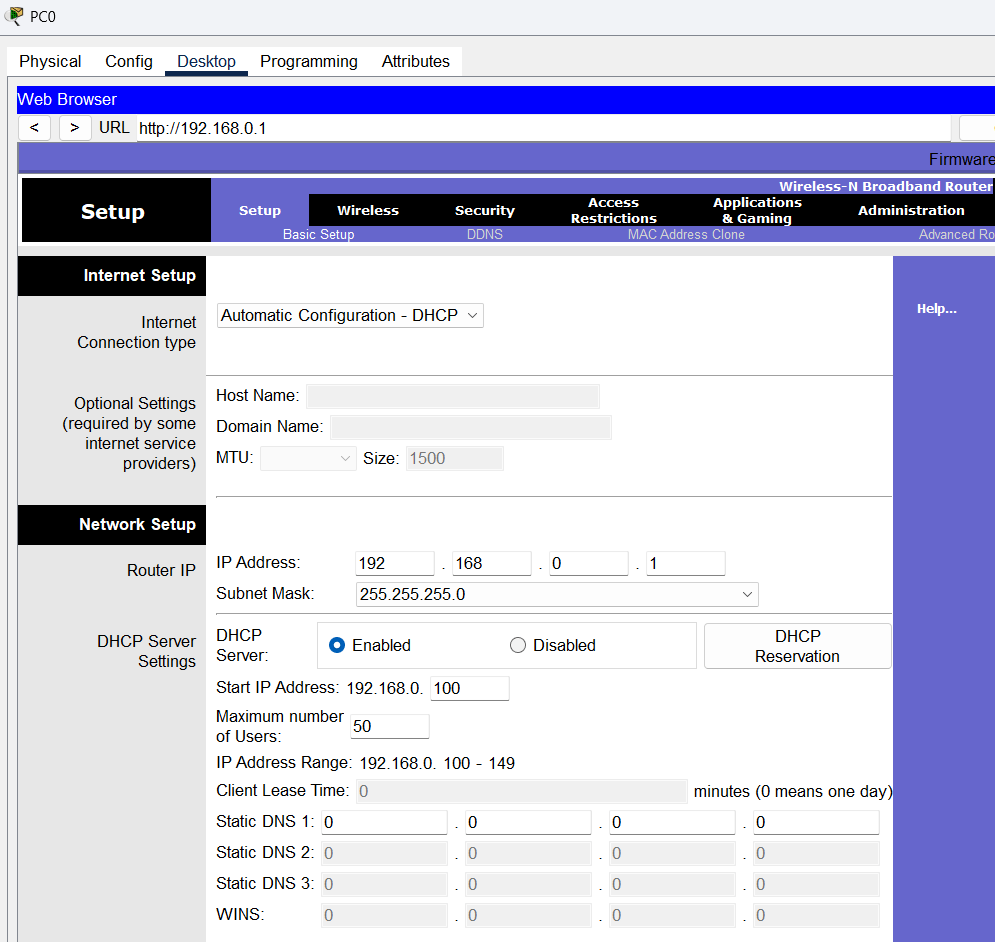
Using custom IP configurations
The default configuration includes a DHCP service running on the wireless router that automatically provides the necessary IP configuration to all devices.
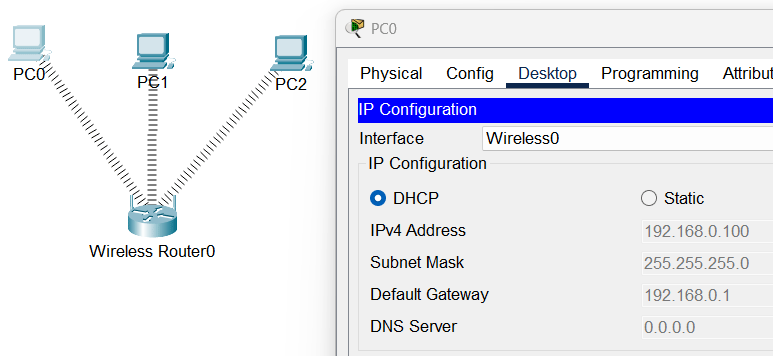
To use a custom IP configuration, either change the default IP range in the DHCP pool or manually assign IP addresses on all devices. Select Static, option and assign a manual IP configuration. Repeat the same process on all PCs.
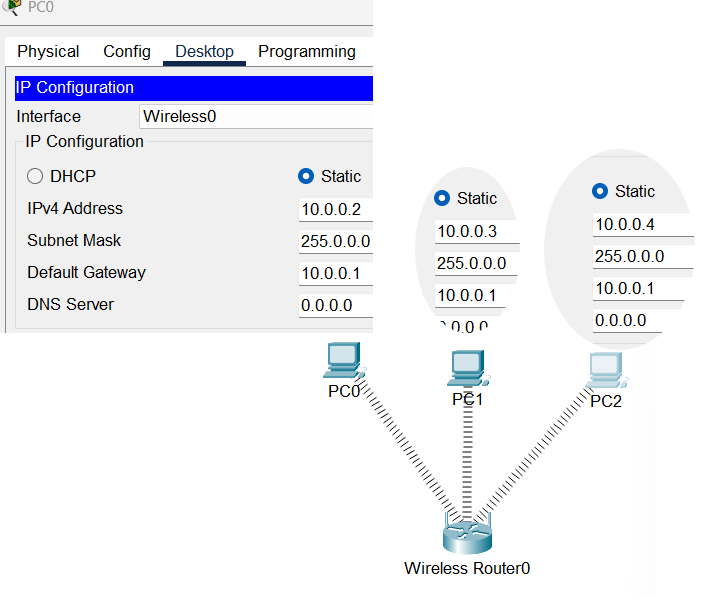
If you use a custom IP configuration, you must update the wireless router's default IP configuration. Assign an IP address from the same IP subnet you used for PCs.

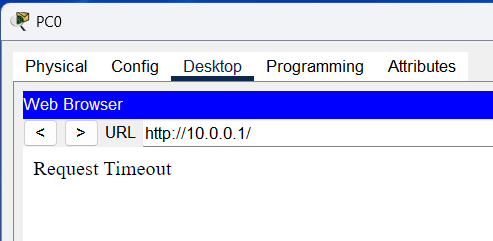
Use the new IP address to access the wireless router from a PC.
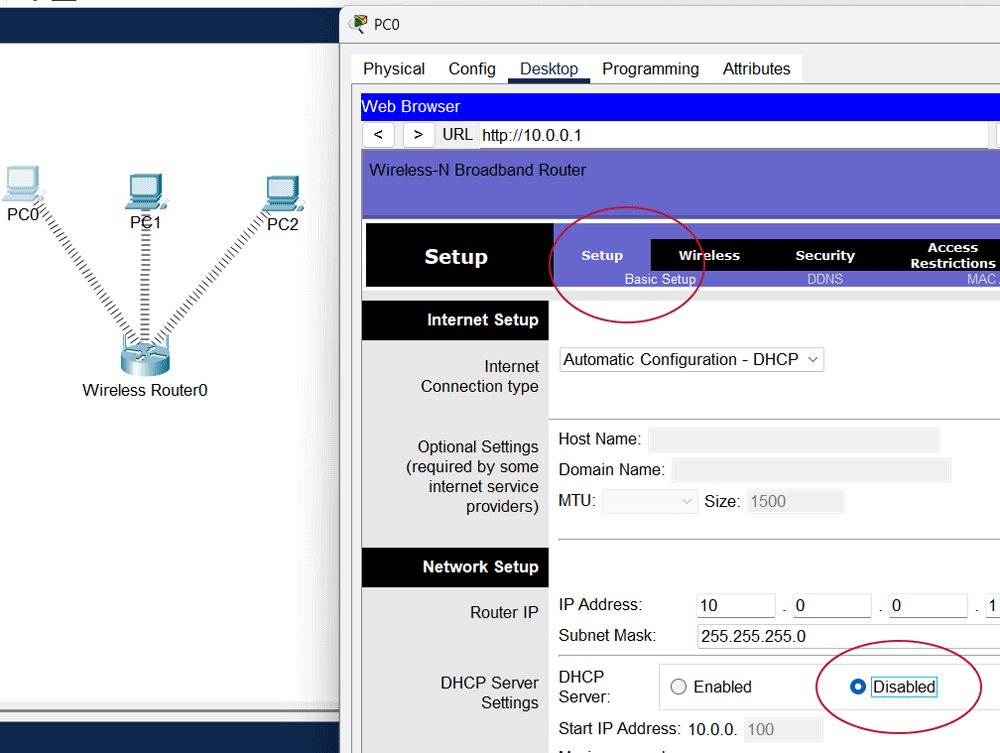
To disable the DHCP service, click Setup, click Basic Setup, click DHCP Server Settings, and select Disabled.
Using a custom SSID
To use a custom SSID, click Basic Wireless settings available under the Wireless menu. Set a custom SSID and click the Save settings button.

Since the SSID has changed, it terminates the existing connection. You must reconnect it using the new SSID.
Open the PC Wireless option on the PC.
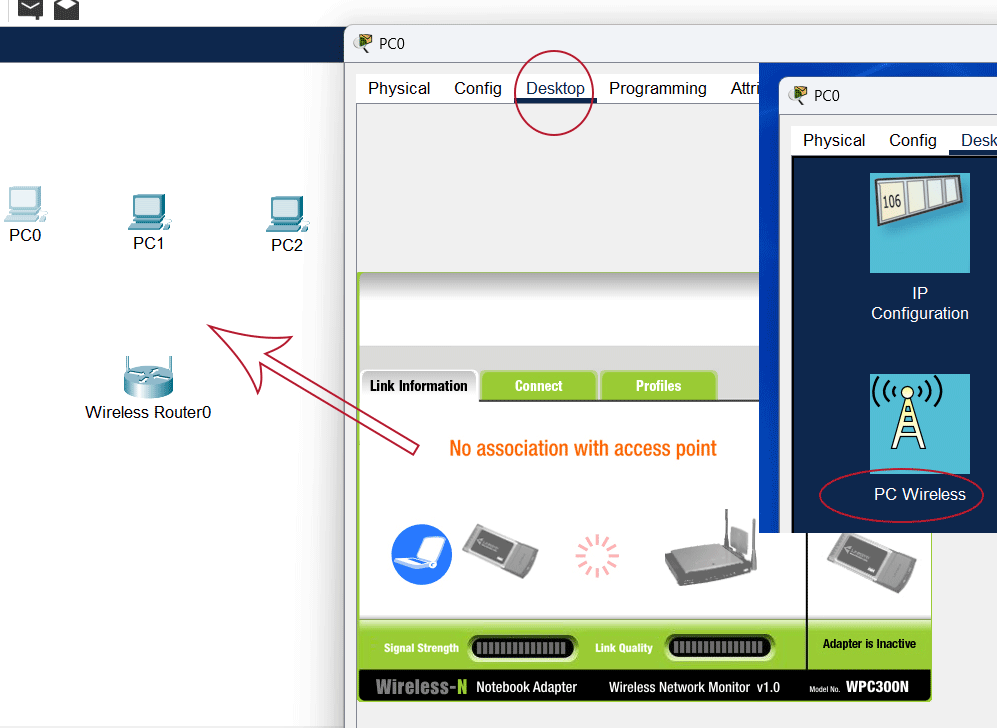
Switch to the Connect tab, select the newly advertised SSID, and click Connect.
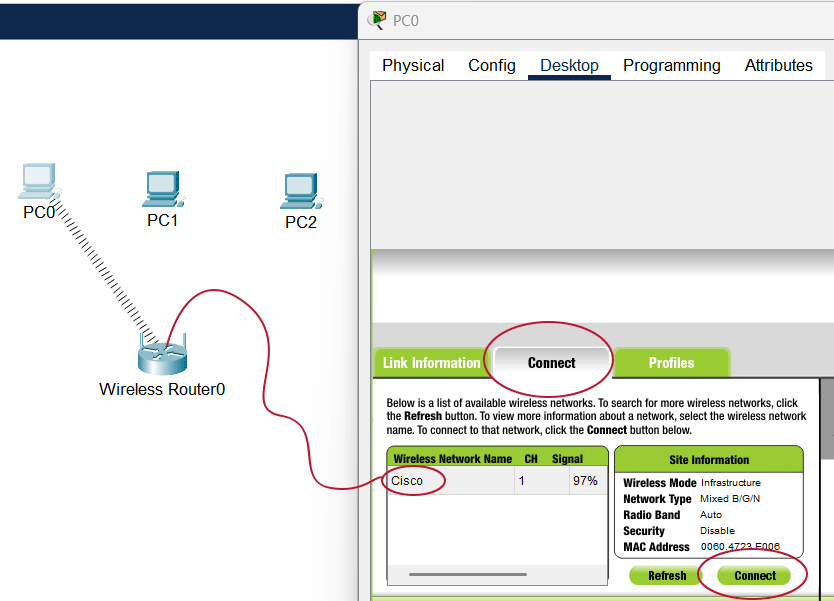
You need to repeat this process on all PCs.
Enabling security
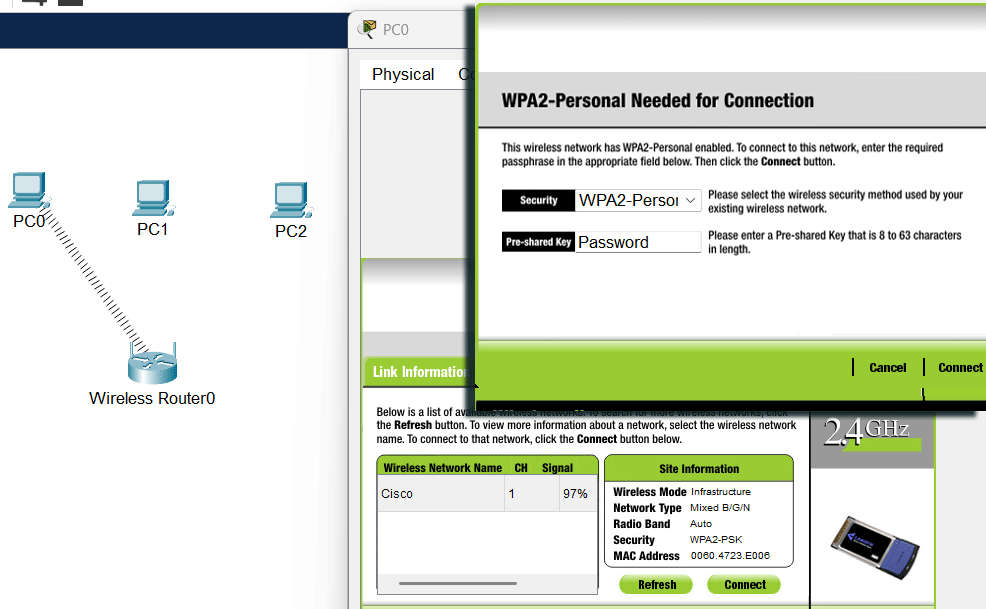
Right now, this network has no security measures in place. Anyone can join it. To secure it, you can enable password-based authentication. After that, only users who know the configured password can join the network. For this, access the wireless router's configuration mode again, and click Wireless security under the Wireless menu. Change Security Mode to WPA2 Personal and set a password in the Passphrase field. Save the settings.

It will also terminate all existing connections. You must reconnect all PCs to the network. Now, connecting PCs to the network requires the password. Use the password you configured in the Passphrase field.
Conclusion
Wireless routers include many configuration settings. The default settings allow you to run a basic network without any security. This tutorial explained how to configure or change essential settings to run a secure custom network.
Author Laxmi Goswami Updated on 2025-10-27