GNS3 Setup Wizard options Explained
GNS3 consists of two components: the GNS3 client and the GNS3 server. The GNS3 client provides a GUI for creating and testing network topologies. GNS3 server stores and runs the devices you use in the network topologies. This tutorial explains how to install and configure the GNS3 server.
You have three options for installing the GNS3 server: on the local system without a virtual machine, on the local system with a virtual machine, or on a remote server with a virtual machine. Depending on your requirement and system configuration, you can choose any one of these three options.

The first option needs less hardware configuration but supports fewer devices. This setup is best if your computer has fewer hardware configurations, or you want to create only small networks.
The second option needs a moderate hardware configuration but supports sufficient devices to create small and mid-size networks. This setup is the best if you want to use GNS3 to practice CCNA/CCNP exam topics. The minimum requirement for this option is the following.
| Operating System | Windows 10 or later |
| Processor | Dual-core or higher |
| RAM | 8GB or more |
| Available Storage space | 40 GB |
If your computer meets the minimum requirements for the second option, you can use it. If not, you pick the first option. The third option requires a remote server and a computer or laptop with adequate RAM, CPU, and hard disk space. This setup is the best if you want to use GNS3 to test live networks. You do not need this setup to practice for the CCNA/CCNP exam.
GNS3 server setup on the local system
Installing and configuring the GNS3 server on the local system without a virtual machine is the first and easiest option. To use this option, you do not need any additional setup or configuration on the local system. The GNS3 client includes all necessary components to use the local system as the GNS3 server. To configure the local system as a GNS3 server, start the GNS3 client. When the GNS3 client begins for the first time, it automatically starts the Setup Wizard. The Setup Wizard allows you to configure the GNS3 server. You can also start the Setup Wizard at any time from the Help menu. Click Help, then click the Setup Wizard option.

On the first screen of the Setup Wizard, select the second option, "Run appliances on my local computer," and click Next.

On the next screen, you need to configure three options: Server Path, Host binding, and Port.
Server Path
When you install the GNS3 client, the installation process automatically installs the GNS3 server component. The installation process installs this component in the GNS3 client's installation directory. You can use the Browse option to select it.
Host binding
The local GNS3 server runs on this IP address. The wizard offers many IP addresses to choose from in the drop-down. Although you can use any available IP address from the drop-down, you should use the IP address 127.0.0.1. This IP address belongs to the loopback interface. It provides the most error-free environment for the applications that run a server process on the local system.
Port
The local GNS3 server accepts connections from GNS3 clients on this port. You can use any available TCP port. By default, the wizard automatically configures these values. Click Next to continue.

The wizard starts the GNS3 server and connects the GNS3 client to it on the selected IP address and port number.

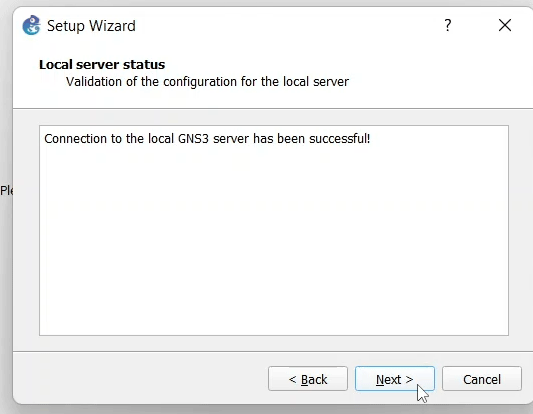
The next screen displays the result. If it shows the message "Connection to the local GNS3 server has been successful", it verifies the local GNS3 server setup.

On the last screen, it displays a summary of the configuration settings used to start the local GNS3 server and connect the GNS3 client to it. Click Finish.

Now, you can use GNS3 to create and test network topologies. This setup supports only a limited set of devices, such as legacy IOS images, VPCS, built-in-hub, switches, etc.
GNS3 server setup on a virtual machine
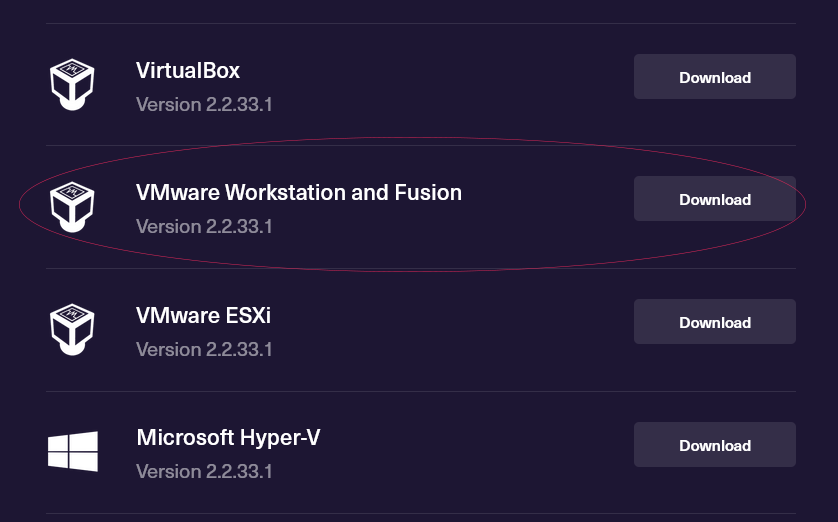
If you want to use GNS3 to practice CCNA/CCNP exam topics, this setup is the best. To use this setup, you need to download the GNS3 server virtual machine. GNS3 provides pre-built, customized GNS3 server virtual machines for VMware, VirtualBox, and Microsoft Virtual PC.
This tutorial provides instructions for VMware Workstation. You can use any virtualization software that you prefer. The installation process and configuration steps are the same for all virtualization software.
Download the pre-built virtual machine for your virtualization software from the following webpage.
https://www.gns3.com/software/download-vm
After downloading the virtual machine, open the folder that contains the downloaded file. Select the GNS3 server file, right-click, and select the Extract all option.

Start VMware Workstation. Click the Open option in the File menu.

Select the extracted file and click Open.

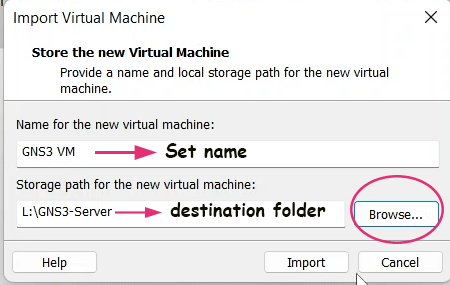
VMware Workstation opens the file in the Import Virtual Machine wizard. Set the name "GNS3 VM" for the virtual machine, then select the destination folder where you want to store it. Select the folder on the partition that has at least 20GB of free disk space. Click Import.
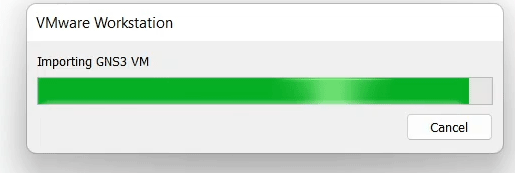
The importing process may take a few minutes.
VMware Workstation lists the imported machine in the left pane.

Open the GNS3 client and start the Setup Wizard again. Select the first option, "Run appliances in a virtual machine," and click Next.

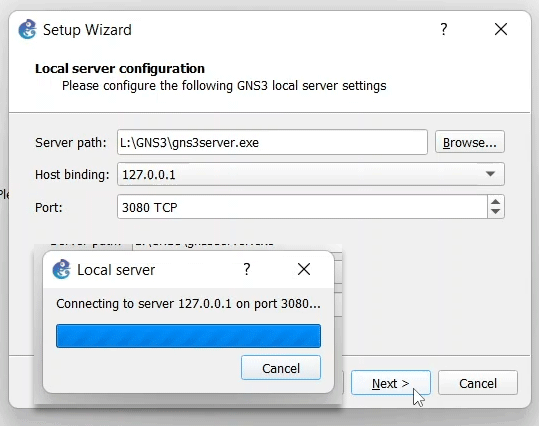
Even though you want to run virtual devices in a virtual machine, you still need to configure the GNS3 local server. The GNS3 client connects to the GNS3 local server. GNS3 local server checks whether a GNS3-VM Server virtual machine is present. If it presents, it runs virtual devices inside it. If not, it runs virtual devices on the host system. The next screen allows you to configure a local server. The wizard automatically selects the necessary values. Click Next.
The wizard configures and starts the local server. The next screen verifies the same. Click Next.
The wizard finds the GNS3 Server virtual machine in VMware Workstation. If it finds the virtual machine, it starts it automatically. If not, or if you have multiple virtual machines, the following screen allows you to manually select the virtual machine you want to use. Select your virtualization software and the virtual machine, and click Next.

The wizard starts the selected virtual machine and shows a summary of settings on the next screen. Click Finish.

To verify the setup, you can check the Servers Summary and Console panes. The Servers Summary pane shows the current state of the running servers. It must show the local server and virtual machine in the running state. The Console pane shows logs. If the wizard fails to start or connect to the virtual machine, it lists the reasons and errors in the Console pane.

Troubleshooting
If you encounter errors or your setup does not work, you can use the following troubleshooting tips.
If the installation or configuration fails, restart the system before trying again. When you install or configure a local server or a virtual machine, it starts many background processes. If the installation or configuration fails, these processes remain active in the background, preventing you from starting them again. A system restart terminates all processes.
Temporarily disable the Windows firewall program. If it solves your problem, you need to allow gns3server, ubridge, and dynamips through your firewall program.
If you get the connection refused error, use the following steps. Restart the computer, open the command prompt, run the ipconfig/all command, note down the IP address listed under the VMnet1 interface, open GNS3, start the Setup Wizard again, and use the noted IP address to connect the local GNS3 server.

This tutorial is part of the tutorial "Installing, Configuring, and Managing Packet Tracer and GNS3". Other parts of this tutorial are as follows:
Chapter 01 How to install and activate Packet Tracer in Windows
Chapter 02 How to install and start Packet Tracer in Ubuntu
Chapter 03 Difference between emulation and simulation
Chapter 04 Differences between Packet Tracer, GNS3, and Cisco VIRL
Chapter 05 What are GNS3-all-in-one and GNS3
Chapter 06 GNS3 Setup Wizard Options Explained
Chapter 07 How to Install GNS3 Explained
Chapter 08 GNS3 Terminology and Overview
Chapter 09 How to Import IOS in GNS3
Conclusion
This tutorial explained how to set up the GNS3 server on the local system to run virtual devices from the local system and a virtual machine. It also provided troubleshooting tips for common errors you may encounter during installation and use.
Author Laxmi Goswami Updated on 2025-10-30