How to install and start Packet Tracer in Ubuntu
Packet Tracer is a network simulator software. It allows you to simulate all the essential networking devices tested in the CCNA exam. This tutorial explains how to install it on Ubuntu Linux.
Downloading Packet Tracer
You can download the latest version of Packet Tracer from its official site or by using the following mirror.
Offical site
https://www.netacad.com/resources/lab-downloads?courseLang=en-US
MirrorDownload Packet Tracer for Windows and Linux
You need a Cisco account to download Packet Tracer from its official site. The official provides only the latest version for all supported platforms. To download previous versions or download them without creating a Cisco account, use the mirror link. No matter what option you choose to download it, you must create a Cisco account to use it. You do not need a special or paid account for it. A basic free account lets you download and use Packet Tracer without any restrictions.
Installing Packet Tracer
Download the latest version, or the version you want to install, and open the folder containing the downloaded file. Double-click the downloaded file. It will open the installer file in the Software Center. The Software Center is the default program for software management on Ubuntu. It allows you to install, update, and remove software. In some circumstances, it may open the file in the Archive manager instead of the Software Center. If it opens the downloaded file in the Archive manager, close the Archive manager, right-click the downloaded file, select "Open with other application," then select "Software install."

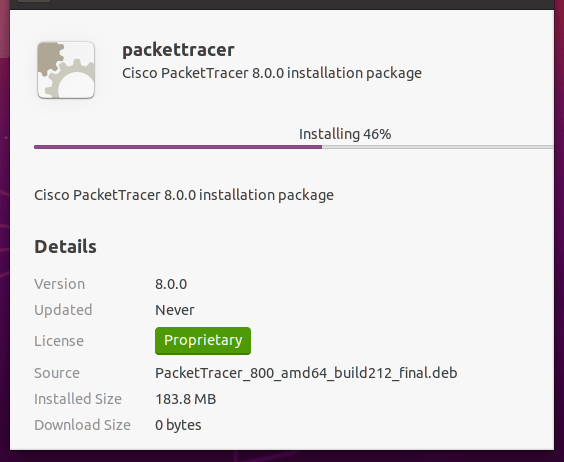
The Software Center reads the package information from the installer file and displays that information. This information includes the application, license type, version, and file size. Click the Install button to start the installation.

Software management-related tasks require authentication. This feature protects the system from unauthorized modifications. To authenticate the installation, use your login password and click the Authenticate button.

Upon successful authentication, the installation process starts. The installation process displays real-time progress.
If the installation process completes without error, the Software Center displays a message verifying the installation. If the installation process fails, you have to install Packet Tracer using other methods. Instead of providing the exact reason for failure, the Software Center displays a generic message indicating that the installation failed.

Troubleshooting installation
Open the folder that contains the installation file. Right-click in the folder and click the "Open in Terminal" option.

Run the following command to start the installation.
$sudo dpkg -i [installer file name]
Use your login password to authenticate the installation.

Press the Enter key to accept the license.
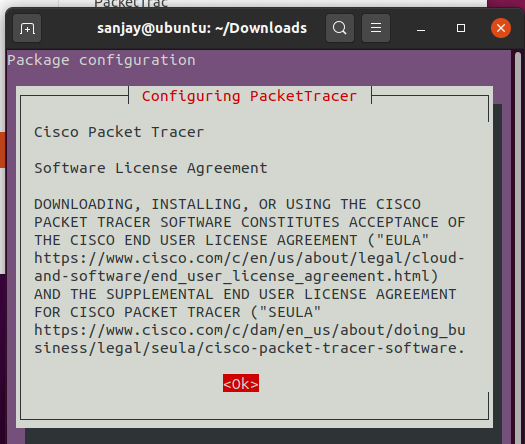
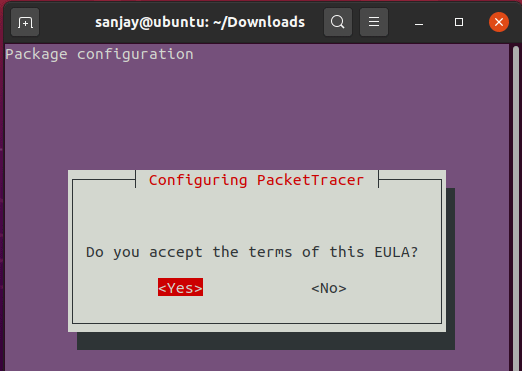
Accept the terms of the end-user agreement.
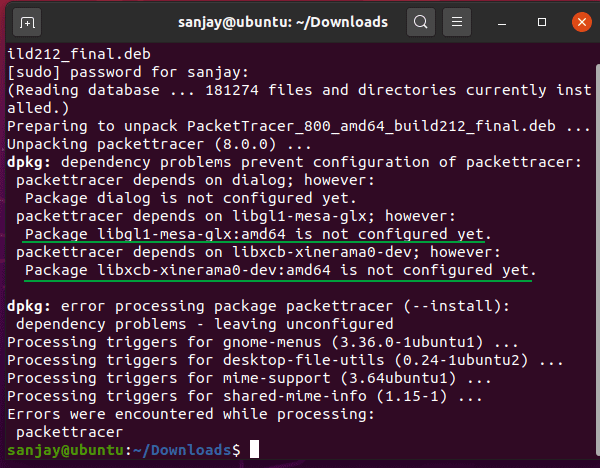
The installation process starts. If it fails, it displays the exact reason that causes the failure. The most common reason for failure is the dependency on packages. Packet Tracer needs several packages. If one or more packages are not installed or configured, the installation fails. For example, Packet Tracer 8.0.0 needs the following packages. These packages are not available with the default Ubuntu installation.
libgl1-mesa-glx, libxcb-xinerama0-dev
To fix the dependency error, install and configure the missing packages. To install the libgl1-mesa-glx package, use the following command.
$sudo apt-get update -y
$sudo apt-get install -y libgl1-mesa-glx

To install the libxcb-xinerama0-dev package, use the following command.
$sudo apt-get install -y libxcb-xinerama0-dev

After installing the missing packages, reinstall Packet Tracer.

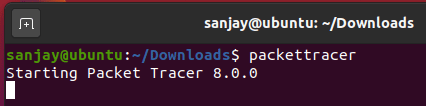
After the successful installation, use the following command to start Packet Tracer.
$packettracer
This tutorial is part of the tutorial "Installing, Configuring, and Managing Packet Tracer and GNS3". Other parts of this tutorial are as follows:
Chapter 01 How to install and activate Packet Tracer in Windows
Chapter 02 How to install and start Packet Tracer in Ubuntu
Chapter 03 Difference between emulation and simulation
Chapter 04 Differences between Packet Tracer, GNS3, and Cisco VIRL
Chapter 05 What are GNS3-all-in-one and GNS3
Chapter 06 GNS3 Setup Wizard Options Explained
Chapter 07 How to Install GNS3 Explained
Chapter 08 GNS3 Terminology and Overview
Chapter 09 How to Import IOS in GNS3
Conclusion
This tutorial explained how to install and start Packet Tracer on Ubuntu using the GUI and CLI interfaces. It also described the common errors you may encounter during installation and provided detailed steps to fix them.
Author Laxmi Goswami Updated on 2025-10-30