How to install XAMPP on Ubuntu Linux
XAMPP is a standalone application. It contains four elements: PHP, Perl, Apache, and MariaDB. It provides a web server environment for developing and testing PHP-based web applications.
In a web environment, there are two types of languages: server-side and client-side.
Server-side languages speed up the web development process. They allow web developers to create websites in minimal time. They include many tools that can automate the repeated process. PHP and Perl are server-side languages. A database makes a website dynamic and flexible. Developers use it to save all the crucial data of websites. MariaDB provides databases.
Users use web browsers to access websites. Web browsers do not understand server-side languages. They work with client-side languages. HTML and JavaScript are client-side languages. A web server translates server-side languages into client-side languages. If you want to build or test a dynamic website, you need a web server. Apache is a web server.
You can configure and set up Apache and MariaDB on any Linux distro. However, it includes many complex configurations. Only a network or system administrator can properly configure it. XAMPP offers an easy solution to it.
It includes pre-configured Apache and MariaDB. You can use it out of the box or customize it according to your requirements. It includes everything you need to develop or test PHP or Perl-based websites or applications.
Downloading the latest version of XAMPP
The following website provides the official download link of XAMPP.
https://www.apachefriends.org/download.html
It provides download links for all platforms. Download the latest version from the Linux section.

Installing XAMPP on Ubuntu
Open the folder that contains the downloaded XAMPP installer file.
Right-click to open the right-click context menu. Then, click the option Open in Terminal.

By default, Linux does not assign the execute permission to any file we download from the internet. To install XAMPP from the installer file, we must make it executable. The chmod command updates the file permission.
Execute the following commands.
$ls -l
$chmod 755 xampp-linux-[version_number]-installer.run
$ls -l
The first and third commands display file permission before and after we change it. The second command updates it.
The following command executes the installer file.
sudo ./xampp-linux-[version_number]-installer.run
Only an administrator can perform software management-related tasks. You must authenticate the installation process. Type your password to authenticate the installation. The installation process starts in a Wizard.
Click Forward on the Welcome screen.

XAMPP offers additional components with the default installation. If you have low disk space, you should keep these components.
Keep the default selection and click Forward.

The Next screen displays the installation directory. By default, it installs XAMPP in the /opt/lampp directory.

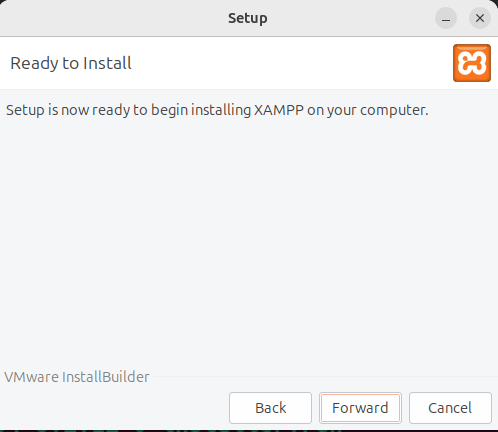
The next screen confirms the installation. Click Forward to continue the installation.
The installation process takes a few seconds.

The last screen confirms the installation process. It allows you to start XAMPP.

If you keep the last screen option selected, it starts XAMPP.

The home screen allows you to manage XAMPP.
Managing XAMPP from the command line
The net-tools package includes commands to start, stop, or restart XAMPP from the command line. By default, Ubuntu does not install this package. The following command installs this package.

After installing the net-tools package, you can use the following commands to start, stop, and restart XAMPP from the command line.
$sudo /opt/lamp/lamp start
$sudo /opt/lamp/lamp stop
$sudo /opt/lamp/lamp restart

Related Articles
How to start XAMPP automatically at startup on Ubuntu
How to fix the XAMPP htdocs folder permission issue on Ubuntu
Conclusion
XAMPP offers a read-to-use web server environment for PHP-based websites and applications. Ubuntu is an open-source Linux operating system. This tutorial explained how to install and run XAMPP on Ubuntu.
By ComputerNetworkingNotes Updated on 2026-05-12