How to configure Nginx Web Server on RHEL
Nginx is a high-performance open-source modular web server. It uses an event-driven architecture to handle concurrent connections. You can use it as a web server, reverse proxy, load balancer, or a file server. It is highly optimized and structured for resource utilization. It uses much less memory and CPU per connection compared to traditional web servers. This tutorial explains how to configure, test, and verify the nginx web server on RHEL Linux.
Installing Nginx
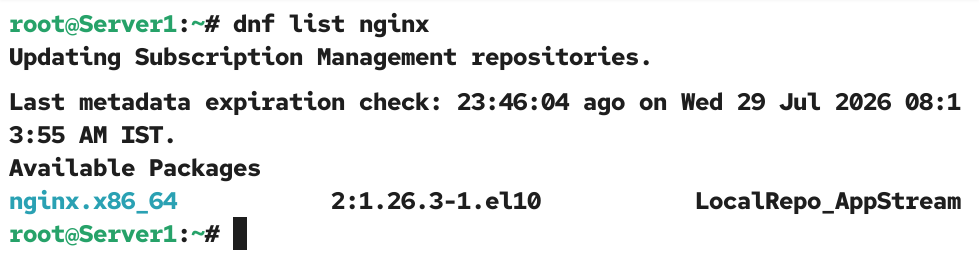
Nginx is not a part of the default installation. To use it, you must install it and its dependencies first. Red Hat distributes the latest version and a few previous versions of nginx from its official online repositories. To download and install a software package from official Red Hat repositories, you need an active Red Hat subscription. If you have that, run the following command to check all available versions of nginx across all available repositories.
#dnf list nginx
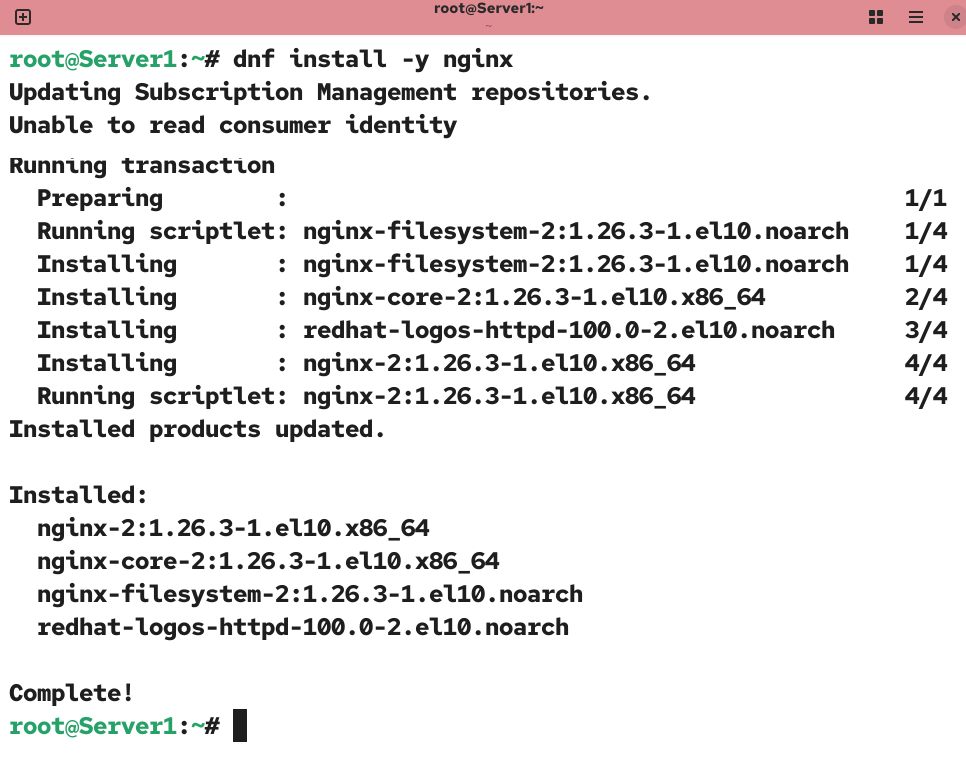
To install the latest version of nginx, run the following command.
#dnf install -y nginx
If you do not have an active Red Hat subscription, you cannot use official Red Hat repositories. Red Hat subscription costs money. If you are using RHEL for learning and testing purposes, you can create a local repository from the RHEL installation disk and use it for installing the software package. The only downside of this approach is that you can install only the software available on the installation disk. The following tutorial explains how to create a local software repository from the installation disk.
How to Configure Local Repository in RHEL LinuxVerifying the installation
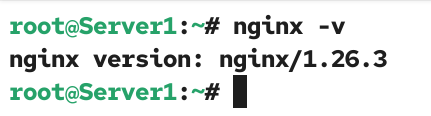
To verify the installation and check the installed version of nginx, run the following command. If nginx is installed, it displays its version.
#nginx -v
Managing nginx
The following command enables nginx at boot time and starts it in the current session.
#systemctl enable --now nginx
The following command stops nginx in the current session.
#systemctl stop nginx
The following command starts nginx in the current session.
#systemctl start nginx
The following command restarts nginx in the current session.
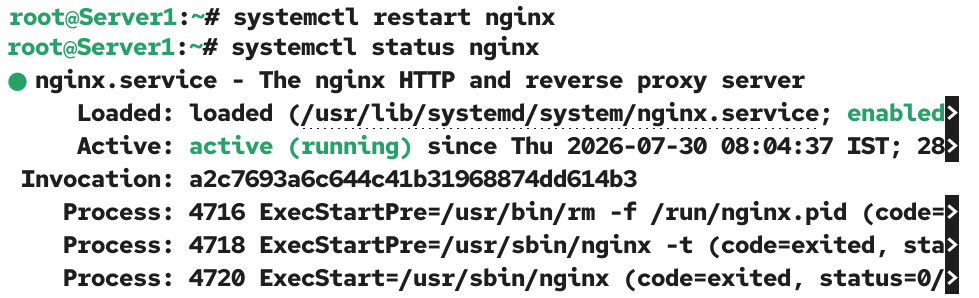
#systemctl restart nginx
The following command displays the current status of nginx in the current session.
#systemctl status nginx
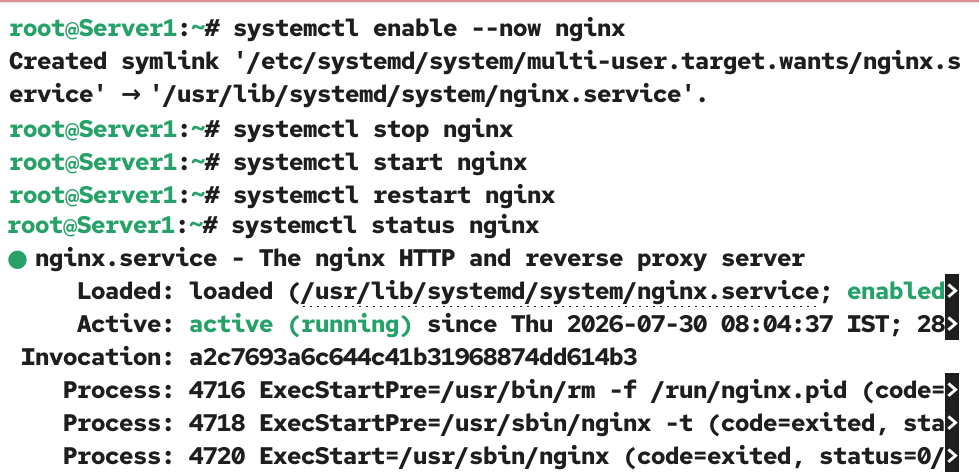
To use and manage nginx, it must be active and running.
Allowing nginx via the firewall
The default firewall does not allow nginx to accept incoming connections. To allow it, you need to open the ports you configure for nginx in the firewall. To use nginx as a web server with default ports, use the following commands.
#firewall-cmd --permanent --add-service=http
#firewall-cmd --permanent --add-service=https
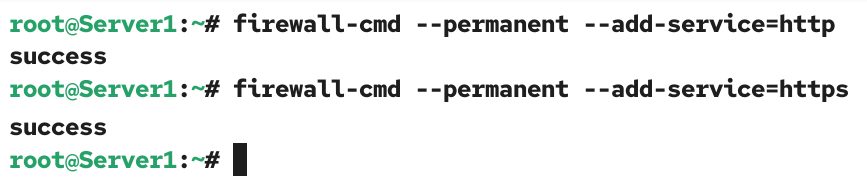
The http service serves web content on port 80. The https service serves web content on port 443. The difference between the two is that HTTP serves content in plain text while HTTPS serves it in an encrypted format. If you use nginx to run any additional service, add that service to the allowed services in the firewall.
Configuring nginx to serve websites
The main configuration file of nginx is /etc/nginx/nginx.conf. This file includes many configuration directives that control how nginx functions. The server block includes all essential configurations required to run a website. The essential directives in the server block are the following.
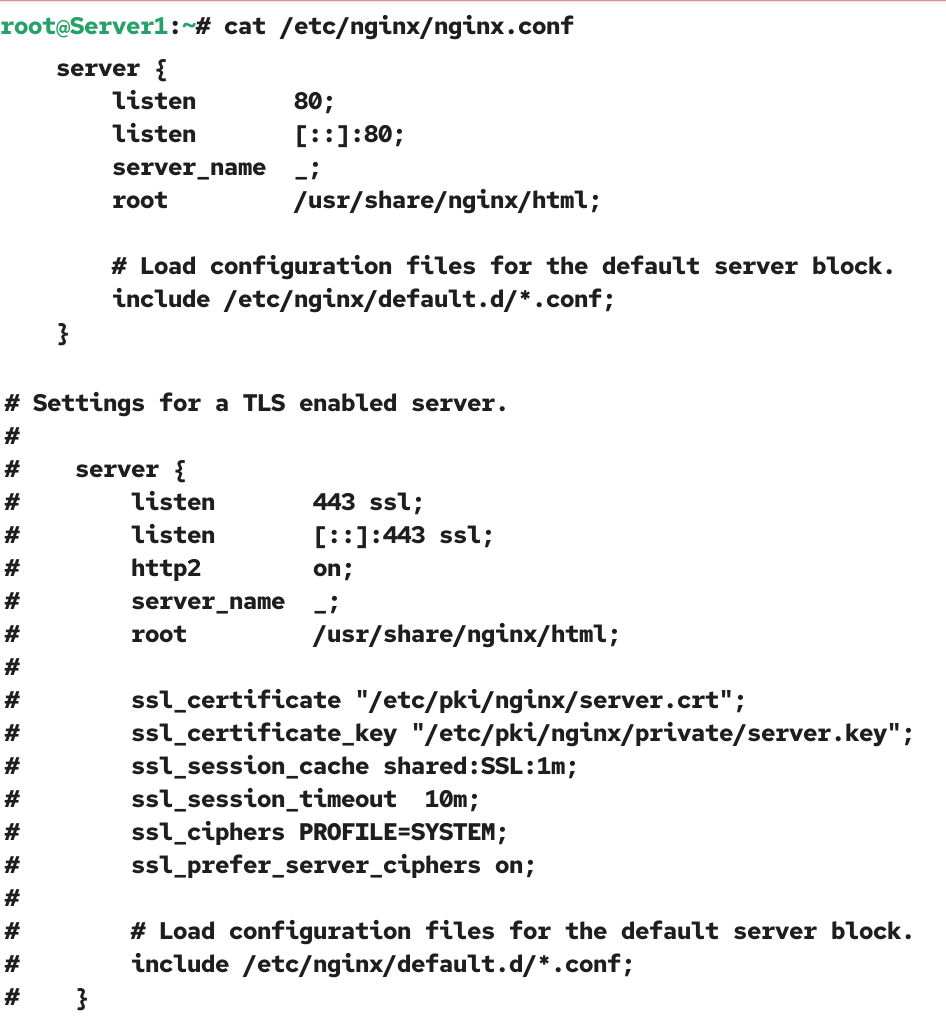
listen
This directive defines the IP address and port on which nginx listens for incoming connections. The default port is 80 for unencrypted connections and 443 for encrypted connections. The default IP address is the IP address configured on the system running nginx.
server_name
This parameter defines the website name. The default is an underscore (_) symbol. If you use the default value, nginx accepts any website name for this server block. If you set a website name, the name must be translated to an IP address by the DNS server. If you haven’t set up a DNS server or it is not functional, you can use the /etc/hosts file to map the website name to an IP address for testing and troubleshooting. If you use it, you need to update this file on all systems you use for testing as well.
root
This directive sets a web root for the website. A web root is a directory that stores all contents of a website. The default web root is /usr/share/nginx/html/. You need to create a separate web root for each website you want to serve from the default web root. Instead of the default web root, if you use a custom web root, you need to update its SELinux contexts. Linux automatically assigns appropriate SELinux contexts to all content you save in the default web root directory. If you use a custom web root directory, you need to assign these SELinux contexts to that directory manually.
include
This directive configures nginx to check for a custom server block in the /etc/nginx/conf.d/ directory. The file name of the custom server block must end with a .conf extension. If a custom server block exists, nginx applies the settings specified in that block. This feature makes nginx modular. It allows you to define custom settings for each website without touching the main configuration file.
access_log
This directive defines a separate access log file for this website. It is an optional but recommended option. It lets you view the access logs of each website individually.
error_log
This directive defines a separate error log file for this website. Similar to the access log file, it is also optional but recommended.
index
This directive lets you set the default file nginx serves when this website is accessed without specifying a resource name. This is the file users will see when they access this site. In other words, this is the home page of your website.
location
This directive configures nginx to serve web content in a try-and-catch manner. If the requested content is available, it serves that. If not, it displays a 404 error message.
The default server contains a catch-all configuration. If you run nginx with the default configuration, it listens on port 80 and serves content stored in the /usr/share/nginx/html/ directory. By default, it does not configure port 443. It keeps the directives that configure port 443 commented out. If you want nginx to deliver encrypted traffic over port 443, configure these directives.
Configuring a custom server block
Create a custom server block file and add the following configuration. This configuration adds a server block for the domain (website) example.com. Replace example.com with your domain name.
#vim /etc/nginx/example.com.conf
server {
    listen 80;
    server_name www.example.com example.com;
    root /var/www/example.com;
    index index.html;
    access_log /var/log/nginx/example.com-access.log;
    error_log /var/log/nginx/example.com-error.log;
    location/ {
    try_files $uri $uri/ =404;
    }

}
:wq
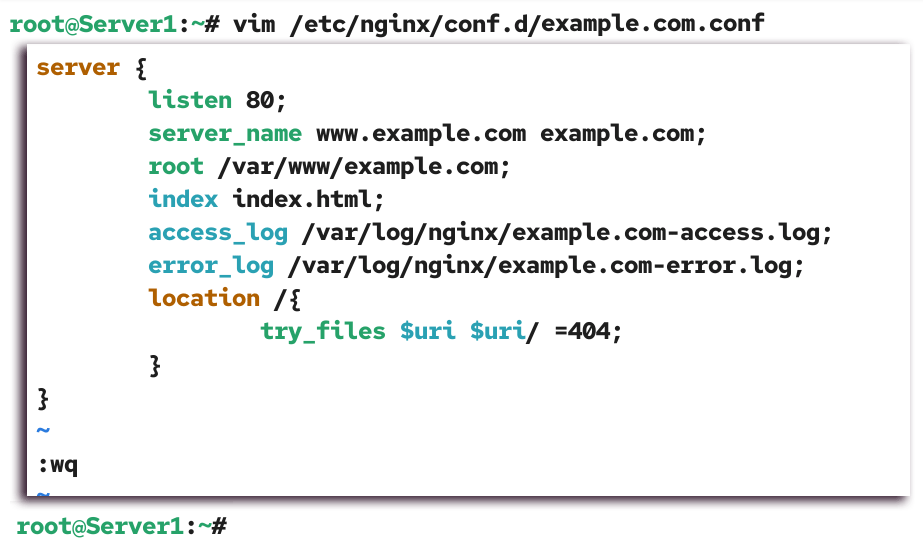
The nginx package includes a tool for testing its configuration files for errors. You can use it to test and troubleshoot your configuration. To use the tool, run the following command.
#nginx -t
If there is an error in any configuration file, it displays the name of that file and the line number that contains the error.
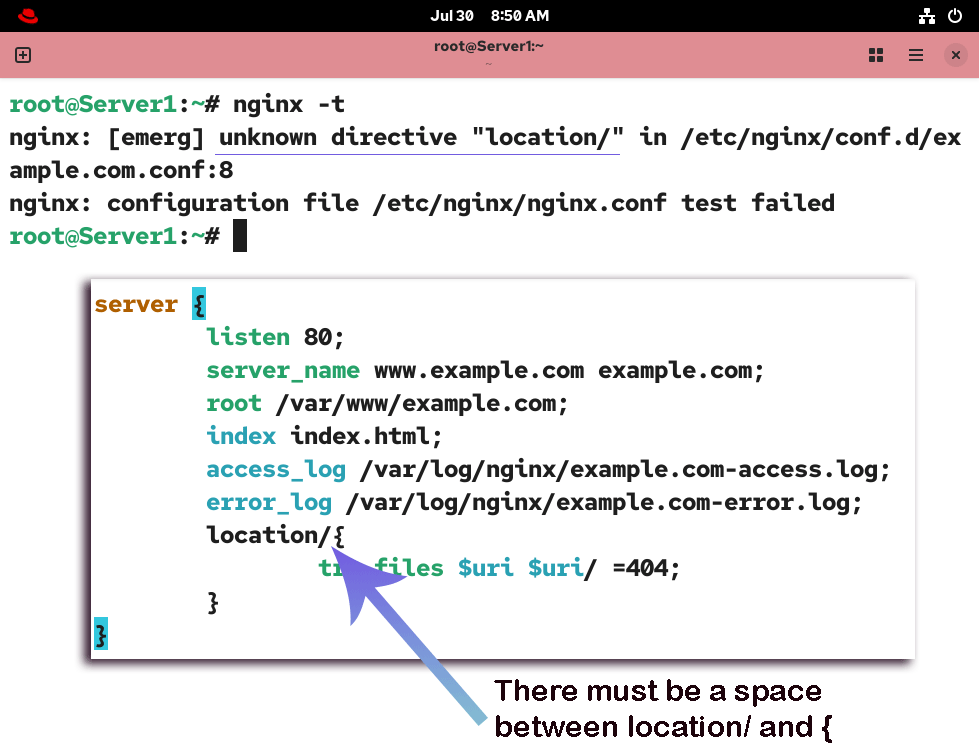
The nginx daemon will not start if there is an error in any configuration file. Fix all errors before moving to the next step.

Creating a custom web root
Create a web root directory and put your web contents in it. For testing, you can create a simple HTML file in it.
#mkdir /var/www/example.com
#cat > /var/www/example.com/index.html
<h1> Hello world ! Example.com </h1>
Ctrl+D

If you are using a non-default web root, install the policycoreutils-python-utils package. This package lets you manage SELinux contexts.
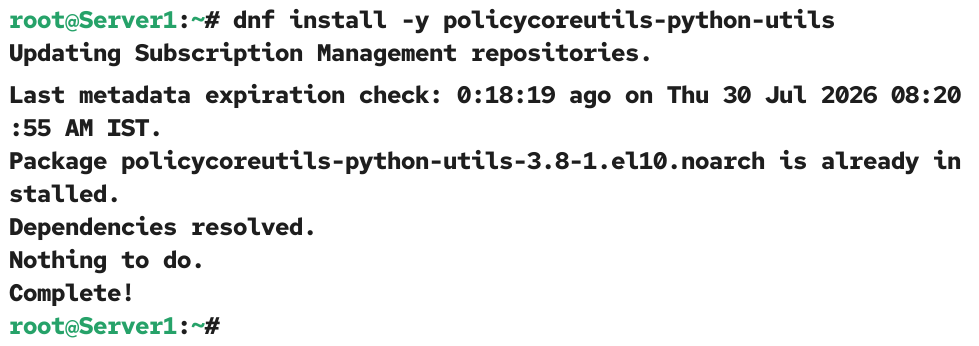
The SELinux file type for web content is httpd_sys_content_t. Run the following commands to update the SELinux contexts for all content stored in the web root directory.
#semanage fcontext -a -t httpd_sys_content_t "/var/www/example.com(/.*)?"
#restorecon -Rv /var/www/example.com/

Updating the /etc/hosts file
Since you have specified the server_name (domain or website name), you must either configure the DNS server to translate the configured name into the IP address or map it in the /etc/hosts file.
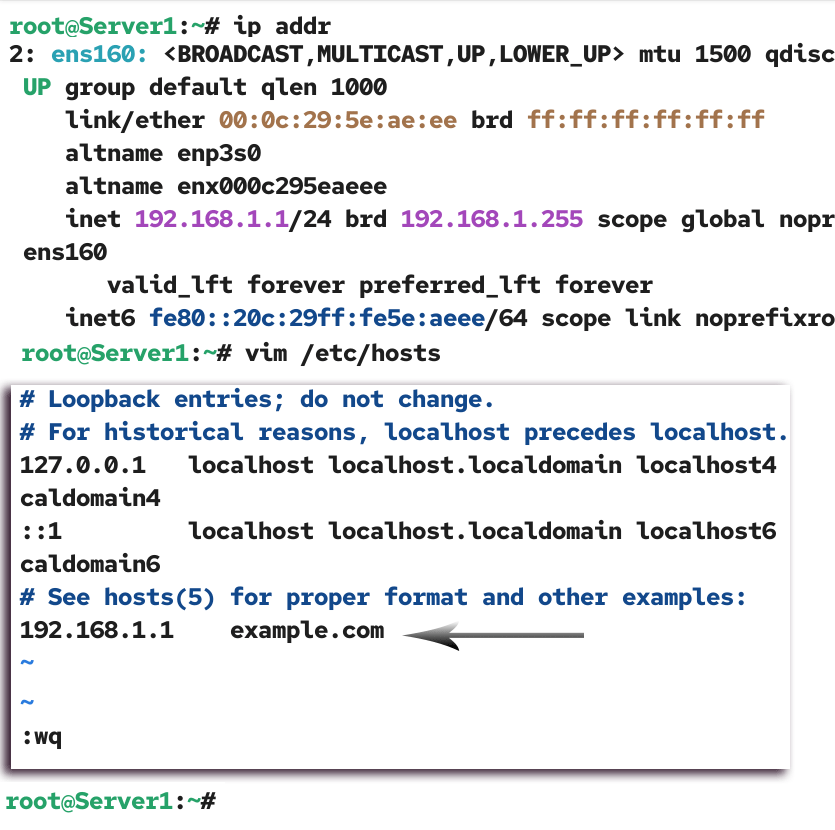
Run the ip addr command and note down the configured IP address.
#ip addr
Open the /etc/hosts file and add the following entry at the end of the file.
#vim /etc/hosts
IP address     domain name

:wq
Replace the IP address with the IP address you have noted earlier.
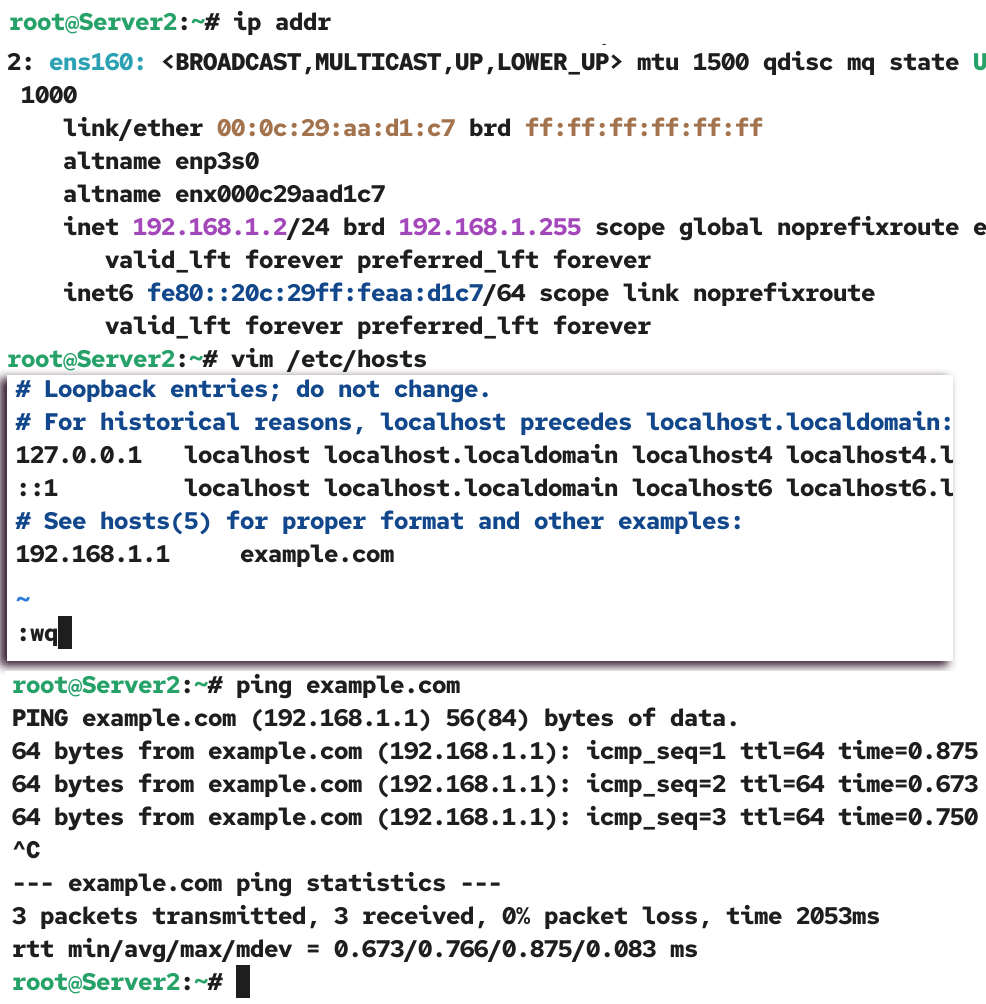
If you want to test nginx from another computer on the network, use the following steps on that system.
- Add the same entry you have added on the nginx server system to the /etc/hosts file.
- Test connectivity with the system running the nginx server.
- Use the domain name instead of the IP address while testing the connectivity.
Applying the changes
Restart nginx to apply the change.
Verifying the nginx server
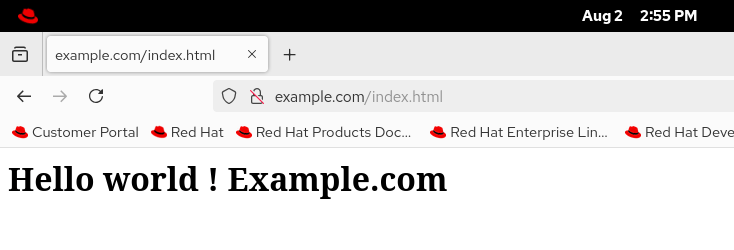
To verify the nginx server, open a web browser and access the following URL.
http://example.com/index.html
Replace example.com with your domain name.
Conclusion
Nginx is a high-performance modular web server. In this tutorial, I explained how to configure it without editing its main configuration file to serve a website using its modular approach. I explained how to test and verify it from a network system without configuring a DNS server using the /etc/hosts file.
Author Laxmi Goswami Updated on 2026-08-06