How to Configure DHCP Server in Linux
DHCP (Dynamic Host Configuration Protocol) is an IP management service. It allows you to configure and manage IP addresses of network devices from a centralized device. It uses a server/client architecture. DHCP clients request IP addresses from the DHCP server. The DHCP server provides IP addresses to the DHCP clients. This tutorial explains how to configure, manage, and verify the DHCP server on RHEL 10.
Lab setup
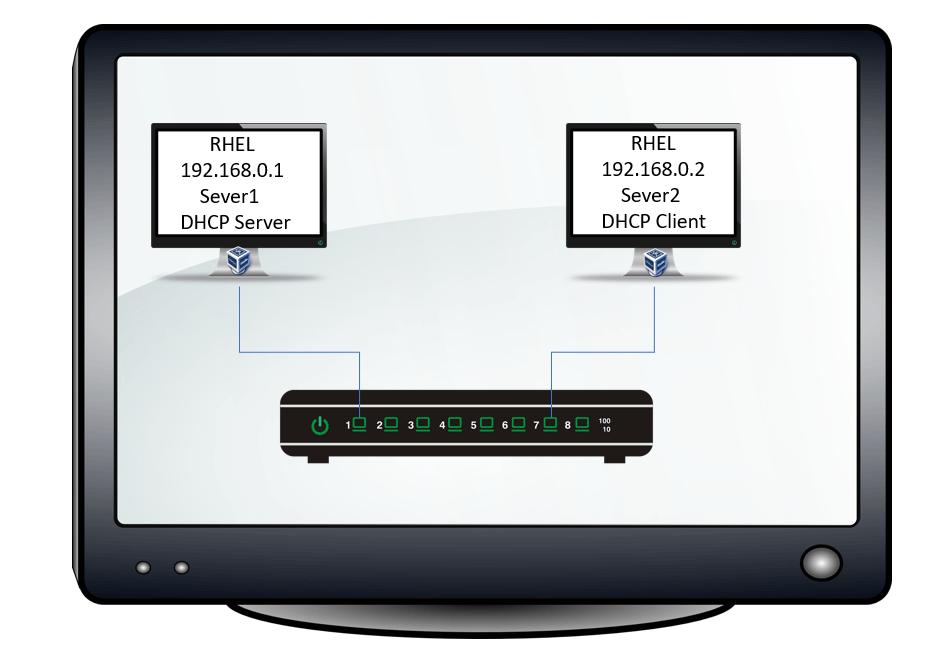
To demonstrate the DHCP server configuration and verification process, I will use a practice lab of two RHEL 10 systems. I will configure the DHCP server on the first system. I will use the second system as the DHCP client to test and verify the DHCP server. The following tutorial explains how to set up this lab on VMware Workstation.
RHCE Practice Lab Setup in VMWare and VirtualBox
You can set up a similar lab for practice, or skip it if you only need the commands and configuration steps for DHCP server configuration.
Installing the DHCP server package
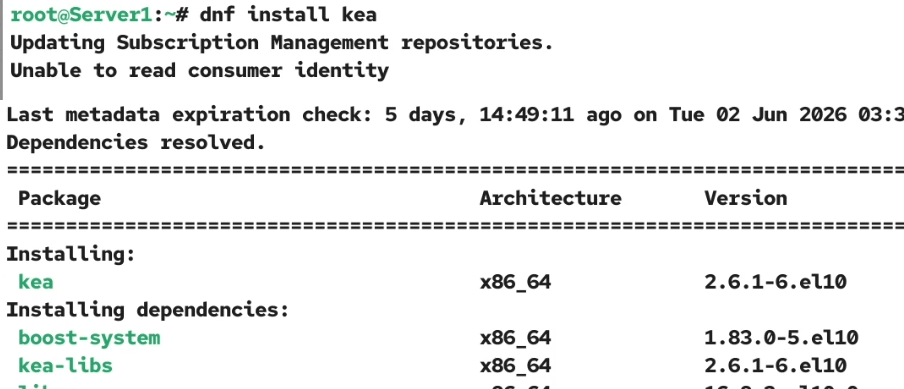
The DHCP Server is not part of the default installation. The kea package provides the DHCP server service. Log in as the root and run the following command to install this package.
#dnf install kea
DHCP server configuration
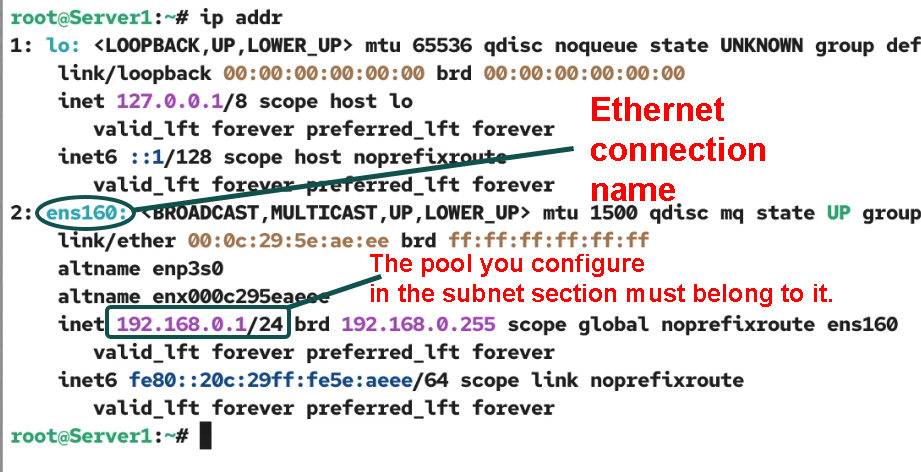
A server may have multiple Ethernet cards connected to different network segments. Each Ethernet card can have multiple connections. A connection is a collection of settings, such as IP address, Gateway, DNS server IP addresses, and more. It’s common to refer to a connection by name. For example, if an Ethernet card has two names, that means it has two connections. You need the connection name and IP address of the Ethernet card connected to the segment for which you want to configure and run the DHCP server. The output of the ip addr command displays both.
Kea uses a modular approach to keep the configuration management straightforward. There are two IP versions: IPv4 and IPv6. It uses separate configuration files and runs respective services for both versions. The main configuration files for both versions are available in the /etc/kea/ directory. The kea-dhcp4.conf is the IPv4 configuration file. For IPv6, the configuration file is the kea-dhcp6.conf. In this tutorial, I will configure the DHCP server for IPv4.
#ls /etc/kea/
The default main configuration file includes several settings and directives to scale and provide DHCP service across networks of any size. It also includes many example settings you can use when customizing these services for your specific network requirements. On the downside, these examples conflict with your custom configuration and cause errors if left with the default values. The best option is to build your custom configurations and use the default configurations as references. Back up the original configuration file and open it for editing.
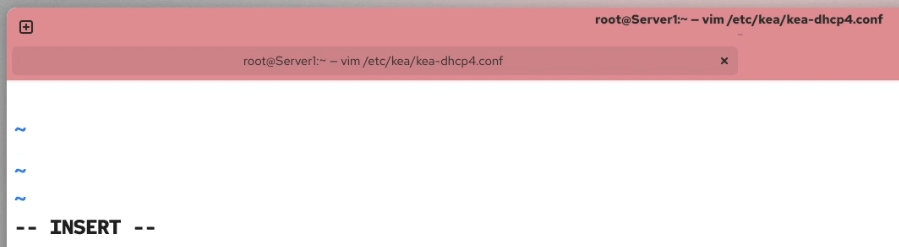
#cp /etc/kea/kea-dhcp4.conf  /etc/kea/kea-dhcp4.conf.bk
#vim /etc/kea/kea-dhcp4.conf

This file saves data in JSON format. In this format, data is stored in key-value pairs and arrays. A collection of key-value pairs is called an object. It is enclosed in curly braces {}. An array is an ordered list of values or key-value pairs enclosed in brackets []. All values are separated by commas. The last pair or value in the object or array does not use a comma. Two forward slashes // are used to comment out a line. Comments let you add information or descriptions to settings or directives.
To build custom DHCP server configurations for a small network, remove all entries from the file, then follow the steps outlined below.
Add curly braces. It will be your main object. You will add settings and directives inside it. Kea uses it to run a DHCP instance with all settings and configurations specified within it.
{

}
Add a child object inside the main object. Use the key Dhcp4 for the child object. Kea uses it to run a DHCPv4 service, with all settings and configurations specified within it.
{
 "Dhcp4": {
          }
}
The interfaces-config key defines the interfaces on which the DHCP server listens to DHCP requests from DHCP clients. Use the interface key to specify the name of the Ethernet card connected to the segment for which you want to run the DHCP service. Replace ens160 with the name of your Ethernet card.
{
  "Dhcp4": {
           "interfaces-config":  {
                                    "interfaces": [ "ens160" ]
                                 }
           }
}
The valid-lifetime key defines the lease duration. A lease duration is the time period for which a client can use the allocated IP address. After this time, it must renew the IP address. This key accepts a value in seconds. For example, the value 86400 (60 * 60 * 24) set the lease duration to one day.
{
  "Dhcp4": {
             "interfaces-config":  {
                                    "interfaces": [ "ens160" ]
                                   },
          "valid-lifetime": 86400
            }
}
The option-data key defines the settings DHCP should provide to DHCP clients. This key is used to define settings such as DNS server names and IP addresses, the default gateway IP address, and relay agents. It uses an array structure to define settings. It uses the name as the key and the data as the value. Add a configuration that sets the domain name to example.com and DNS server IP addresses to 192.168.0.4 and 192.168.0.5.
{
  "Dhcp4": {
             "interfaces-config":  {
                                    "interfaces": [ "ens160" ]
                                   },
             "valid-lifetime": 86400,
             "option-data": [
                                 {
                                     "name": "domain-name",
                                     "data": "example.com"
                                 },
                                 {
                                     "name": "domain-name-servers",
                                     "data": "192.168.0.4, 192.168.0.5"
                                 }
                            ]
            }
}
The subnet4 key defines IP subnets for this instance. You can configure a single or multiple IP subnets. You need to configure at least one IP subnet for each interface you add in the interfaces-config key. The IP address configured on the interface must be within the subnet you define for it. For example, this configuration adds interface ens160. The IP address configured on it is 192.168.0.1/24. For this, you must add the subnet that provides this IP address. The subnet 192.168.0.0/24 provides this IP address. The id key provides a unique identifier for the subnet.
{
  "Dhcp4": {
             "interfaces-config":  {
                                    "interfaces": [ "ens160" ]
                                   },
             "valid-lifetime": 86400,
             "option-data": [
                                 {
                                     "name": "domain-name",
                                     "data": "example.com"
                                 },
                                 {
                                     "name": "domain-name-servers",
                                     "data": "192.168.0.4, 192.168.0.5"
                                 }
                            ],
                 "subnet4": [
                                 {
                                     "id": 1,
                                     "subnet": "192.168.0.0/24"
                                 }
                            ]
            }
}
The pool key defines the IP pool. The DHCP service assigns IP addresses from this pool to the DHCP clients. This pool must be within the subnet you added. To define a pool range, first exclude the IP addresses assigned to static resources, such as servers, printers, routers, and other network devices, count the required IP addresses for DHCP clients, and then create a pool that provides the required IP addresses. For example, if your network has 40-45 devices, you can create a pool of 50 IP addresses.
{
  "Dhcp4": {
             "interfaces-config":  {
                                    "interfaces": [ "ens160" ]
                                   },
             "valid-lifetime": 86400,
             "option-data": [
                                 {
                                     "name": "domain-name",
                                     "data": "example.com"
                                 },
                                 {
                                     "name": "domain-name-servers",
                                     "data": "192.168.0.4, 192.168.0.5"
                                 }
                            ],
                 "subnet4": [
                                 {
                                     "id": 1,
                                     "subnet": "192.168.0.0/24",
                                     "pools": [ { "pool": "192.168.0.50  - 192.168.0.100" } ]
                                 }
                            ]
            }
}
A gateway device allows DHCP client devices to connect to external devices. Add a default gateway device IP address to the configuration.
{
  "Dhcp4": {
             "interfaces-config":  {
                                    "interfaces": [ "ens160" ]
                                   },
             "valid-lifetime": 86400,
             "option-data": [
                                 {
                                     "name": "domain-name",
                                     "data": "example.com"
                                 },
                                 {
                                     "name": "domain-name-servers",
                                     "data": "192.168.0.4, 192.168.0.5"
                                 }
                            ],
                 "subnet4": [
                                 {
                                     "id": 1,
                                     "subnet": "192.168.0.0/24",
                                     "pools": [ { "pool": "192.168.0.50  - 192.168.0.100" } ],
                                     "option-data": [
                                                      {
                                                         "name": "routers",
                                                         "data": "192.168.0.10"
                                                      }
                                                    ]
                                 }
                            ]
            }
}
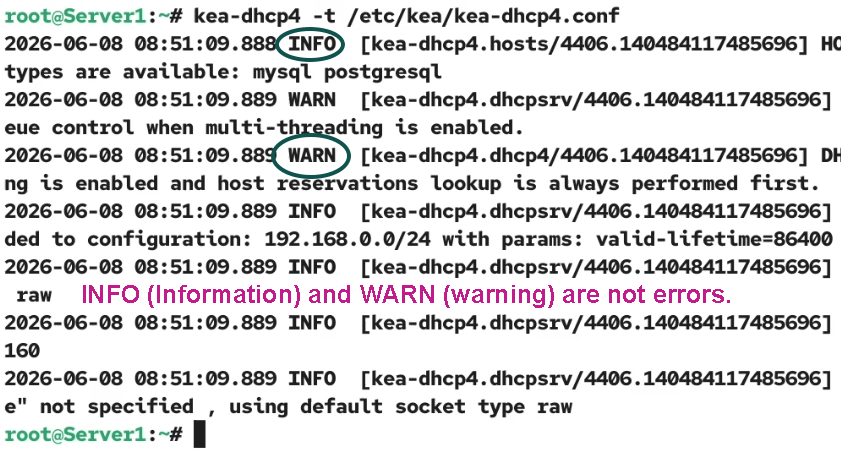
That’s all the essential configuration you need in this file. Save the file and run the following command to check it for errors.
#kea-dhcp4 -t /etc/kea/kea-dhcp4.conf
The following image shows the output of this command with an error. It indicates a required curly brace or bracket is missing.

If this command returns an error, fix it before moving to the next step. The following image shows the output of this command without errors.
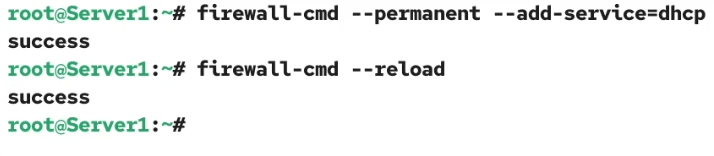
The default firewall configuration prevents the DHCP service from listening for DHCP requests. Use the following commands to allow it through the firewall.
#firewall-cmd --permanent --add-service=dhcp
#firewall-cmd --reload
Finally, run the following command to enable it at boot time and start it immediately.
#systemctl enable --now kea-dhcp4
Use the following to verify the service is running and active.
#systemctl status kea-dhcp4

DHCP clients configuration
The DHCP client configuration is straightforward. Change the IP configuration to DHCP and restart the Ethernet to apply the change. Linux provides many options for changing or updating IP configuration. You can use any option for this.

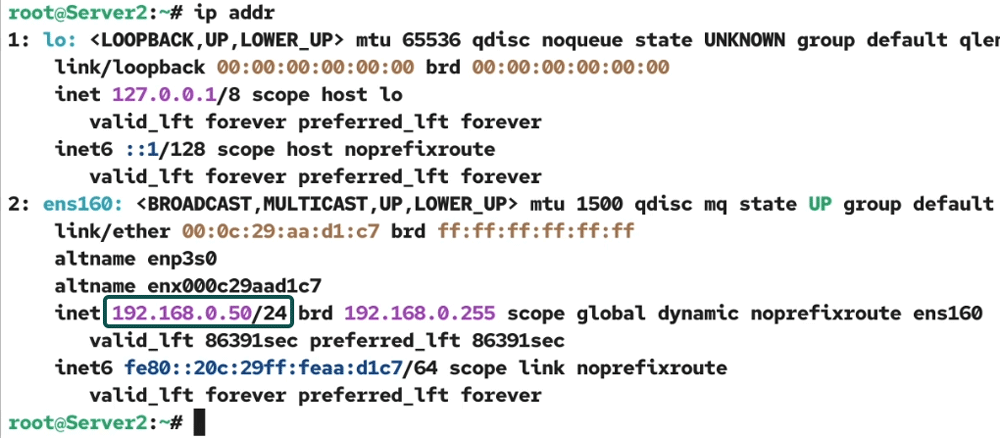
After changing the IP configuration mode to DHCP, use the ip addr command to check the IP address. If it receives an IP address from the DHCP server's configured pool, it verifies the DHCP server configuration.
Viewing leased addresses
Kea saves leased addresses in the /var/lib/kea/kea-leases4.csv file. You can check this file to view a list of all leased addresses.
#cat /var/lib/kea/kea-leases4.csv

Customizing logs
By default, Kea saves log messages to the systemd journal. To save them to a custom location or change the default log option, add the following setting to the configuration file.
#vim /etc/kea/kea-dhcp4.conf
| loggers | The key that defines and controls log settings. |
| name | It is the binary name for the logger settings. |
| output | It is the name of the log file in the /var/lib/kea/ directory. All logs will be saved in this file. |
| maxsize | It is the maximum size of the log file in bytes. |
| maxver | It is the maximum number of rotated versions to keep. If you set the maxsize value less than 204800 bytes, rotation will be disabled. |
| severity | This option defines the logged messages category. If you set this option, it will log only messages at or above the configured severity level. Valid severity levels are NONE, FATAL, ERROR, WARN, INFO, and DEBUG. |
{
  "Dhcp4": {
             "interfaces-config":  {
                                    "interfaces": [ "ens160" ]
                                   },
             "valid-lifetime": 86400,
             "option-data": [
                                 {
                                     "name": "domain-name",
                                     "data": "example.com"
                                 },
                                 {
                                     "name": "domain-name-servers",
                                     "data": "192.168.0.4, 192.168.0.5"
                                 }
                            ],
                 "subnet4": [
                                 {
                                     "id": 1,
                                     "subnet": "192.168.0.0/24",
                                     "pools": [ { "pool": "192.168.0.50  - 192.168.0.100" } ],
                                     "option-data": [
                                                      {
                                                         "name": "routers",
                                                         "data": "192.168.0.10"
                                                      }
                                                    ]
                                 }
                            ],
                "loggers":  [
                                 {
                                    "name":"kea-dhcp4",
                                    "output-options":[
                                                       {
                                                         "output":"kea-dhcp4.log",
                                                         "maxsize":1048576,
                                                          "maxver":8
                                                       }
                                                     ],
                                    "severity":"INFO"
                                 }
                            ]
            }
}
Save the file, check it for errors, and restart the service.

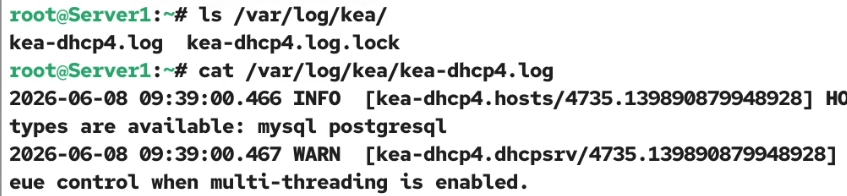
To verify the logger settings, you can check the log file.
#cat /var/log/kea/kea-dhcp4.log
DHCP client reservation
The reservation directive in the configuration file allows you to assign a static IP address or a fixed IP address to a DHCP client. To use this feature, you need the client's MAC address. Run the ip addr command on the DHCP client and note down the MAC address.
Open the DHCP server configuration file on the server, and add the following directive in the subnet4 section.
"reservations": [ { "hw-address": "00:0c:29:aa:d1:c7", "ip-address": "192.168.0.74" } ],
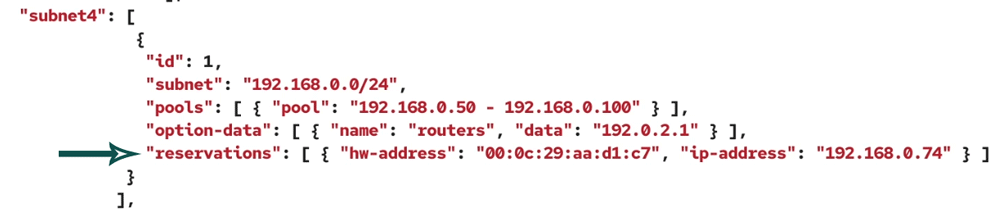
Replace 00:0c:29:aa:d1:c7 with the MAC address of your DHCP client and 192.168.0.74 with the IP address you want to assign to it.
{
  "Dhcp4": {
             "interfaces-config":  {
                                    "interfaces": [ "ens160" ]
                                   },
             "valid-lifetime": 86400,
             "option-data": [
                                 {
                                     "name": "domain-name",
                                     "data": "example.com"
                                 },
                                 {
                                     "name": "domain-name-servers",
                                     "data": "192.168.0.4, 192.168.0.5"
                                 }
                            ],
                 "subnet4": [
                                 {
                                     "id": 1,
                                     "subnet": "192.168.0.0/24",
                                     "pools": [ { "pool": "192.168.0.50  - 192.168.0.100" } ],
                                     "option-data": [
                                                      {
                                                         "name": "routers",
                                                         "data": "192.168.0.10"
                                                      }
                                                    ],
                                    "reservations": [
                                                       {
                                                          "hw-address": "00:0c:29:aa:d1:c7",
                                                          "ip-address": "192.168.0.74"
                                                       }
                                                     ]
                                 }
                            ],
                "loggers":  [
                                 {
                                    "name":"kea-dhcp4",
                                    "output-options":[
                                                       {
                                                         "output":"kea-dhcp4.log",
                                                         "maxsize":1048576,
                                                          "maxver":8
                                                       }
                                                     ],
                                    "severity":"INFO"
                                 }
                            ]
            }
}
Save the file, check it for errors, and restart the service.
To verify the client always receives a fixed IP address, run the following command to flush the existing IP configuration.
#ip addr flush dev ens160
Replace ens160 with the name of your Ethernet card. Check the IP address again.

#ip addr
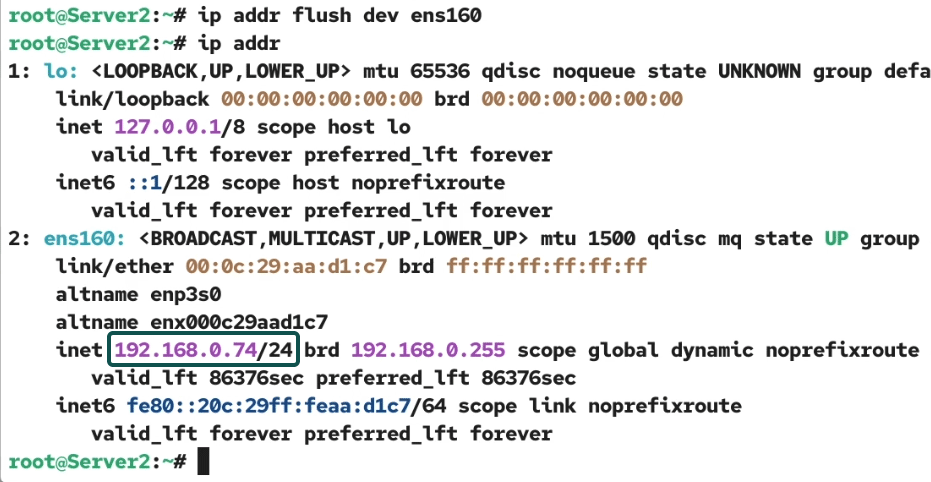
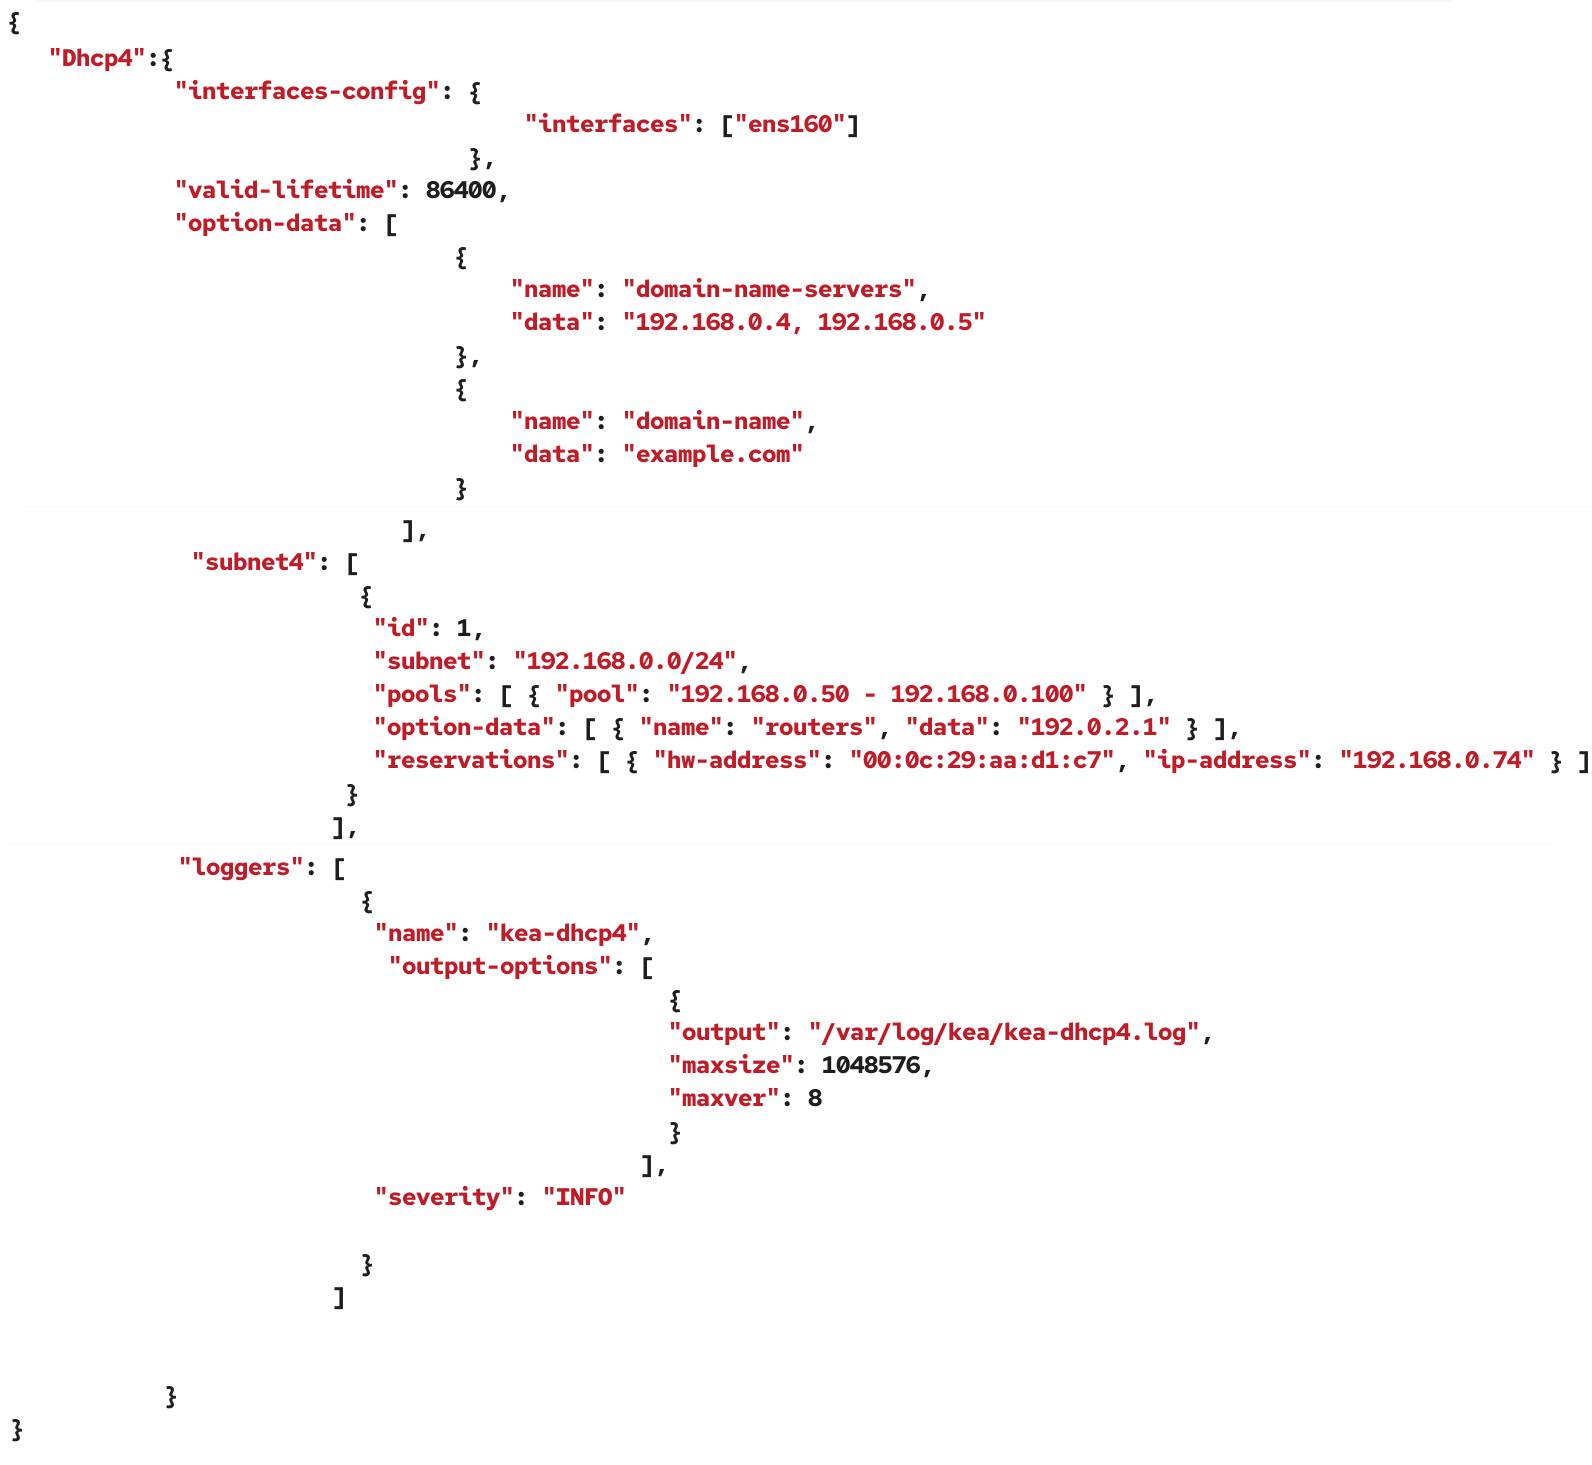
Repeat this process a few more times to verify it always receives the same IP address from the DHCP server. The following image shows the /etc/kea/kea-dhcp4.conf file with all the configuration explained in this tutorial.
Conclusion
A DHCP server dynamically manages IP addresses on DHCP clients. This tutorial explained how to configure, test, and verify it on a CentOS/RHEL 10 system. By carefully setting up the server, defining the necessary network parameters, and verifying the configuration at each step, you can ensure reliable and efficient IP address management for your network.
Author Laxmi Goswami Updated on 2026-06-10