How to Configure Printer Server in Linux
CUPS (Common Unix Printing System) is a web-based printing service. It allows you to add and manage printers locally and remotely from a web browser on Linux systems. This tutorial explains how to configure, test, manage, and verify it on RHEL/CentOS.
Lab setup
You need two Linux systems to set up a practice lab. You will configure the first system as the printer server. You will use the second system to verify that the printer server accepts remote printing. The following tutorial explains how to set up this lab on VMware Workstation or VirtualBox.
RHCE Practice Lab Setup in VMWare and VirtualBox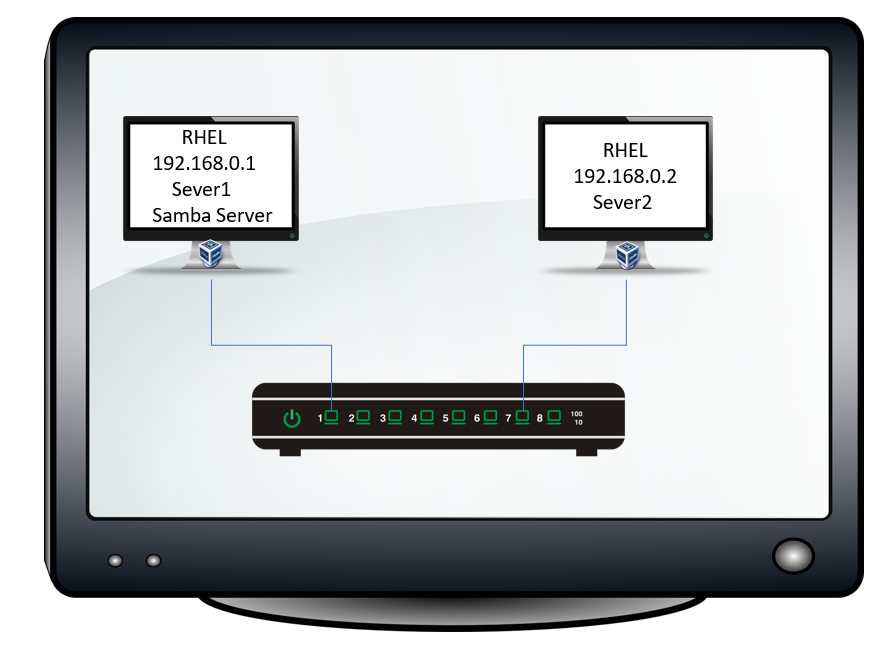
This lab is optional and required only if you want to practice this topic for any certification program, such as RHCE.
Printer server configuration
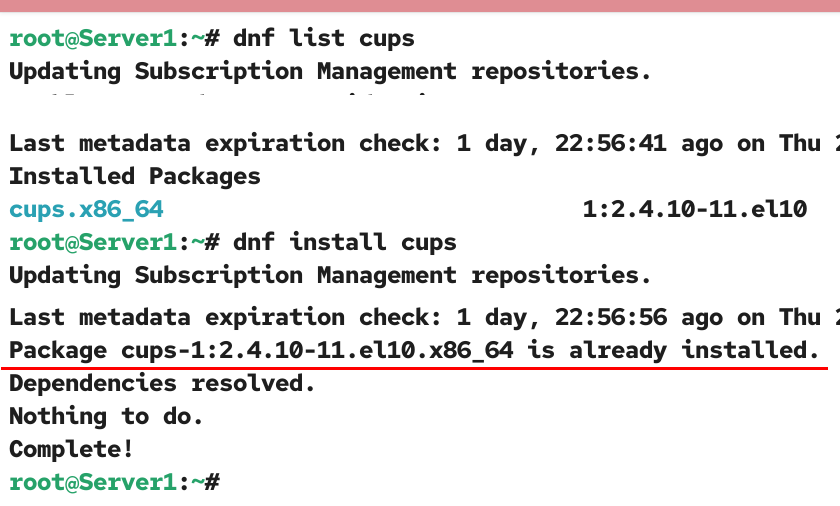
The cups package provides the printer server service. To know whether this package is already installed, use the following command.
#dnf list cups
If the package is not installed, use the following command to install it.
#dnf install cups
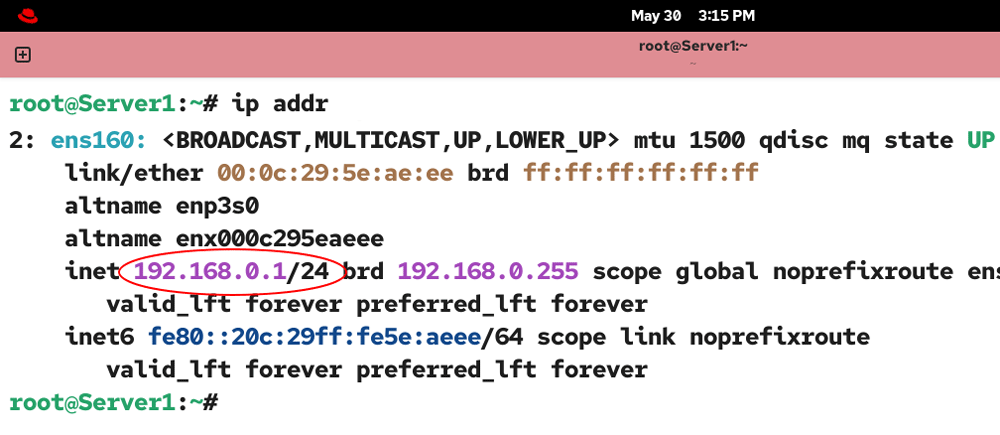
After installing the package, note the system’s IP address. You need this IP address to configure this system as the printer server.
#ip addr
The /etc/cups/cupsd.conf is the main configuration file of CUPS. You can customize it based on your requirements. Back up the original file, then open it for editing.
#cp /etc/cups/cupsd.conf  /etc/cups/cupsd.conf.backup
#vim  /etc/cups/cupsd.conf

By default, CUPS allows only the host system to configure, use, and manage the printers. To use this system as a printer server, you need to configure CUPS to allow connections from remote systems.
The Listen directive defines the IP address and port number on which this service listens for incoming connections. By default, it listens on the loopback address (127.0.0.1). The name localhost refers to the loopback address. Only the host system can use this address for internal communication between services. The host system can not accept incoming connections from other systems on this port. It can accept connections from other systems on an IP address configured on a physical interface connected to the network.
Add the following lines below the default Listen directive.
#Listen for connections from remote machines.
Listen 192.168.0.1:631
Replace 192.168.0.1 with your server’s IP. 631 is the default port for CUPS. You can use the default port or use a custom port. To keep the configuration straightforward, use the default port.

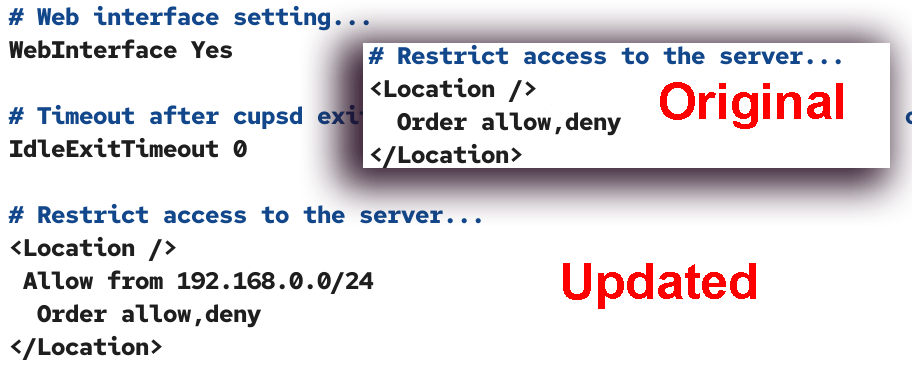
The <Location> directive defines the IP addresses that can use this service. To allow the entire subnet, you can use its network address. Only IP addresses defined by this directive can access this service. It will not accept print jobs from IP addresses outside this range. Use the Allow from [IP range] option to define the allowed IP addresses.
<Location />
Allow from 192.168.0.0/24
Order, allow, deny
</Location>
Replace 192.168.0.0/24 with the network address of your network.
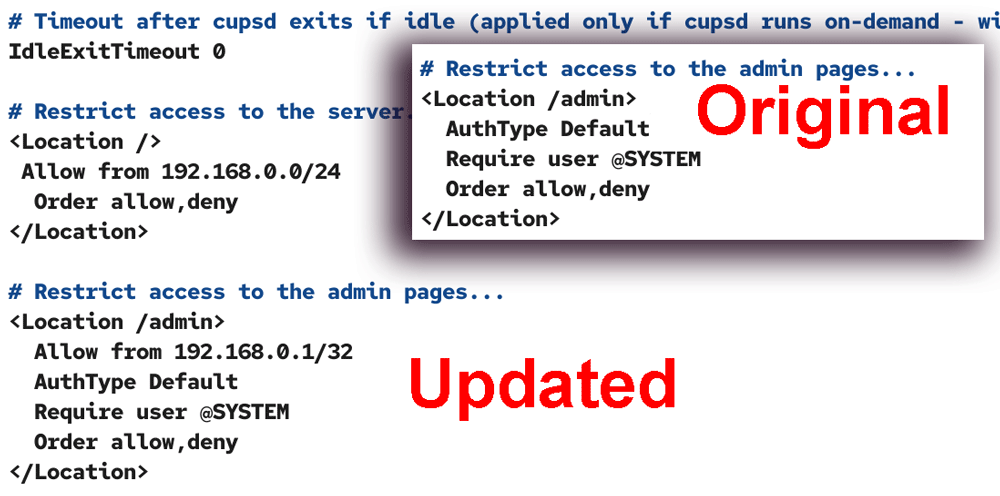
The <Location /admin> directive defines administrative IP addresses. Only IP addresses allowed in this directive can access the CUPS administration services. The AuthType option defines the authentication type. The default is to log in via the local user accounts. The Require option defines the user accounts you can use for login.
<Location /admin>
Allow from 192.168.0.1/32
AuthType Default
Require user @SYSTEM
Order, allow, deny
</Location>
Replace 192.168.0.1 with your server’s IP address.
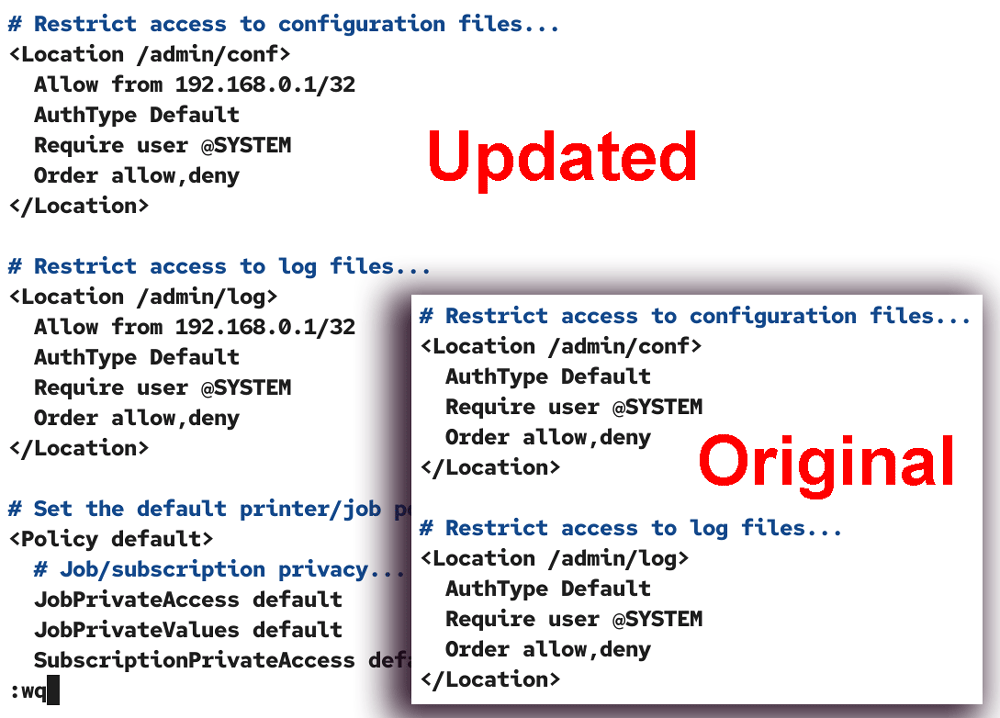
The <Location /admin/conf> directive defines the IP addresses that you can use to access this service's configuration files. Similarly, the <Location /admin/log> directive defines the IP addresses you can use to view this service’s log files. Add the host system’s IP address in both directives and save the file.
<Location /admin/conf>
Allow from 192.168.0.1/32
AuthType Default
Require user @SYSTEM
Order, allow, deny
</Location>
<Location /admin/log>
Allow from 192.168.0.1/32
AuthType Default
Require user @SYSTEM
Order, allow, deny
</Location>
Replace 192.168.0.1 with your server’s IP address.
The above configuration adds only the host system’s IP address in the administrative directives. If you want to manage the print server from the remote system, add that system’s IP address in the administrative directives. The administrative directives are <Location /admin>, <Location /admin/conf>, and <Location /admin/log>.
Allowing CUPS through the firewall
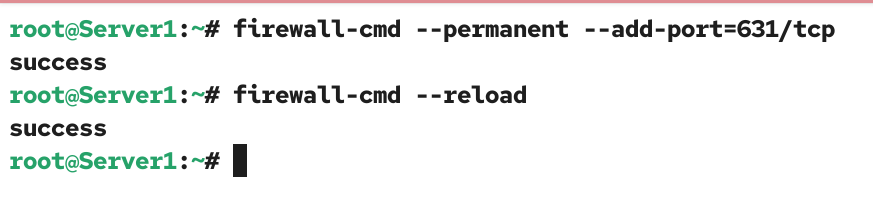
The default firewall blocks CUPS from accepting incoming traffic and connections from remote systems. Use the following command to open the CUPS port in the firewall.
#firewall-cmd --permanent --add-port=631/tcp
Reload the firewall to apply the change.
#firewall-cmd --reload
Starting the service
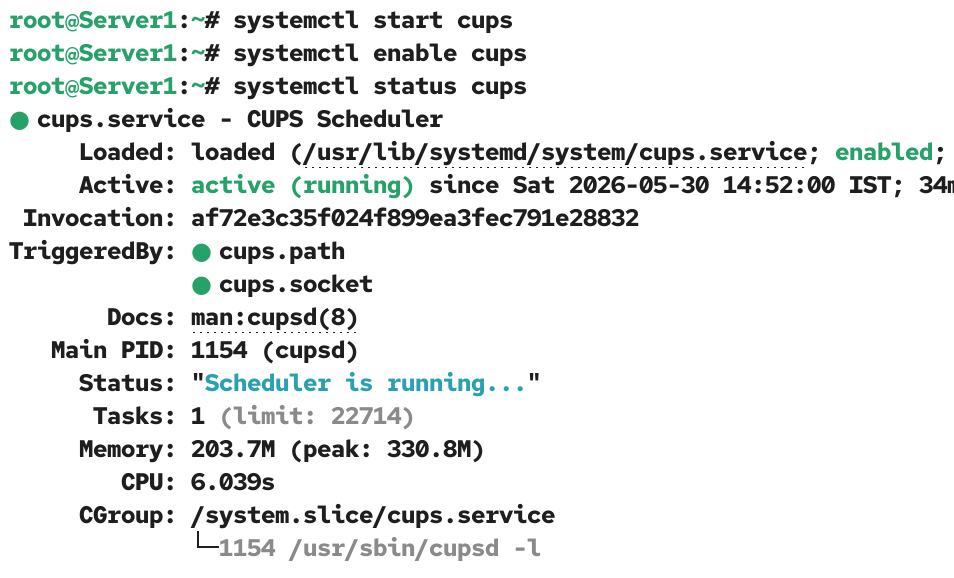
After making all necessary changes, start the service. If the service is already running, restart it to apply the change. Check the current status to verify the service is active and running.
The following command starts this service.
#systemctl start cups
The following command restarts this service.
#systemctl restart cups
The following command starts and enables it at boot time.
#systemctl enable cups
The following command shows the current status of this service.
#systemctl status cups
Verifying CUPS
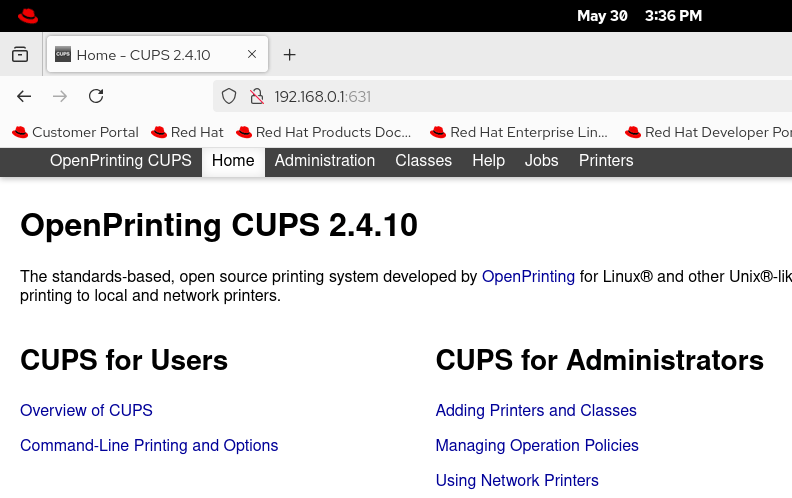
To verify CUPS is active and running, open a web browser on the system you configured as the print server and on the system you use to test the print server and access the following URL.
http://[print server IP]:631
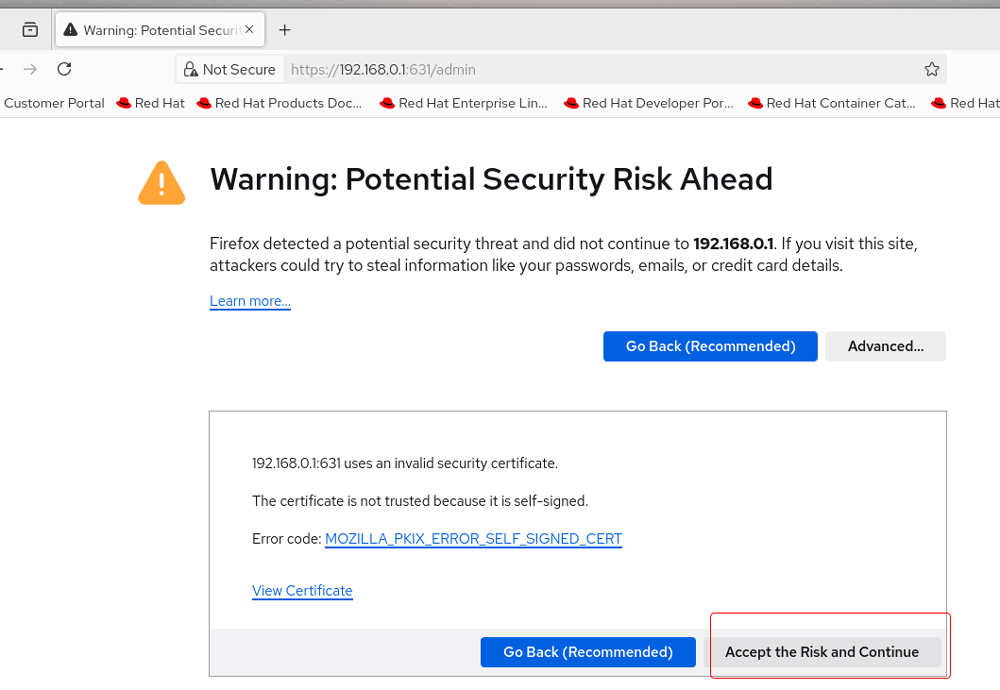
The browser may display a security warning message. Click Advanced and then click Accept the Risk and Continue.
The HTTP protocol sends information in clear text format. The use of this protocol on a public network is deprecated. Instead, HTTPS is used, which encrypts information. CUPS supports HTTPS. You can configure CUPS for HTTPS. It requires a few additional configurations on the print server. If you use CUPS on a public network, configure it for HTTPS. In a private network, you can continue with HTTP to keep the configuration simple.
The home page of CUPS on the browser verifies the CUPS configuration.
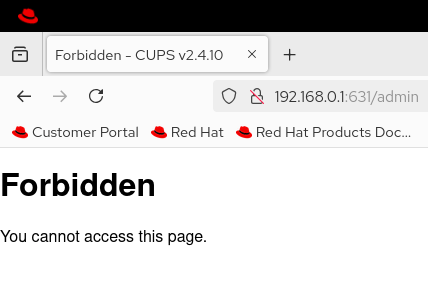
To verify that the administration section of CUPS can be accessed only from the IP addresses configured in the administrative directives, click Administration or access the following URL.
http://[print server IP]:631/admin
If you access this URL from an unauthorized IP address, the request will be denied. In this example, you keep the second system for testing. Access this URL from that system. It will be denied.
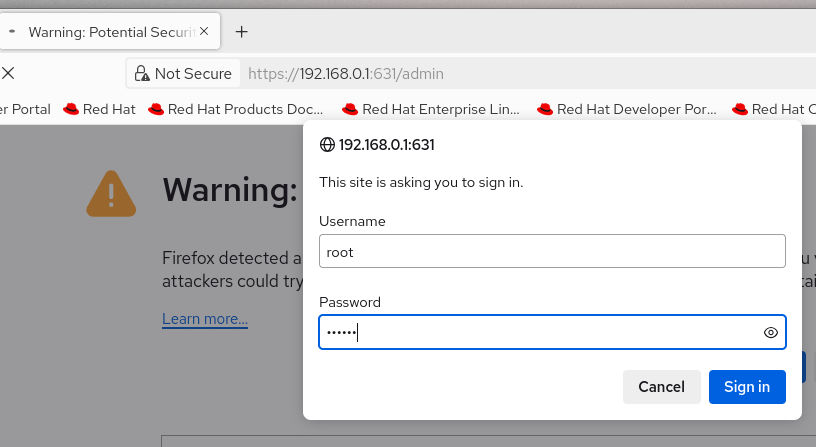
If you access this URL from an allowed IP address, you will be prompted for authentication. In this example, you added the first system’s (print server) IP address to the allowed IP addresses. Use it to access the admin page. Use the super user (root) account on the printer server to authenticate it.
After the successful authentication, the Administration page opens. You can use it to add new printers and manage existing ones.
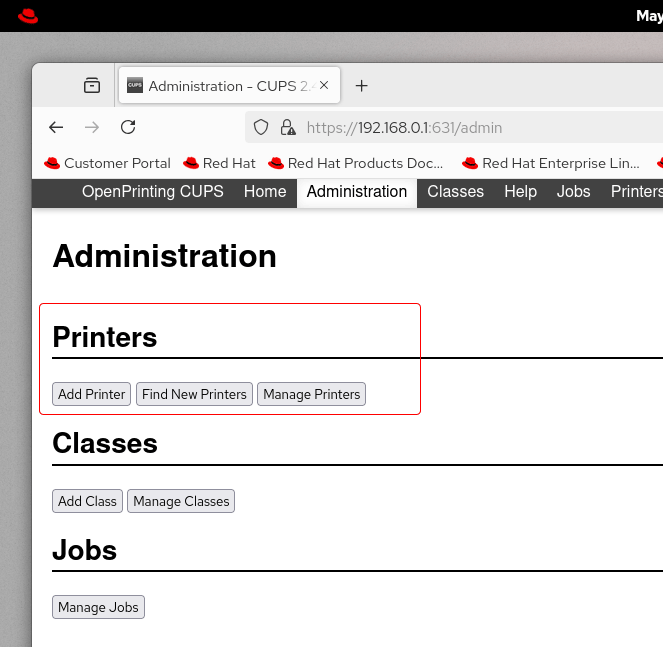
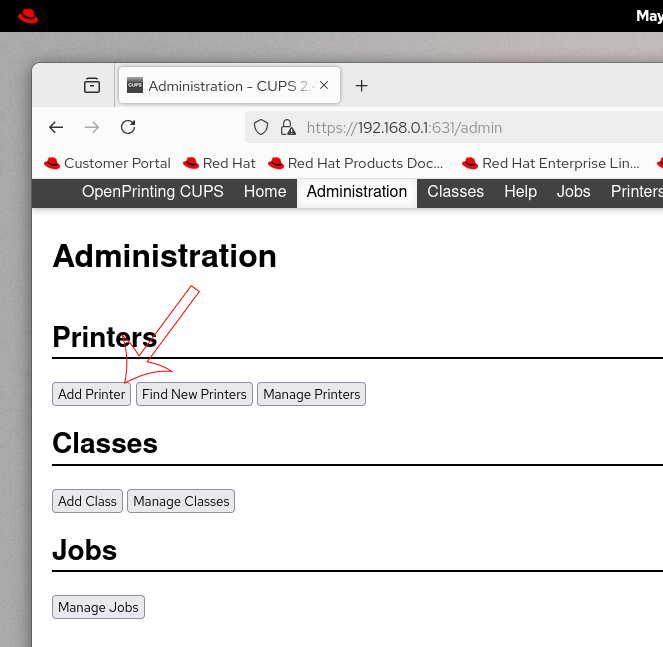
Adding a new printer (on the printer server)
To add a new printer, access the Administration page and click Add printer.
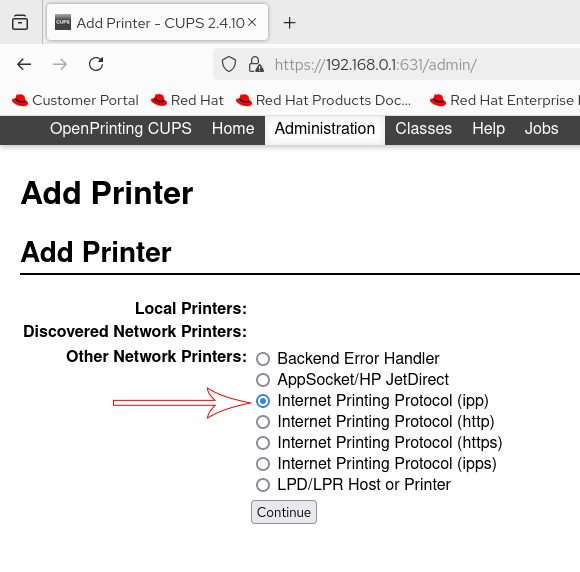
To add a network printer for testing, select Internet Printing Protocol (ipp) and click Continue.
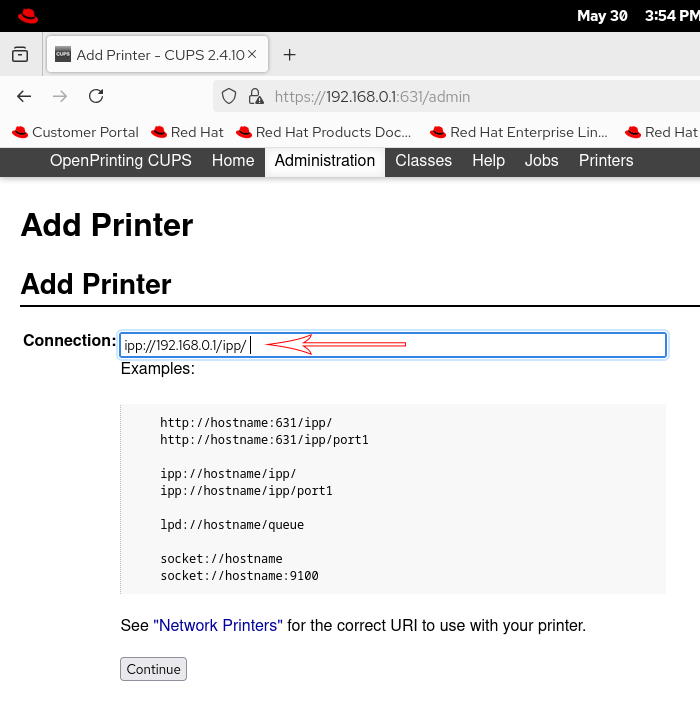
On the next screen, enter the following value in Connection and click Continue.
ipp://[printer server IP]/ipp/
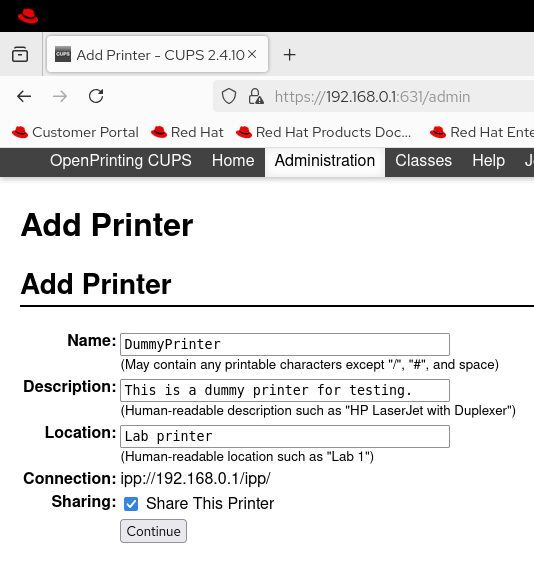
On the next screen, enter a Name, Description, and Location for the printer. Enable the Sharing option and click Continue.
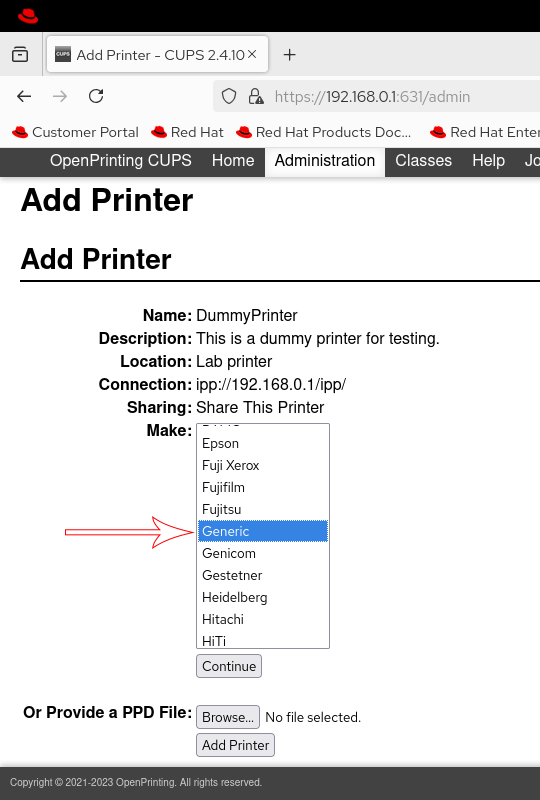
To add a dummy printer for testing, select Generic from the Make list on the next screen and click Add Printer.
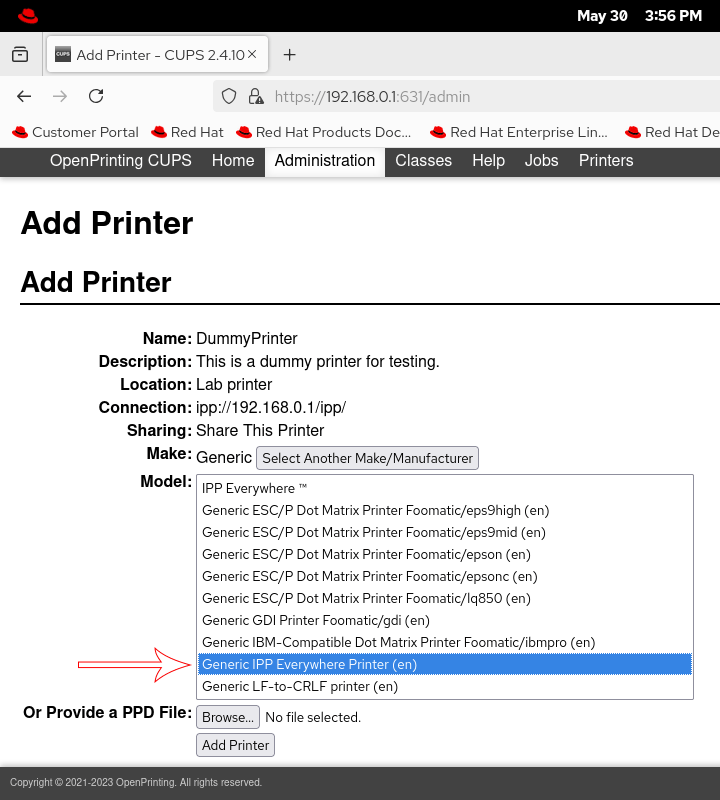
On the next screen, select the Generic IPP Everywhere Printer option and click Add Printer.
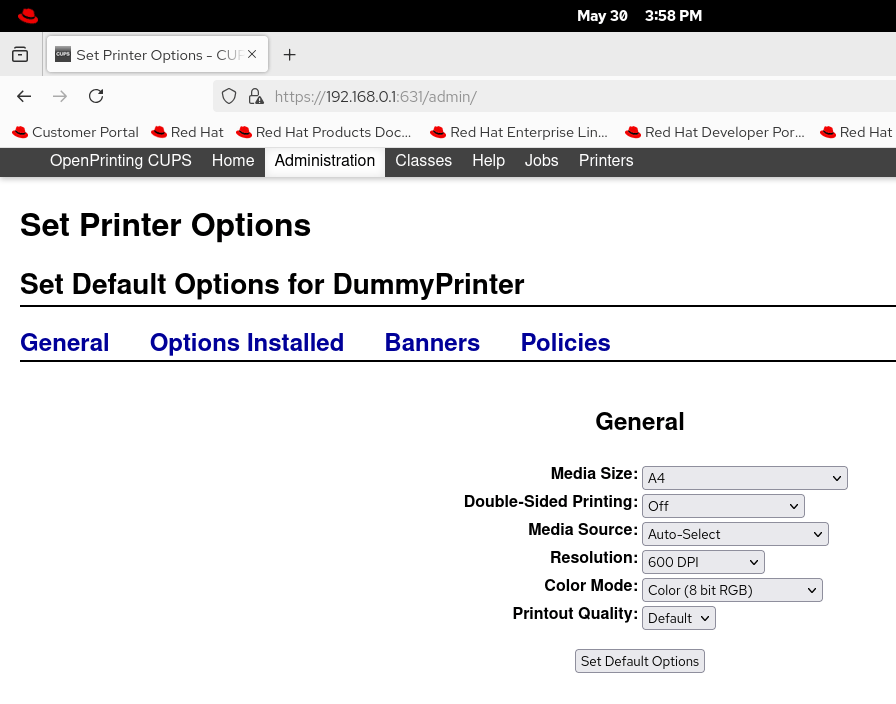
The last screen allows you to set default printer options.
For a physical printer, you can adjust these options. For a dummy printer, you can keep the default options. Click Set Default Options.
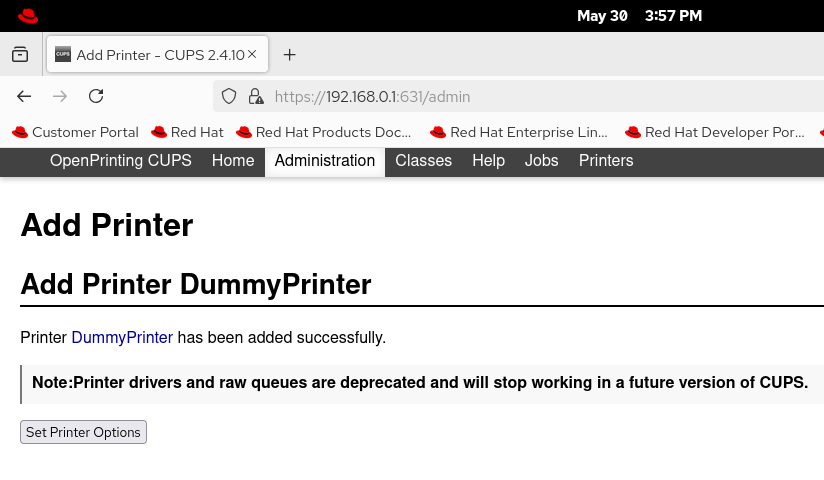
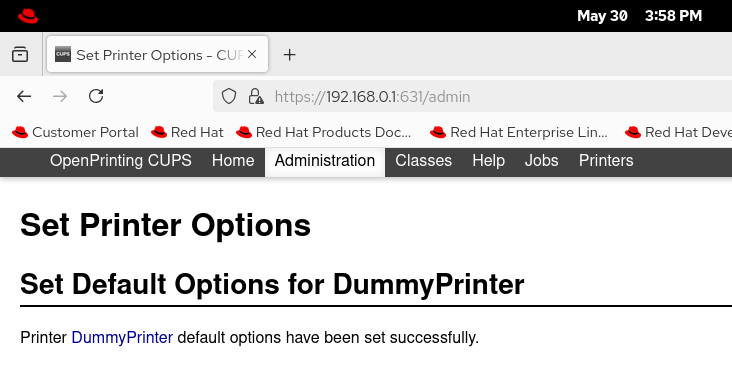
The last screen confirms the printer's addition with the default option.
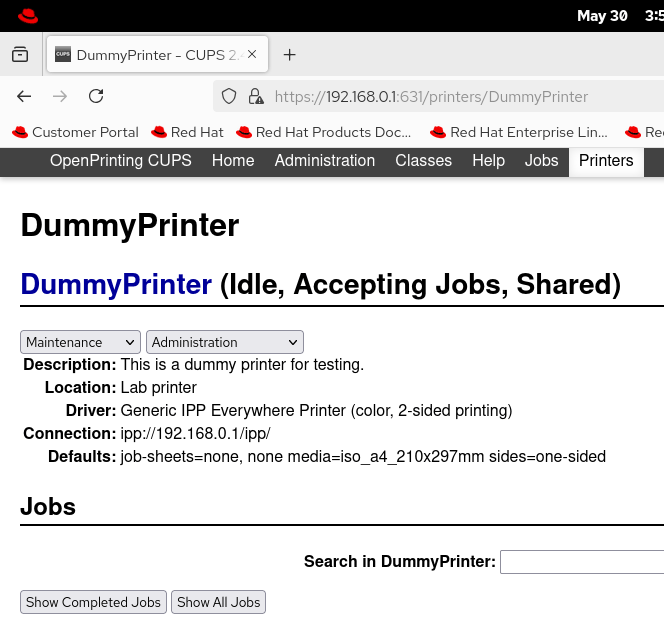
Click the Printers tab to view the added printer.
Installing the printer (on the client system)
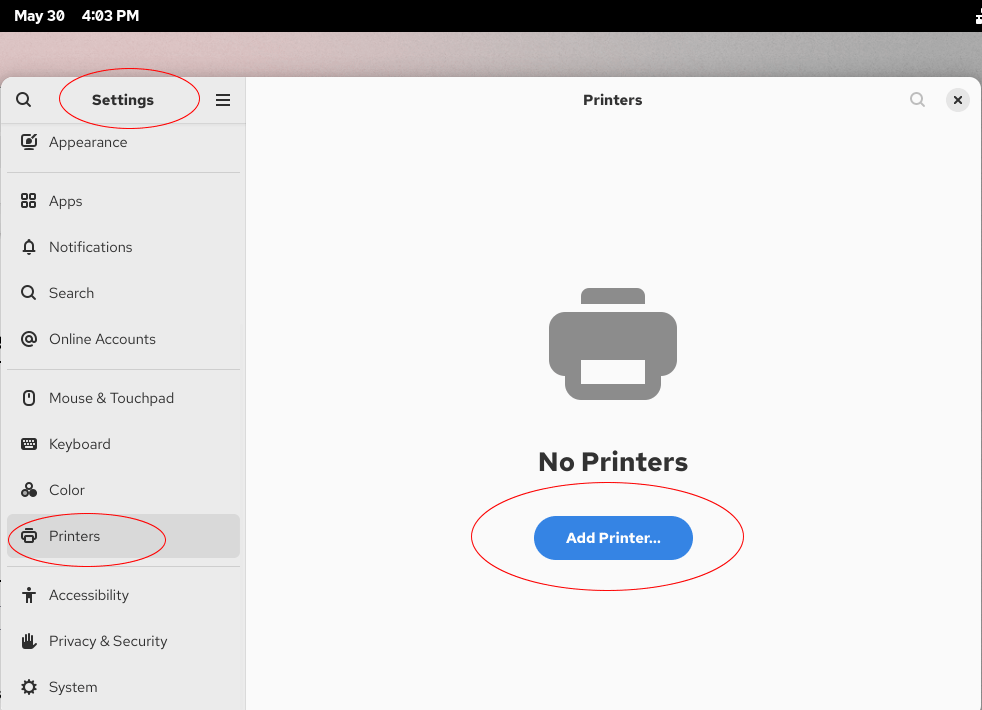
To install a shared printer from the printer server, open Settings on the client system and click Printers.
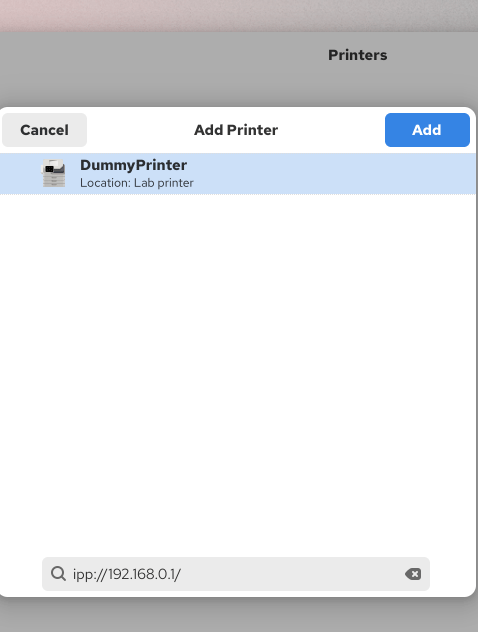
Type ipp://192.168.0.1/ in the search box and press Enter.
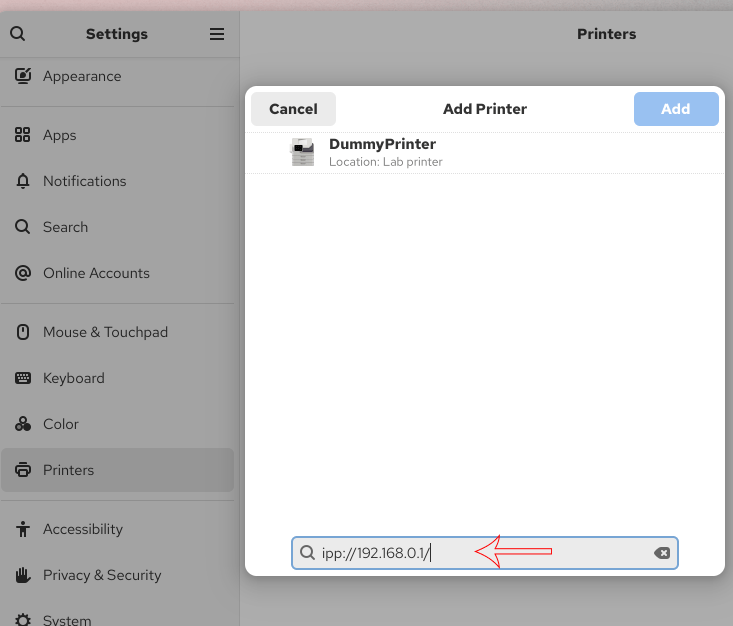
If you do not see a shared printer, check connectivity with the server system. Select the shared printer on the printer server, then click Add.
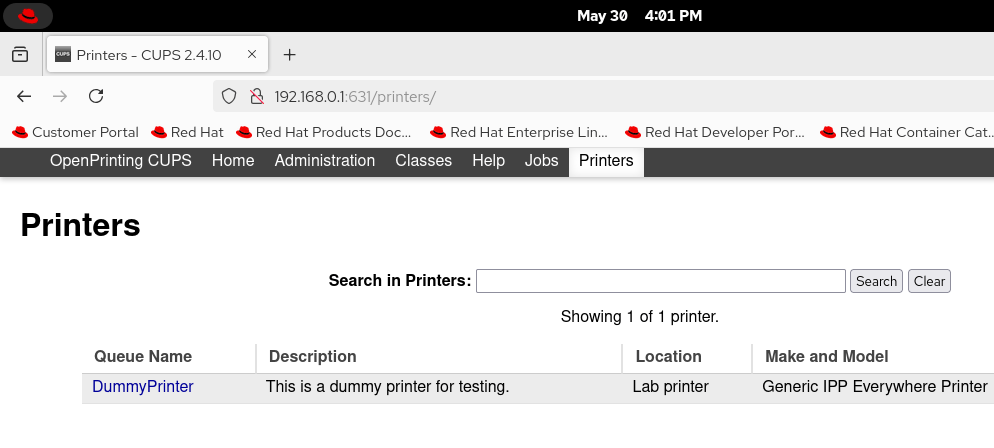
After adding the printer, close Settings. To view the added printer, open a web browser and navigate to the following URL.
http://[printer server]:631/printers/
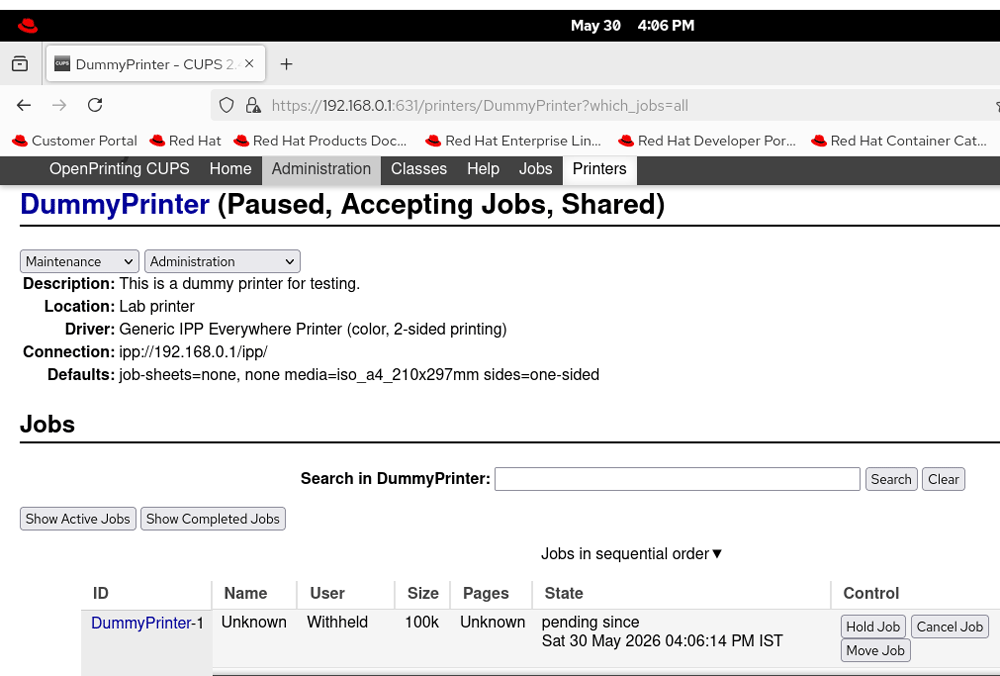
To verify the added printer, open a terminal, create a text file, and print it.
#cat > testfile
This is a test file.
CTRL+D
#lpr testfile
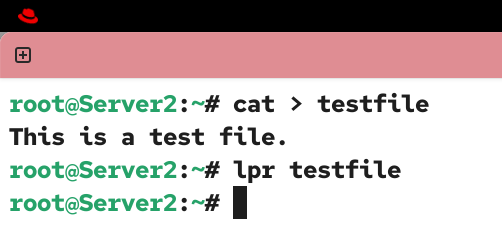
On the printer server, view all print jobs for the added printer. If you see the text file sent from the client system in the pending jobs, it verifies the printer server configurations and setup.
Conclusion
CUPS is a network printing service. It allows you to configure a Linux system as a printer server. It supports web-based management. You can manage it from any network system. This tutorial explained how to configure, test, verify, and manage it through examples.
By ComputerNetworkingNotes Updated on 2026-06-01