How to Install VLC Player in Ubuntu Linux
Ubuntu offers two native tools for software management. These tools are the apt and the App Center. The apt is the command line utility. It allows you to manage software on the CLI interface. App Center is the GUI tool. It allows you to add or remove software on the GUI interface. You can use both tools to install or remove the VLC player.
Installing VLC Player via the App Center
Connect the system to the Internet and open App Center.

Search for the keyword vlc. The App Center finds VLC in all configured repositories and lists the result. Click the VLC icon.

It opens the result on the detailed description page. Click the Install button to start the installation process.

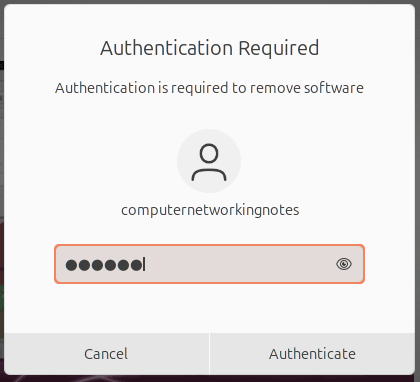
To authenticate the installation, type your password and click the Authenticate button.

Upon successful authentication, the installation process starts. Since the installation process downloads the installation files from the Internet, depending on the Internet speed, the time taken by the installation process may vary.

After installing the VLC Player, the App Center hides the Install button and shows the Open and Uninstall buttons. The Open button allows us to start the VLC directly from the detailed description screen, whereas the Uninstall button allows us to uninstall the VLC player.

Installing VLC from the apt command line utility
Press the Alt+Ctrl+T keys to open a new terminal. You can also open it from the right-click context menu. In the terminal, run the following command.
$sudo apt-get update
This command synchronizes the local database with remote repositories. It ensures Ubuntu downloads and installs the latest version of the application.

After updating the database, run the following command to install the VLC.
$sudo apt-get install vlc
This command downloads the latest version of the VLC player. Once downloading is finished, it calculates the necessary disk space for installation. It prints the calculated disk space and takes permission to continue the installation process. To continue the installation process, type y and press the Enter key.

Starting VLC player from the command line
After installing the VLC player, you can use the following command to start VLC from the command line.
$vlc

Starting VLC player from Dash (Application launcher)
Click the Dash button. It displays the most frequently accessed applications with a search box. If you see the icon of the VLC player in the list, click it to open it. If you do not see the VLC player in the list, use the search box to find it.

When you start the VLC Player for the first time, it displays the Network and Access policy. Keep the default selection and click the Continue button.

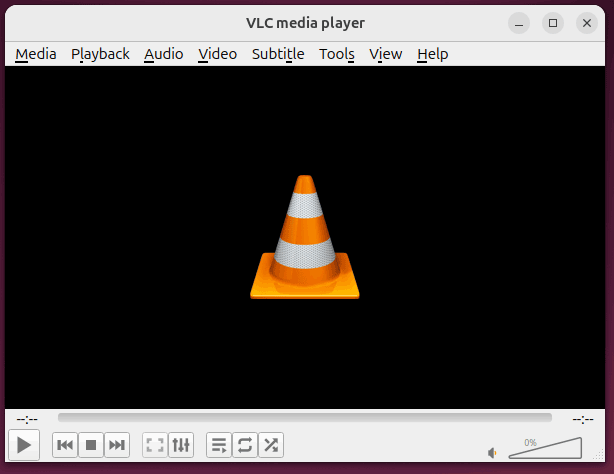
It brings the main screen of the VLC player.
Removing the VLC player from the GUI
Open the App Center. In the search box, search for the keyword vlc. From the result, click the installed vlc player. Click the Uninstall button to uninstall the VLC.

To authenticate the uninstallation, type your password and click the Authenticate button.
Upon successful authentication, the App Center removes the VLC player.

Removing VLC from the command line
To remove VLC from the command, open a terminal. In the terminal, run the following command.
$sudo apt-get remove vlc
When it prompts, type y and press the Enter key to confirm the uninstallation.

Conclusion
VLC is an open-source media player. You can use it to play media files. In this tutorial, I explained how to install and remove it on Ubuntu Linux.
Author Laxmi Goswami Updated on 2026-04-30