SELinux Explained with Examples in Easy Language
SELinux is a security implementation. It enhances system security. If a security breach occurs, it stops it from spreading in the entire system. This tutorial explains how it happens through a web server example.
SELinux on a Web Server
A web server hosts many websites for different clients. Administrators open various ports to allow access to services running on websites. Hackers can use these ports to crack the system through security exploits. If that happens, hackers gain access to the web server process. To serve web pages, a web server process usually has read permission on the document root and write permission on the /tmp and /var/tmp directories. With this permission, hackers can write malicious scripts in the /tmp directory and use them to hack other services available on the server. This way, one infected process can cause security risks to all services running on the server. SELinux protects the system in such a situation. It prevents hackers from accessing any other service running on the server.
Web Server Setup
The httpd package provides web service. If it is unavailable, use the dnf command to install. After installing it, use the systemctl command to start it.
#dnf install httpd [Install the package if unavailable.]
#systemctl start httpd

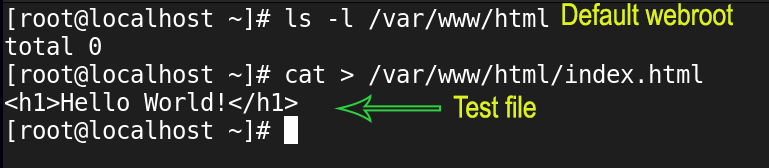
With the default configuration, the web server serves web pages from the /var/www/html/ directory. Create a test file in this directory.
#cat > /var/www/html/index.html
<h1> Hello World </h1>
We need the webserver's IP address or hostname to access the hosted websites or web pages. The default hostname is localhost. The ip addr command displays the configured IP addresses. Open a web browser and access the test file.

Implementing SELinux
There are three SELinux modes: disabled, permissive, and enforcing. In disabled mode, it remains disabled. It does not process access requests. In permissive mode, it logs access requests but does not filter them. In enforcing mode, it processes each access request based on the SELinux policy and allows or denies it.
The setenforce 1 command enables the enforcing mode in the current session. To make it permanent, update the SELinux directive's value in the /etc/sysconfig/selinux file.

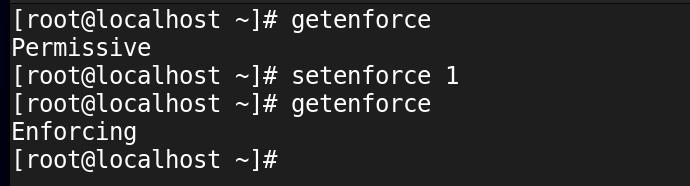
Enable SELinux in enforcing mode.
#getenforce
#setenforce 1
#getenforce
How SELinux protects WebServer
SELinux runs the httpd service in the confined domain. In the confined domain, it allows processes to access only the files and resources associated with them. To identify which process can access what resources, it uses security context. A security context is the collection of security-related information assigned to each object (file, directory, application, port, process, etc.) of a Linux file system. SELinux uses this information to make access control decisions. The Z option with the ls command shows the SELinux security contexts of the objects in the specified directory.
Check the security contexts of files and directories stored in the default webroot directory.
#ls -lZ /var/www/html/
The httpd_sys_content_t is the default allowed file type for the httpd process. If a file or directory has this file type in its SELinux security context, the httpd process can access it. SELinux assigns file types to files and directories based on their locations. Since the /var/www/html directory is the default webroot directory, all files and directories created in this directory get this file type in their SELinux security contexts. Users can access only files with this type in their security context. If a file's type differs, the httpd process can not access it. If a hacker succeeds in hacking the web server, he gets access only to files that have this file type in their security contexts.

Exercise
Check security contexts of files saved in the /var/www/html/ directory.
#ls -lZ /var/www/html/
Create a new test file in the /var/www/html/ directory and check its SELinux file type.
#cat > /var/www/html/test1.html
<h1> Hello World! - Test file 1 </h11>
Ctrl+D
Open the web browser and access the file to verify the users can access the allowed files.

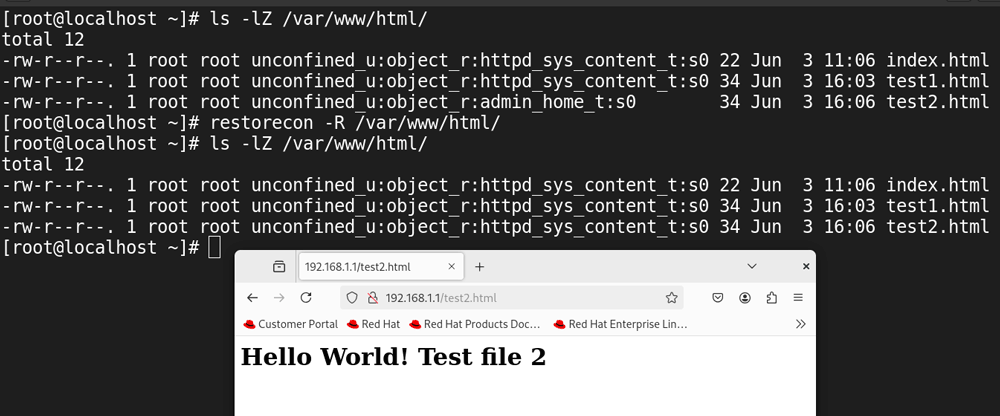
Change the current directory to the home directory and create another test file. Since SELinux assigns file types based on the location, the file will get a different file type. Move this file to the default webroot and access it from the browser. The browser cannot access it. It verifies SELinux does not allow the httpd process to access unauthorized files and resources.
#cd
$pwd
#cat > test2.html
<h1> Hello World! - Test file 2 </h11>
Ctrl+D
#ls -lZ test2.html
#mv test2.html /var/www/html/
#ls -lZ /var/www/html/

For regular users, this security feature can cause permission-related issues. For example, a web developer usually creates webpages in his home directory and moves them to the webroot directory. Since SELinux assigns different security contexts to files created in the home directory from those made in the webroot directory, the httpd process cannot access files moved from the home directory to the webroot directory.
The resotrecon command allows us to fix this issue. It updates the security contexts based on the location. For example, if we move files from the home directory to the webroot directory and run this command, it updates their security contexts to the httpd_sys_content_t.
Update/restore the security context in the /var/www/html.
#resotrecon -R /var/www/html/
Check and verify the updated security context.
#ls -lZ /var/www/html/

Access the file moved from the home directory using the web browser to verify all files in the default webroot have the correct file type.
SELinux with the custom webroot
Instead of using the default webroot, administrators generally use a custom webroot. It allows them to save websites on a separate partition or drive. To replicate this scenario, we have to change the configuration file of the httpd service. Create a backup of the default configuration file and open it for editing.
#cp /etc/httpd/conf/httpd.conf /etc/httpd/conf/httpd.conf.bk
#vim /etc/httpd/conf/httpd.conf

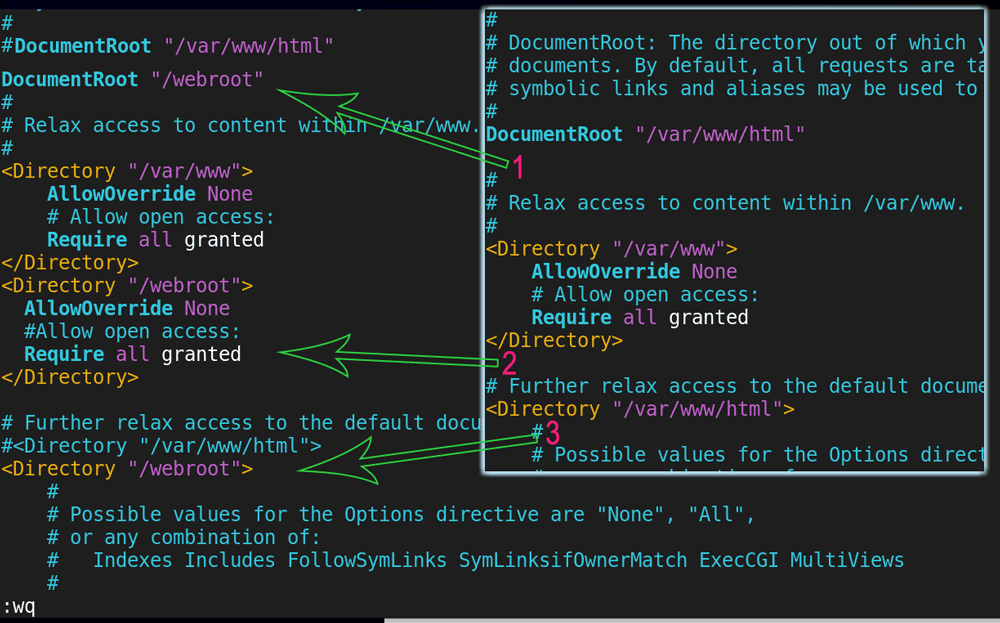
Comment out the default webroot directive, add a custom webroot directory, and save the file. It requires you to update three settings. The following image shows them.
Restart the service. You need to create the custom webroot directory before you restart the service. The systemctl command rereads the configuration file when we restart the service. It fails to start the service if it does not find the custom webroot directory.

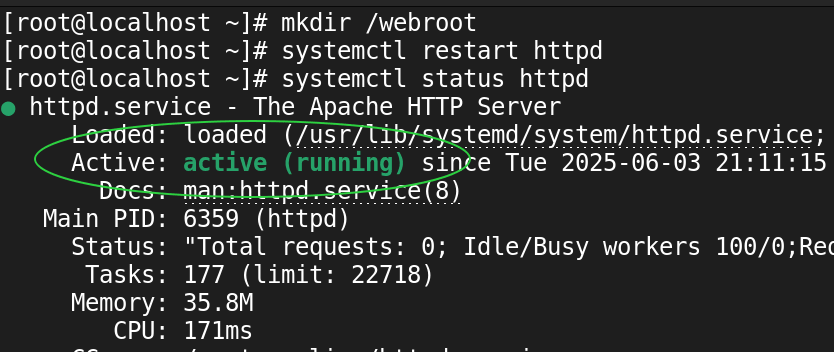
Make the custom webroot directory and restart the httpd service.
#mkdir /webroot
#systemctl restart httpd
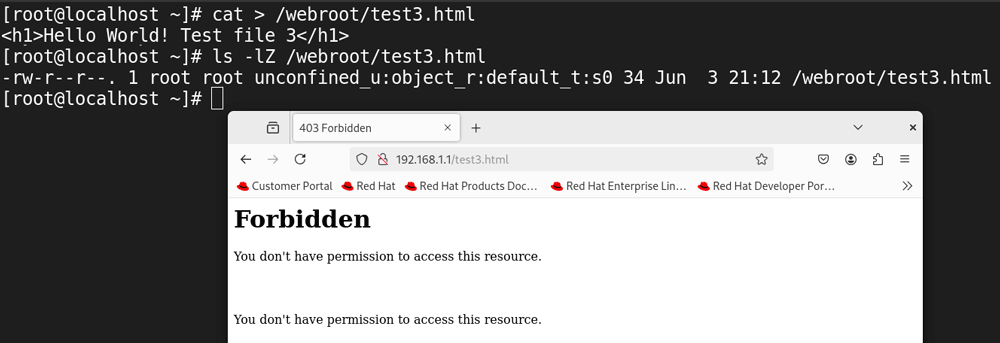
SELinux assigns file types based on locations. If we change the default location, files in the new location will get file type from its parent directory. It creates the SELinux permission issue. To verify this, create a test file in the custom location. Check its security context and access it from the web browser.
#cat > /webroot/test1.html
<h1> Hello World! - Test file 3 </h11>
Ctrl+D
If we use the restorecon command to fix this issue, it will not work, as it restores security contexts from the parent directory. To verify this, restore the security contexts of the custom webroot directory and recheck them.
#restorecon -R /webroot
#ls -lZ /webroot
To fix this issue, we need to update the SELinux database. The following command attaches the file type httpd_sys_content_t to the /webroot directory.
#semanage fcontext -a –t httpd_sys_content_t “/webroot(/.*)?”
After updating the SELinux database, if we run the restorecon command on the custom webroot directory or create new files in this directory, the files get the updated security contexts instead of the default contexts. To verify this, update security contexts using the restorecon command.
#restorecon -R /webroot
Access the test file using the web browser.

Cleaning up
The following command removes the custom file type added earlier.
#semanage fcontext --delete –t httpd_sys_content_t “/webroot(/.*)?”
The following command removes the custom webroot directory and its files.
#rm -rf /webroot/

SELinux context files
SELinux saves the context database in the /etc/selinux/targeted/contexts/ directory.
#ls /etc/selinux/targeted/contexts/

It saves contexts related to file types in the files directory. The file_contexts file saves contexts for default locations of standard services. You can check this file to learn the file type associated with a specific service. This file contains a vast list of contexts. You can use the grep command to narrow down or filter the results. For example, you can view the security contexts related to the /var/www/html/ directory using the following command.
#grep /var/www/html/ file_contexts

The file_contexts.local saves all custom contexts we add using the semanage command.
Exercise
View the file_contexts.local file.
#cat /etc/selinux/targeted/contexts/file_contexts.local
Add a custom file type for a directory and recheck this file.
#semanage fcontext  -a –t httpd_sys_content_t   “/webroot(/.*)?”
#cat /etc/selinux/targeted/contexts/file_contexts.local
Remove the custom file type and recheck the file.
#semanage fcontext  --delete –t httpd_sys_content_t   “/webroot(/.*)?”
#cat /etc/selinux/targeted/contexts/file_contexts.local

This tutorial is part of the tutorial " SELinux Explained with Examples.". Other parts of this tutorial are as follows:
Chapter 1 Basic concepts and fundamentals of SELinux
Chapter 2 SELinux and AppArmor Differences and Terminology
Chapter 3 SELinux Modes Explained with Examples
Chapter 4 SELinux Contexts for Users, Processes, and Files
Chapter 5 Copying, Moving, and Archiving Files with SELinux Contexts
Chapter 6 SELinux Explained with Examples in Easy Language
Chapter 7 SELinux Booleans Explained with Examples
Chapter 8 Troubleshooting SELinux explained with Booleans
Conclusion
SELinux enhances the web server's security by enforcing strict access controls. If enabled and implemented in enforcing mode, the httpd (the web server) service can access files and resources with the appropriate security contexts. This containment prevents malware or unauthorized access from compromising the entire server if a security breach occurs.
Author Laxmi Goswami Updated on 2026-02-09