Firewalld Rich Rules Explained with Examples
The firewalld is the firewall service. It utilizes firewall-rich rules to filter incoming traffic. This tutorial explains how to configure, verify, test, and remove the firewall rich rules through various examples.
Lab setup
This tutorial uses the following lab to explain firewall rich rules. This lab contains two Linux systems. Both systems have connectivity and use the IP configurations as shown in the following image.

If you need help with this lab setup, you can check the following tutorials.
RHCE Practice Lab Setup in VMWare and VirtualBox
RHCE Practice Lab initial Configurations Explained
Start and verify the firewalld service on the first system.
#systemctl start firewalld
#systemctl status firewalld

Firewalld service uses zones to save and manage configurations. It includes the following zone with the default configuration.
block, dmz, drop, external, home, internal, nm-shared, public, trusted work
From the above-listed zones, the public zone is the default. If required, you can create additional zones or change the default zone. If you add or manage rich rules with the default zone, the zone name is not required. However, it is compulsory for all other zones. The --zone option lets you specify the zone name. Since the zone name is not necessary with the default zone, this tutorial use it to explain the rich rules. It eliminates the need to type the zone name repeatedly. No matter whether you use a default or custom zone or which zone you use as the default zone, the process of adding and managing rich rules is the same for all zones.
The following command displays the name of the default zone.
#firewall-cmd --get-default-zone
Use the following command to list the configuration of the default zone.
#firewall-cmd --list-all
If the system has only one interface, the firewalld service automatically attaches it to the default zone. You can list all attached interfaces using the show ip addr command.
#show ip addr
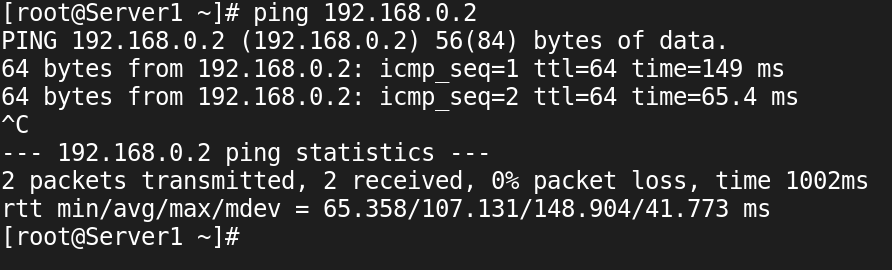
The firewalld service filters incoming traffic. In this lab, the second system will provide the incoming traffic. Before configuring the firewall rich rules, test and verify connectivity between both systems. For this, send ping requests from the first PC. If the second PC replies to the ping requests, it verifies the connectivity.
#ping 192.168.0.2
You also need a service running on the first server for testing. You can use the FTP service for it. This service is not part of the default installation. The following command installs it.
#dnf install vsftpd
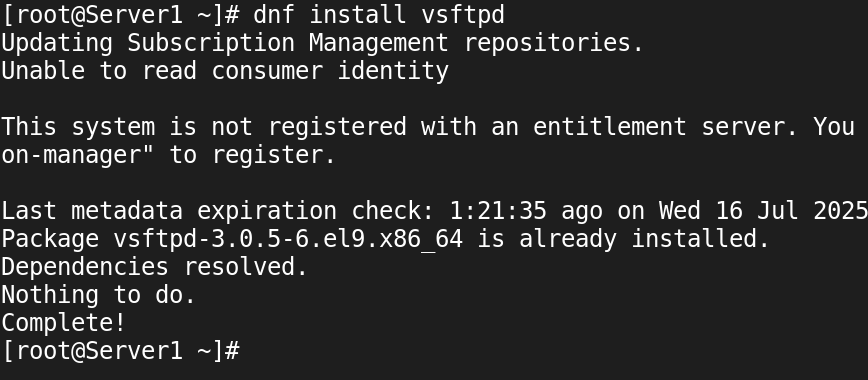
The above command installs the FTP server. The FTP service works in a server-client architecture. You need an FTP client to access the FTP service running on the FTP server. The following command installs an FTP client. Run it on both systems.
#dnf install ftp

After installing the FTP server, run the following commands to start and verify the FTP server.
#systemctl start vsftpd
#systemctl status vsftpd

That's all the configurations and settings you need to practice the firewall rich rules configurations.
Listing rich rules
The firewalld service saves rich rules and other configurations in zone files. The --list-all option shows all the configuration from the specified zone. If you skip the zone name, it displays the configuration from the default zone. The following command shows all the configuration from the default zone.
#firewall-cmd --list-all
The following command displays all the configuration from the dmz zone.
#firewall-cmd --list-all --zone dmz
To view only the rich rules, use the --list-rich-rules option. You can use it with the --zone option to view rich rules of a particular zone. For example, the following command displays rich rules of the dmz zone.
#firewall-cmd --list-rich-rules --zone dmz
To view the rich rules of the default zone, use the following command.
#firewall-cmd --list-rich-rules
By default, the firewalld service does not place any rich rules in the default zone file.

Creating, managing, and removing firewall rules
Firewalld service allows you to create firewall rules at two levels: high and low.
At the high level, you can create simple rules for the object-level access. For example, if you want to allow the FTP service for all hosts, add it to the allowed services. Remove it from the allowed services list to deny access for all hosts.
At the low level, it uses rich rules. Rich rules are complex but offer a higher level of customization. They allow you to create rules for the functional-level access. For example, if you want to allow a single host from a network, you cannot do it at the high level. For this, you must create rich rules at the low level.
Creating and managing object-level rules
Run the following command on the first system to list the allowed services.
#firewall-cmd --list-services
By default, the firewalld service does not allow the FTP service in the default zone.

Since the FTP service is not in the allowed list, you can not access it from the second system. To verify it, run the following commands from the second system.
#ping 192.168.0.1
#ftp 192.168.0.1
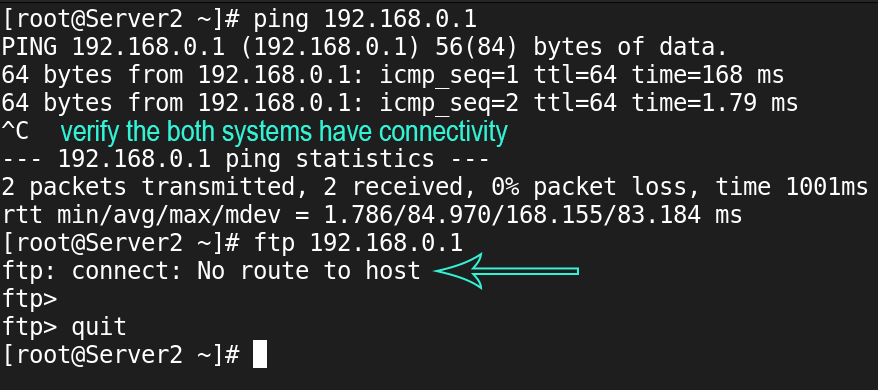
The first command verifies that both systems have connectivity. The second command accesses the FTP service. Since the FTP service is not in the allowed services list, the first system denied the request. On the second system, you get the 'No route to host' error. To grant access, add the FTP service to the allowed services list. The following command adds the FTP service to the allowed services list in the running configuration.
#firewall-cmd --add-service ftp

Any change in the running configuration does not require a configuration reload. It takes effect immediately. To verify it, access the FTP server from the second system again.
#ftp 192.168.0.1
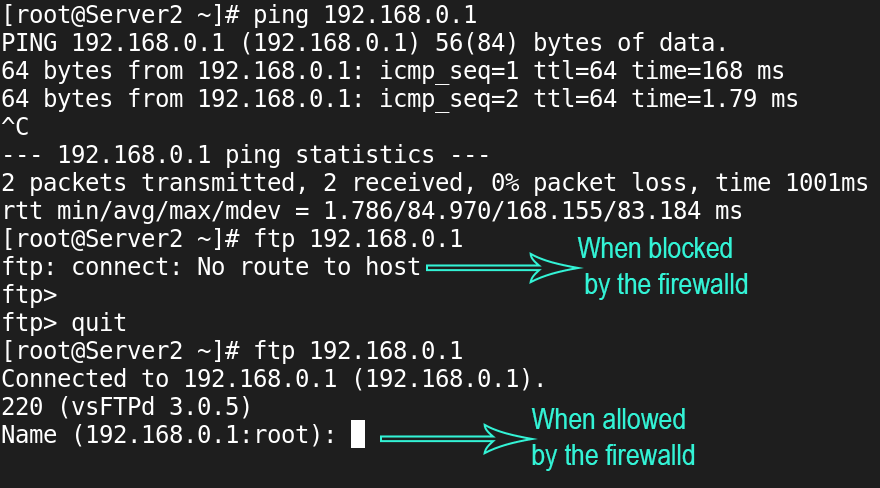
If the output displays an FTP login prompt, it confirms that the system can connect to the FTP server running on the first system.
If you add the rule in the running configuration, it remains available only until the next service restart. When you restart the firewalld service or reload the configuration, it rebuilds the running configuration from the startup configuration. If you add it to the startup configuration, the change takes effect only after the configuration reload and remains available until you manually remove the rule. The following command adds it to the startup configuration.
#firewall-cmd --add-service ftp --permanent
To implement the new rule, run any one of the following commands.
#firewall-cmd --reload
#systemctl restart firewalld
The first command reloads the configuration without terminating the existing connections. It only refreshes the rules. Use it when you change firewall rules in the startup configuration.
The second command restarts the firewalld service. It terminates all connections and reloads all configuration, including firewall rules. Use it when you change the configuration of the firewalld service.
The following command removes the FTP service from the running configuration.
#firewall-cmd --remove-service ftp

To verify the removal action, reaccess the FTP service from the second system.
#ftp 192.168.0.1
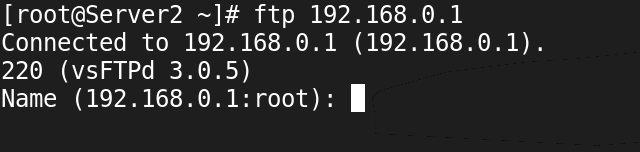
Similar to services, you can also create and implement rules for ports, interfaces, and IP addresses. The second part of this tutorial explains the required options and arguments.
This tutorial is part of the tutorial " Setting up a firewall using firewalld service.". Other parts of this tutorial are as follows:
Chapter 1 Firewalld Basic concepts Explained with Examples
Chapter 2 How to Configure Firewalld in Linux
Chapter 3 Firewalld Rich Rules Explained with Examples
Creating, managing, and removing rich rules
If you want to allow or block the FTP service for specific hosts, you can't do that with the object-level rules. For that, you need functional-level rules. Functional-level rules are called rich rules. To create the rich rules, use the following syntax.
#firewall-cmd [action] Rule
[priority] [family]
[source] [destination]
{service|port|protocol|icmp-block|masquerade|forward-port}
 	[log] [audit]
[accept|reject|drop]
Essential actions
| Option | Description |
| --add-rich-rule='[RichRule]' | Add the specified [RichRule] Rule |
| --query-rich-rule='[RichRule]' | Query for the specified rule |
| --remove-rich-rule='[RichRule]' | Remove the specified [RichRule] Rule |
| --list-rich-rules | List all Rules |
By default, the firewall-cmd command uses the default zone to perform the specified action in the running configuration. To use another zone, provide its name with the --zone option. Use the --permanent option to perform the specified operation in the startup configuration.
Rich Rule ordering
The firewalld service checks rich rules for incoming traffic from top to bottom. Once it finds a match for a specific traffic, it does not check the remaining rules. It checks the following rule only when the current rule does not match the incoming traffic type. It makes ordering crucial for rich rule definitions.
Let us take an example.
Suppose you want to allow only one host from a network while denying the remaining. For this, you create two rules in the following order.
Rule A: - Deny all hosts from the network.
Rule B: - Allow the particular host from the network.
It does not function as expected. The first rule blocks all hosts from the network, including the allowed host. Since the permitted host belongs to the network blocked by the first rule, it also gets denied. To fix it, you need to change the ordering. Place the allowed rule before the denied rule.
Rule A: - Allow the particular host from the network.
Rule B: - Deny all hosts from the network.
If you place rules in the above order, it works as expected. When it receives traffic from the allowed host, the first rule allows the traffic. If it gets traffic from any host other than the permitted host, the first rule does not match, and it checks the second rule. The second rule blocks the host.
Let us take another example to understand the ordering in more detail.
Suppose you want to configure the firewall to allow only the host 192.168.0.2 to access the FTP service while denying all remaining hosts from the network 192.168.0.0.
To fulfill this requirement, follow these steps.
Reload the running configuration. It removes all custom settings you made earlier to practice the object-level rules.
#firewall-cmd --reload
After resetting the default configuration, run the following command. It adds a rule that allows the host 192.168.0.2 to access the FTP service.
#firewall-cmd --add-rich-rule='rule family=ipv4 source address="192.168.0.2/32" service name=ftp accept'
The following table explains the above command.
| firewall-cmd | Main command |
| --add-rich-rule | Option to add the rich rule |
| rule | Parameters after it define rich rule |
| family=ipv4 | Rule belongs to IPv4 family |
| source address="192.168.0.2/32" | This rule matches the traffic coming from the host 192.168.0.2. |
| service name=ftp | This rule matches incoming traffic for the ftp service. |
| accept | If traffic matches the criteria defined earlier (source address and service name), it takes this action with the matched traffic. |
In the source address, the value after the IP address is the wildcard mask. Wildcard masks allow you to define a specific host or a range of IP addresses. You can check the following tutorial to learn more about it.
Wildcard Masks in ACLs Explained
The following command adds a rule to reject all hosts on the network 192.168.0.0 from accessing the FTP service.
#firewall-cmd --add-rich-rule='rule family=ipv4 source address="192.168.0.0/24" service name=ftp reject'
If rules do not overlap, you can create them without the priority option. But if they do, only the top rule in the list applies. The firewalld service never checks the rules you place below it. The above commands create rich rules without priority. If you create rich rules without priority, the firewalld service organizes them based on their rule action. It places the deny rule above the allow rule. To verify this, you can list rich rules.
#firewall-cmd --list-rich-rules

Since this configuration contains a deny rule above the allow rule for the host 192.168.0.2, it prevents the host from accessing the FTP service. To verify this, access the FTP service from the host 192.168.0.2.
#ftp 192.168.0.1
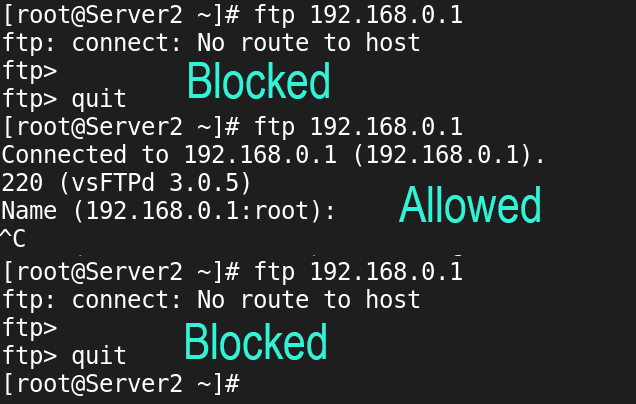
The priority option allows you to customize the ordering. It accepts a number between -32768 and 32767. In this range, the lower numerical values have higher precedence. For example, if you use numbers 10 and 20 for two rules, it will place rule 10 above rule 20 in the list.
Reload the firewalld configuration. It removes the rules you created earlier.
#firewall-cmd --reload
Use the following commands to recreate the rules with the specified priority number.
#firewall-cmd --add-rich-rule='rule priority=10 family=ipv4 source address="192.168.0.2/32" service name=ftp accept'
#firewall-cmd --add-rich-rule='rule priority=20 family=ipv4 source address="192.168.0.0/24" service name=ftp reject'
If you specify the priority, the firewalld places rules in the list based on their priority. To verify this, list the rich rules again.
#firewall-cmd --list-rich-rules

This firewall works as expected. It allows the host 192.168.0.2 to access the FTP service while denying all other hosts on the network 192.168.0.0. To verify this, reaccess the FTP service from the host 192.168.0.2.
#ftp 192.168.0.1

To verify the second rule, change the IP address of the second system to 192.168.0.5. After changing the IP address, reaccess the FTP service.
#ftp 192.168.0.1

Similar to source addresses, you can also create rich rules for protocols, services, and ports. For example, the following command creates a rich rule that blocks ping requests.
#firewall-cmd --add rich-rule='rule protocol value=icmp reject'
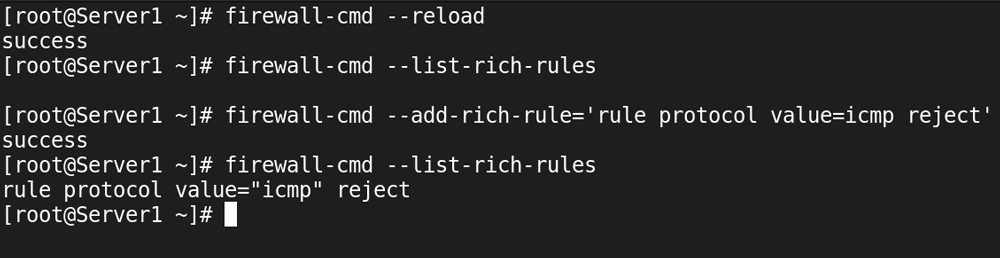
To verify the above rule, resend the ping requests from the second system.
#ping 192.168.0.1
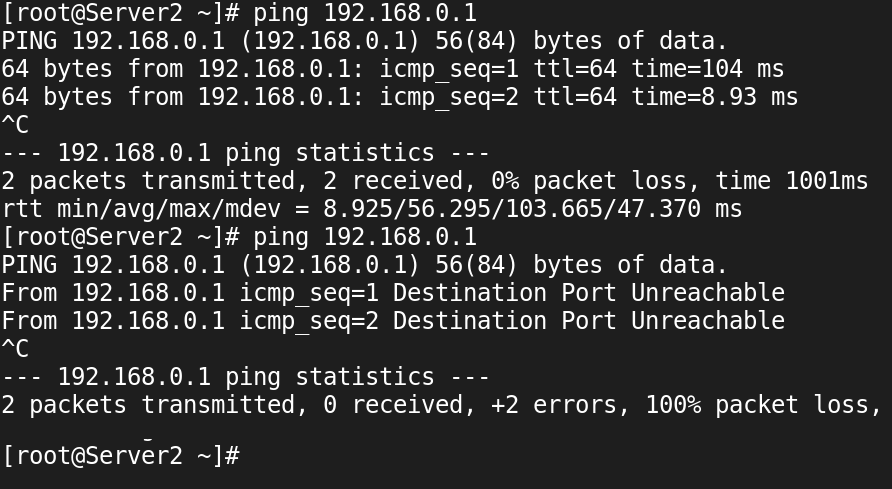
To remove a rich rule, specify the rule as the argument of the --remove-rich-rule option. The following command removes the rule added earlier.
#firewall-cmd --add rich-rule='rule protocol value=icmp reject'

You can remove a rule only from the configuration in which you added it. For example, if you add a rule to the running configuration, you cannot remove it from the startup configuration. Similarly, if you add a rule to the startup configuration, you cannot remove it from the running configuration. The --permanent option adds a rule to the startup configuration. Without it, the firewall-cmd command places the rule into the running configuration.

Conclusion
The firewalld service provides rich rules. Rich rules enable you to create flexible access rules tailored to specific requirements. This tutorial explained how to create, verify, manage, and remove rich rules.
Author Laxmi Goswami Updated on 2026-03-05